Lab Lesson
Version Control with git and GitHub
Topics
- version control, conceptually
- joining GitHub and installing
git - creating and using repositories
- creating an SSH key
- committing to GitHub
- cloning others' repositories
- pull requests
Some material from this lesson is drawn from the GitHub website and other guides.
Before This Class
You didn't have anything to submit this week; instead, your assigment was to make an account on GitHub. It shouldn't've taken you too long, and if you didn't get to it, go ahead and do it now.
Assigment
Your assignment for this week is a 2 week group project that builds on your python and jupyter notebook skills and uses GitHub to allow you to work as a group. The details are in the other notebook, but, basically, you're going to be teaming up with a friend or two and writing some python!
Version control and the origins of git
As code became, more and more, a large commercial endeavour with many contributors across different teams, cities, and timezones, the process of tracking versions of software became non-trivial.
Enter the VCS
A version control system, or VCS, tracks the history of changes as people and teams collaborate on projects together. As the project evolves, teams can run tests, fix bugs, and contribute new code with the confidence that any version can be recovered at any time. Developers can review project history to find out:
- Which changes were made?
- Who made the changes?
- When were the changes made?
- Why were changes needed?
There are a lot of versioning systems, beginning with SCCS in 1973; systems used right now generally include Subversion (SVN), CVS (not the pharmacy), and Mercurial. But, by far the most widely-used one is...

git
I'm an egotistical bastard, and I name all my projects after myself. First 'Linux', now 'git'.
— Linus Torvalds
git was first released in 2005 by Linus Torvalds. He built it to make version-controlling the Linux kernel after an issue with the licensing of another common version-controlling software, BitKeeper.
If you run man git, you'll see it described thusly:
git - the stupid content tracker
git really aims to be just that: so simple it's stupid. Using git is incredibly simple to get started with.
A note: getting git
We're going to be using the shell on JupyterHub to do our git-ing today, but if you want to use it in the future, you're going to want to configure git on your personal computer. You can install Git on your machine with the following links:
- Windows: https://git-for-windows.github.io/
- macOS: https://code.google.com/archive/p/git-osx-installer/downloads
- Linux: https://git-scm.com/book/en/v2/Getting-Started-Installing-Git
These links provide a good installation guide, and in general, it's pretty easy to configure git on your computer, but if you need any help troubleshooting, send your TA an email or drop by office hours. This was actually part of the installation process at the begining of the semester, but if you haven't installed git, now is the time to do it!
Repositories
A repository is usually used to organize a single project. Repositories can contain folders and files, images, videos, spreadsheets, and data sets – anything your project needs. GitHub makes it easy to add a README and other files, such as licenses and codes of conduct.
Open up a console in JupyterHub and load it up side-by-side with this notebook. Then, open a second tab in your browser, and go to GitHub.
Creating a new repository
- On GitHub, in the upper right corner, next to your avatar or identicon, click + and then select New repository.
- Name your repository hello-world.
- Write a short description.
- Select Initialize this repository with a README.
- Click Create repository.
Getting it from GitHub
The command git clone will make an exact copy, including all changes, of any repository you give it. When using GitHub, your command will be git clone git@github.com:YOUR-USERNAME/YOUR-REPOSITORY.git.
If you go to your repository page, click the green Clone or Download button near the top right corner, click "SSH" below the "Clone" heading, and click the copy to clipboard button (the clipboard icon), you can paste the path directly into your terminal.
*IMPORTANT NOTE:* You must select the "SSH" option when copying the clone URL. Later, you'll see that this is the only way GitHub can tell who you are!
Once you have your URL copied, go back to your terminal on JupyterHub, type in git clone and then paste your URL.
Check your work
Once you've succesfully cloned your repository, run ls. See the hello-world folder? cd into it, ls, and then cat README.md. That's the README for your repository, created automatically by GitHub.
Commitment issues
So, this is a pretty boring repository. Let's add to it. Use nano to create a new text file. Type whatever you want in it, just a few sentences. Once you're done, save your file, and ls to make sure it's there.
Diversion: what actually is a repository?
So, you know how you can use ls with the -a flag to print all the files, even the hidden ones? Let's do that here; it'll reveal something cool. If you do ls -a, you'll see two files you didn't know were there: .git and .gitignore.
.gitignore is a file where you can specify files for git to, well, ignore. Things like sensitive passwords or databases, you don't want to put up on GitHub for everyone to see, so this lets you quickly tell git to not save anything you don't want it to.
.git is much deeper, though: it's where the repository actually lives. .git is actually a directory which contains information about the repository and a list of every change you've ever made in the repository. Every time you tell git to save your work, it'll track everything you've altered, removed, or added to the repository in that .git folder. That way, if you ever want to revert back to a previous change, you can do so. And, additionally, anyone who can see your repository can look at how your code has changed and developed over time.
Saving your work
You tell git to save your work by using the command git commit. Committing is like hitting "Save" on a Word document, but it's a little more intentional than that; because you have to specifically tell git why you're saving, a commit is a human-meaningful amount of work.
So, go ahead and run git commit -m "my first commit". The -m flag stands for message, and that's how you tell git and, by extension, anyone who looks at your repository, what you did for this commit.
git is stubborn
Remember what git's description is? If you changed or added files in a repository and you want to commit them, you have to explicitly tell git to include. You do that with the command git add. To add everything in a repository, you'd use the . which, as you remember, stands for "the current directory". So, go ahead and run git add . and then try committing again.
Because this is your first real commit, write your own message! Describe, in a few words, what you did. (Make sure you wrap your message in quotes.)
Back to the cloud
So, we've cloned our repository, made changes, and told git that we want to save our changes. There's only one thing left to do: copy our changes back to GitHub, for the world to see!
But how do we make sure that we're the only ones that can modify the code in our repository? We have to authenticate with GitHub on JupyterHub before we can copy our changes back.
Secure Shell (SSH)
There are many different ways to authenticate with GitHub, but the easiest way to set up through JupyterHub is creating an SSH key.
But what is SSH? SSH stands for secure shell, and it's a way of communicating with a remote computer's command line through an encrypted tunnel. For instance, if I have a computer far away and have an SSH server enabled on that computer, I can log in to the remote computer and use it just as if I was sitting at the computer in the physical world! I can also rest assured that my communication will be safe from any evesdropppers, as every byte I send across the connection is strongly encrypted.
SSH can also be used for transferring files, which is where it comes in handy for GitHub.
Because SSH was built with authentication in mind (it does have "secure" in the name, after all), we can create what's called an "SSH key" that allows us to log in to a computer (or in this case, GitHub) without a password. Let's create our key now:
- Open a new terminal in JupyterHub and type
ssh-keygen -t ed25519 -C "<your GitHub email here>". It will ask you a few questions after the command, but you can just press enter for each one as a default. - We're going to use the cat command that we learned last week to get our "public key". This is the part of the key we give to GitHub so they can verify it's us whenever we log in. Type
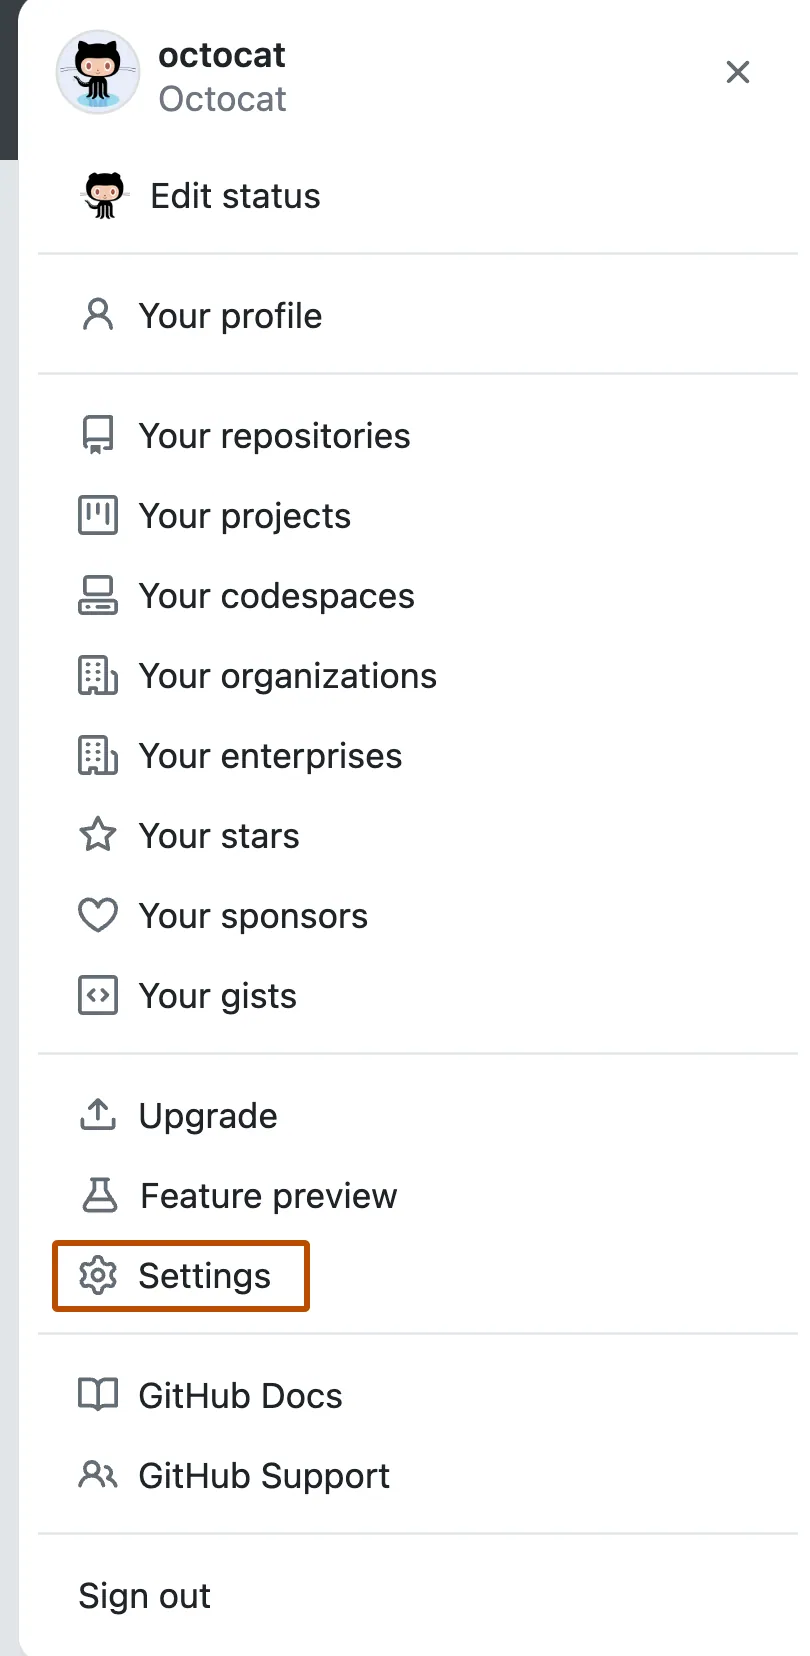
cat ~/.ssh/id_ed25519.pubto see your public key. It should look something like:ssh-ed25519 AAAAC3NzaC1lZDI1NTE5AAAAIM/Dn+lfxKZtwXT2qWIex6yqYNgLNCwK90mNd86pl9VC <your email>. Copy that long string onto your clipboard. - Go to your GitHub settings by clicking your profile picture in the top right-hand corner and selecting "settings" from the list. It looks like this:
- Next, click "SSH and GPG keys" on the left sidebar. It should bring you to a new screen with "SSH keys" at the top.
- Click "New SSH Key", and on the new page, enter a title for the key (maybe "JupyterHub"), and paste your key in the box labeled "Key". Click "Add SSH key" at the bottom of the page. You might have to type your password in again.
Now GitHub will know you who are whenever you want to upload files!
The command to move things from our repository to somewhere else is git push. Right now, we're going to run git push origin main.
origin is the GitHub repository, which is where this repository in your personal folder "originated" from. main is the name of the main part of your repository. (We'll talk more about what main means in a bit.)
So, run the command, and then switch over to your GitHub tab (or reopen GitHub if you closed yours). Reload the page, and what do you see? It's your file, that you added on your computer and pushed up to the cloud! Congratulations, your words will never die now. You're immortal!
Silverware, and playing nice with others
There's a repository link on the board. Go ahead and open that repository in a new tab.
I created it for you to play around with. In order for you to make changes, you have to first make your own copy, so let's fork! Up in the top right corner, click the Fork button. Presto! You've got a copy of my stupid repository.
Making it less stupid
So, navigate to the repository in your userspace on GitHub and get the URL for cloning. It should look like this: git@github.com:YOUR-USERNAME/hello-class. It's important that you get your version of the repository.
Once you have that URL copied, head back to JupyterHub, go to the shell, and do cd .. to get out of your repository folder.
Then, run git clone and your URL. cd into the shiny new hello-class repository and look around.
It's now your job to make some changes. Add a file, change around the files I've got there, edit my README, do whatever you want. Note: Remember to run git add . if you add any files.
Once you're done, do git commit and save your changes, then git push them back up to GitHub.
Telling me your changes
Once you have the changes up on your version of the repository, it's time to tell me about them. You do that with a pull request, essentially asking the original repository maintainer to merge your changes back into their main repo.
So, now, go back to your repository on GitHub and click the green New Pull Request button. Now you can view all of the edits that you have committed. Look over your changes in the diffs on the Compare page, make sure they’re what you want to submit. When you’re satisfied that these are the changes you want to submit, click the big green Create Pull Request button. Give your pull request a title and write a brief description of your changes. Then submit it!
My turn!
I can see all pull requests to my repositories. This example puts me in the role of project maintainer, who, as we discussed last week, are often referred to as "benevolent dictators" of their projects. I'm the benevolent dictator here, and I can decide whose changes I accept and whose I reject.
Branching: like pull requests, but for yourself
You just did something interesting: you made a copy of work, changed it, and then merged that copy back. You did that on GitHub, with pull requests, but there's a feature of git itself that accomplishes the same thing. Go ahead and cd back into your hello-world repo.
Branches in git are versions of your project that you separate from the original branch, which is called main. Ours is called main because we made the repository on GitHub. But, if you make a repo through git itself, the original branch will be called master. You might hear someone refer to an original branch as master, so just remember that they both sorta refer to the same thing.
You can create a new branch with the command git checkout, using the -b flag, which (you guessed it) stands for "branch".
Go ahead and run the command git checkout -b readme-edits. Now you have two branches, main and readme-edits. They look exactly the same, but not for long! Next, we’ll add our changes to the new branch.
So, why'd we call it "readme-edits"?
Open up the README by running nano README.md. Now, add something to it; write a sentence or two about what you think of git so far. Save your changes and exit nano.
Then, commit your changes using git commit. The message is whatever you want it to be.
Another diversion: check your status
Before we go any further, run the command git status. You'll get something like this:
You can use git status to quickly let you know "where you are" if you ever get lost or overwhelmed in the course of editing a repository. It'll tell you what branch you're on and if you have any changes to commit.
Merging to main
Run git checkout main. This switches from the readme-edits branch that you're on, back to the original, primary branch. Now, you want to merge your changes from the readme-edits branch to the main branch. You do that with the command git merge, which has the format git merge BRANCH-TO-MERGE. Note: You must be in the branch you want to merge to when you run git merge. In this case, we're merging from readme-edits to main, so we're in main and merging readme-edits.
Now, it's time to merge. Run git merge readme-edits. It'll resolve itself and merge everything! Run cat README.md just to be sure.
Pair Assignment: be your own benevolent dictator
Now, it's time for you guys to try this out. Here's how this is going to go.
- Split up into pairs and create a new repository on GitHub. Name it whatever you want, but make sure your friend and you choose different names.
- Get the URL of your friend's repository and fork it to your own GitHub account. Then
git cloneit to your directory on JupyterHub. - Change it up! Add some code, add a text file, write a poem, do whatever you want.
git addany files you create, andgit committhem all to the repository. Then,git push origin mainaway back to GitHub. - Create a pull request from your fork to your friend's repository.
- You should've gotten a pull request from your friend! Now comes the fun part. Decide whether or not to accept your friend's pull request. Be the benevolent dictator of your dreams.
Abstraction and Representation
Last week during lab, we discussed how files and the filesystem are simply an abstraction of the bits and bytes that live on your hard drive. The previous lecture also discussed abstraction, but a little bit more in depth.
How does the way we represent data with Git or other version control systems differ from the traditional filesystem? How does the manner of abstraction and representation effect the way data is useful?
A quick git review
git clone URLmakes a copy of a repository on GitHub!- You can also make a blank repository on your computer with
git init. - You use
git addto tellgitto track files, andgit committo save them. git push origin mainmakes things go back up on GitHub.- You can create a branch with
git checkout -b new-branch, and merge branches withgit merge. - Pull requests are fun.

This Week's Assignment
Check out the Lab-Exercises.ipynb file for more details. And break into groups of two or three!