# FIRST import all the necessary libraries and modules!
import cv2               # import OpenCV
import numpy as np       # import NumPy

# import functions
import sys
sys.path.insert(0, '../..')
from utils import *
Contours
In this lab, we will learn about contours and how to use contours to help us identify objects. Furthermore, we will be learning about the following functions:
-
cv2.threshold -
cv2.findContours -
cv2.drawContours -
cv2.contourArea -
cv2.boundingRect -
cv2.minAreaRect -
cv2.minEnclosingCircle
We will learn how to create a function to help us detect drawings on a piece of paper!
What is a contour?
A contour is a curve joining all continuous points along a boundary. The green below outlines the contours of a computer mouse:
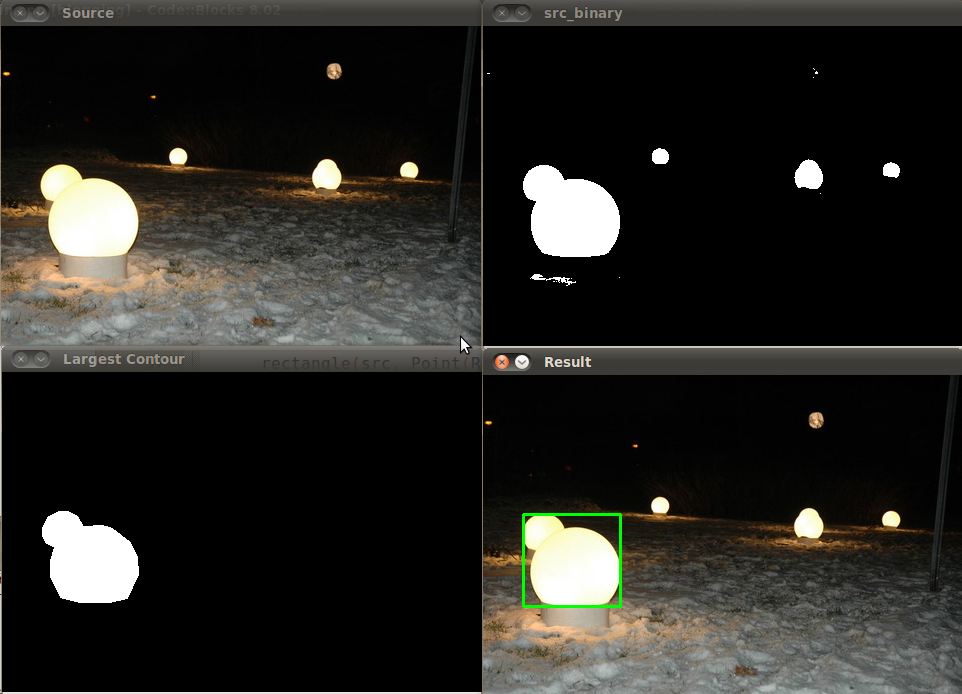
Why contours?
Contours can help us analyze an object's shape and detect objects, so they will be helpful in the future when we want detect specific objects or obstacles in the car's field of view (ie. cones).
Find and Draw Contours
In the following section, we will learn how to find and draw contours.
To find the contours of an image, a few steps need to be taken:
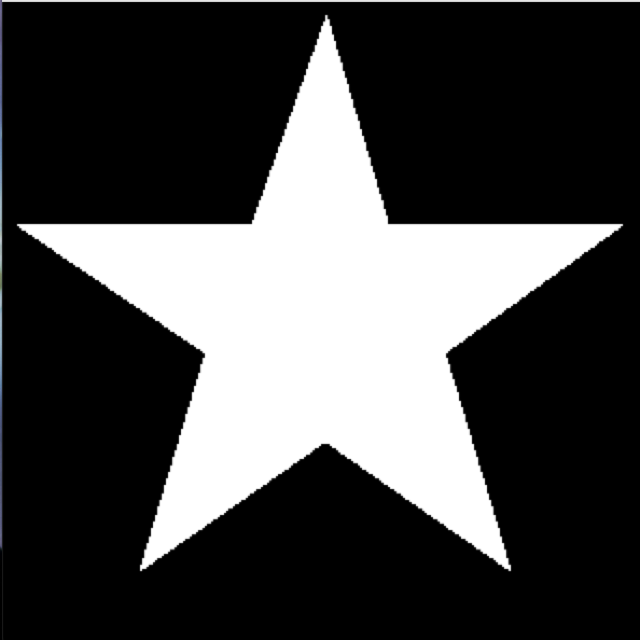
STEP #1: Read the image.

# TASK #1: Read 'star.png' via cv2.imread. Save as 'img'.


# Save the original image to display later.
img_copy = img.copy()

# Show image in popup window
cv2.imshow('original', img)
close_windows()
STEP #2: Convert the image into grayscale.

# TASK #2: Convert the BGR image to grayscale via cv2.COLOR_BGR2GRAY.
#          Save as 'img_gray'


# Show image in popup window
cv2.imshow('grayscale', img_gray)
close_windows()
STEP #3: Convert the grayscale image into a binary image with cv2.threshold.
cv2.threshold looks at each pixel to see if it is greater than or less than the threshold value, and then reassigns the input minVal/maxVal to the pixel.
It has the following format:
thresh = cv2.threshold(<grayscale_image>, <threshold_value>, <maxVal>, <minVal>)[1]

# TASK #3: Threshold the image. Save as 'thresh'.
#          Use threshold_value=240, maxVal=255, and minVal=0


# Show image in popup window
cv2.imshow('threshold', thresh)
close_windows()
STEP #4: Invert the threshold mask
# TASK #4: Invert the threshold mask via cv2.bitwise_not. Save as 'mask'


# Show image in popup window
cv2.imshow('mask', mask)
close_windows()
STEP #5: Use cv2.findContours to find the list of contours.
It has the following format:
contours = cv2.findContours(<mask>, 3, 2)[0]
# TASK #5: Find contours of 'mask' via cv2.findContours. Save as 'contours'.


# Print contours found
print(contours)
STEP #6: Draw contours via cv2.drawContours.
It has the following format:
cv2.drawContours(<image>, <contours>, <contour_index>, <color>, <thickness>)
Notes:
Use -1 for <contour_index> to draw all contours.
To draw a specific contour, index into the list via [contours[i]] for <contours>, and set 0 for <contour_index>

# TASK #6: Draw GREEN contours via cv2.drawContours.
#          Use contour_index=-1 and thickness=3.


# Show image in popup window
cv2.imshow('contours', img)
close_windows()
Exercise:
Draw blue contours around the opencv logo opencv_logo.png only. Experiment with the first parameter of cv2.threshold. Note that the opencv logo naturally has a white background.
# TASK #1: Read the image 'opencv_logo.png'. Save as 'img'


# TASK #2: Convert the image into grayscale via cv2.cvtcolor


# TASK #3: Threshold the image via cv2.threshold.
#          Use threshold_value=240, maxVal=255, and minVal=0


# TASK #4: Find the list of contours of 'thresh' via cv2.findContours


# TASK #5: Draw BLUE contours via cv2.drawContours on 'img'


# Show image in popup window
cv2.imshow('opencv contours', img)
close_windows()
Contour Features and Properties
Now that we know a bit more about contours and how to use them, lets extract some data from them!
Contour Area
cv2.contourArea(<single_contour>) calculates the total area that a contour encloses.
It is necessary to select a single contour when looking for the area, even when contours only has one contour stored in it.
Exercise:
Find the contour area of star.png
# Get contours of star.png
img = cv2.imread('star.png')
img_gray = cv2.cvtColor(img, cv2.COLOR_BGR2GRAY)
thresh = cv2.threshold(img_gray, 240, 255, 0)[1]
inverted_thresh = cv2.bitwise_not(thresh)
contours = cv2.findContours(inverted_thresh, 3, 2)[0]


# TASK #1: Index into the first contour and save it to 'cnt'.


# TASK #2: Get the contour area of the first contour


# TASK #3: Print the area


# Show the first contour
cv2.drawContours(img, [cnt], 0, (255, 0, 0), 3)
cv2.imshow('star contour', img)
close_windows()
Straight Bounding Rectangle
We can use cv2.boundingRect to draw a rectangle.
It has the following format:
x, y, w, h = cv2.boundingRect(<single_contour>)

Exercise:
Find the straight bounding rectangle of bolt.jpg
# Get contours of bolt.png
img = cv2.imread('bolt.jpg')
img_gray = cv2.cvtColor(img, cv2.COLOR_BGR2GRAY)
thresh = cv2.threshold(img_gray, 240, 255, 0)[1]
contours = cv2.findContours(thresh, 3, 2)[0]


# TASK #1: Get bounding rectangle of the first contour


# TASK #2: Draw a GREEN bounding rectangle using cv2.rectangle


# Show bounding rectangle in popup window
cv2.imshow('bounding rectangle', img)
close_windows()
Minimum Enclosing Rotated Box
Another bounding rectangle is cv2.minAreaRect. This rectangle encloses the contour with the smallest area, and can be rotated.
The function has the following format:
rect = cv2.minAreaRect(<single_contour>)
Exercise:
Find the minimum enclosing rectangle of bolt.jpg
# Get contours of bolt.png
img = cv2.imread('bolt.jpg')
img_gray = cv2.cvtColor(img, cv2.COLOR_BGR2GRAY)
thresh = cv2.threshold(img_gray, 240, 255, 0)[1]
contours = cv2.findContours(thresh, 3, 2)[0]


# TASK: Get min area bounding rectangle of the first contour.
#       Save as 'rect'.


# Draw the rectangle
box = np.int0(cv2.boxPoints(rect))
res = cv2.drawContours(img, [box], 0, (0,0,255), 2)

# Show min area bounded rectangle
cv2.imshow('min bounded rectangle', res)
close_windows()
Optional Note on cv2.minAreaRect:
rect = cv2.minAreaRect(<contour>) will output rectangle data so that box_points = cv2.boxPoints(rect) can calculate box points. The box points will be floating data types at first, so we want to use np.int0(box_points) to convert the datatype from floats to integers. Then, we can use cv2.drawContours to draw the minimum enclosed (rotated) box around the image.
Minimum Enclosing Circle
cv2.minEnclosingCircle gives us the center and radius of the minimum enclosing circle of a contour.
The function has the following format:
(x,y), radius = cv2.minEnclosingCircle(<single_contour>)

Exercise:
Find the minimum enclosing circle of bolt.jpg
# Get contours of bolt.png
img = cv2.imread('bolt.jpg')
img_gray = cv2.cvtColor(img, cv2.COLOR_BGR2GRAY)
thresh = cv2.threshold(img_gray, 240, 255, 0)[1]
contours = cv2.findContours(thresh, 3, 2)[0]

# TASK #1: Get the minimum enclosing circle of the first contour


# Convert to values to int
center = (int(x),int(y))
radius = int(radius)

# TASK #2: Draw a GREEN bounding circle using cv2.circle


# Show image in popup
cv2.imshow('enclosing circle', img)
close_windows()
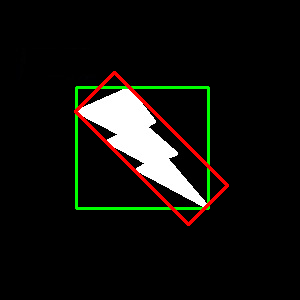
Let's Draw it All!
Let's put everything we've learned altogether now! Draw a straight bounded rectangle, a minimum area rectangle, and a minimum enclosing circle around bolt.jpg. Make sure to use different colors for the different contours!
# TASK #1: Read the image 'bolt.jpg'. Save as 'img'


# TASK #2: Convert the image into grayscale


# TASK #3: Threshold the image via cv2.threshold.
#          Use threshold_value=240, maxVal=255, and minVal=0


# TASK #3: Find the contours of thresh


# TASK #4: Use cv2.boundingRect to find x, y, w, h


# TASK #5: Draw a BLUE straight rectangle


# TASK #6: Use cv2.minAreaRect to find the minimum enclosing rectangle.
#          Save as 'rect'


# Draw minimum enclosing rectangle
box = np.int0(cv2.boxPoints(rect))
res = cv2.drawContours(img, [box], 0, (0,255,0), 2)

# TASK #7: Use cv2.minEnclosingCircle to find radius and (x,y)


# Convert values to int
(x,y) = int(x), int(y)
radius = int(radius)

# TASK #8: Draw the RED circle


# Show the image
cv2.imshow('all contours', img)
close_windows()
Drawing Detector
Let's draw a contour around our very own drawings!
Here is what we need to do:
- Get a piece of white printer paper AND colored marker from a TA.
- Draw an image using your colored marker on the printer paper.
- Use
hsv_select_liveto find the hsv threshold values of your drawn image. - Fill in the
hsv_lowerandhsv_uppervalues below. - Run the cell block. Your drawings should now be detected via contours.
- Try it again with different drawings!
Note: Make sure your white piece of paper fills the entire video image, else you might be detecting background images rather than your drawing!
# TASK #1: Run this cell block to find the HSV lower and upper bounds for your drawn image!
hsv_select_live()
# TASK #2: Define the corresponding HSV bounds found from above!
hsv_lower = (None, None, None)    # replace None with your values!
hsv_upper = (None, None, None)    # replace None with your values!


# Show video
color_range = [hsv_lower, hsv_upper]
def find_drawings(frame):
    res = detectDrawings(frame, color_range)
    cv2.imshow('detected drawings', res)
video(find_drawings)