# FIRST import all the necessary libraries and modules!
import cv2               # import OpenCV
import numpy as np       # import NumPy

# import instructor made functions
import sys
sys.path.insert(0, '../..')
from utils import *
Birdie Mask Lab
One cool thing we can do with OpenCV is object detection, in particular, by colors!
In this lab, we will learn how to:
- Find HSV color ranges using:
hsv_select - Mask an image using:
cv2.inRange - Mask multiple colors using bitwise image arithmetic operations:
cv2.bitwise_and
cv2.bitwise_not
Masks
What is a Mask?
Masks are images. They tell the computer what to cover and what to show.
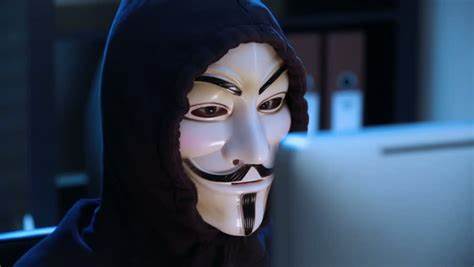
Consider the hacker mask below.
The only parts that are see-through are the eyes:

So when we put that mask on a face... Only the eyes show!
Similar to the face mask above, OpenCV masks:
- Cover parts of an image with BLACK (aka the face mask)
- Only allows specific parts of an image to show as NORMAL or WHITE (aka the eyes).
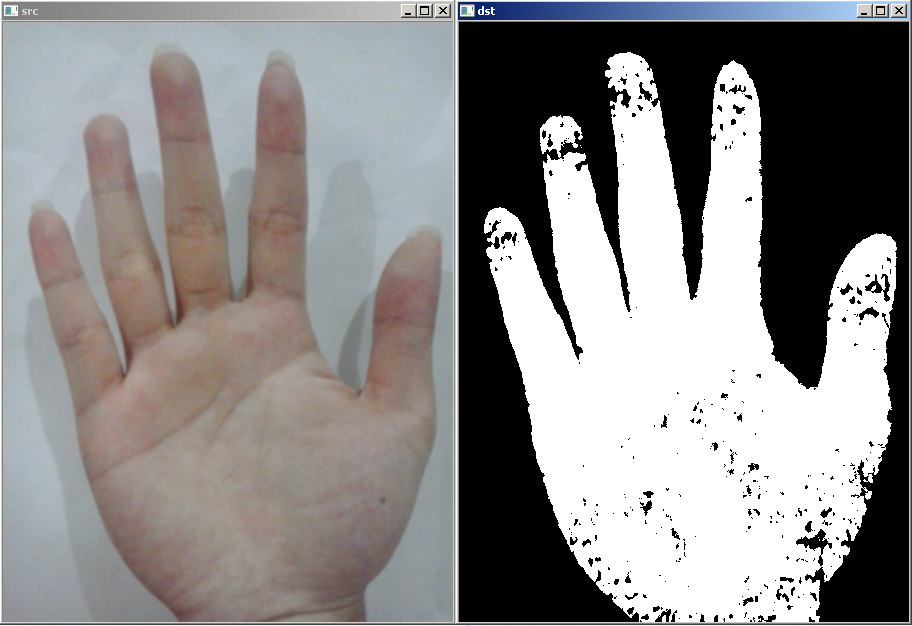
Below is an example of a masked image of a hand:
Discuss! Which part is masked, and which part is unmasked?
Masks in OpenCV
On a mask, there can only be 2 values in each pixel: 0 and 255.
When we apply a mask to an image, if the pixel value is:
0(or False), the pixel will be BLACK.255(or True), the pixel WILL SHOW / BE WHITE.
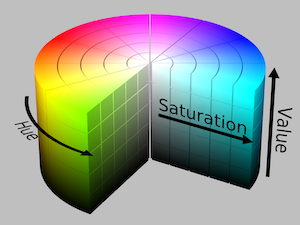
HSV Masking
HSV tends to be better for tracking an object by color than BGR.
Why do you think this is?
We can mask video frames using lower and upper bounds for hue (H), saturation (S), and value (V) to track objects by their color.
Exercise
Run the code below, and move the HSV trackbar values around to get familiar with how masks work. Press ESC to close the pop-up.
You should get a pop-up window that looks something like this:

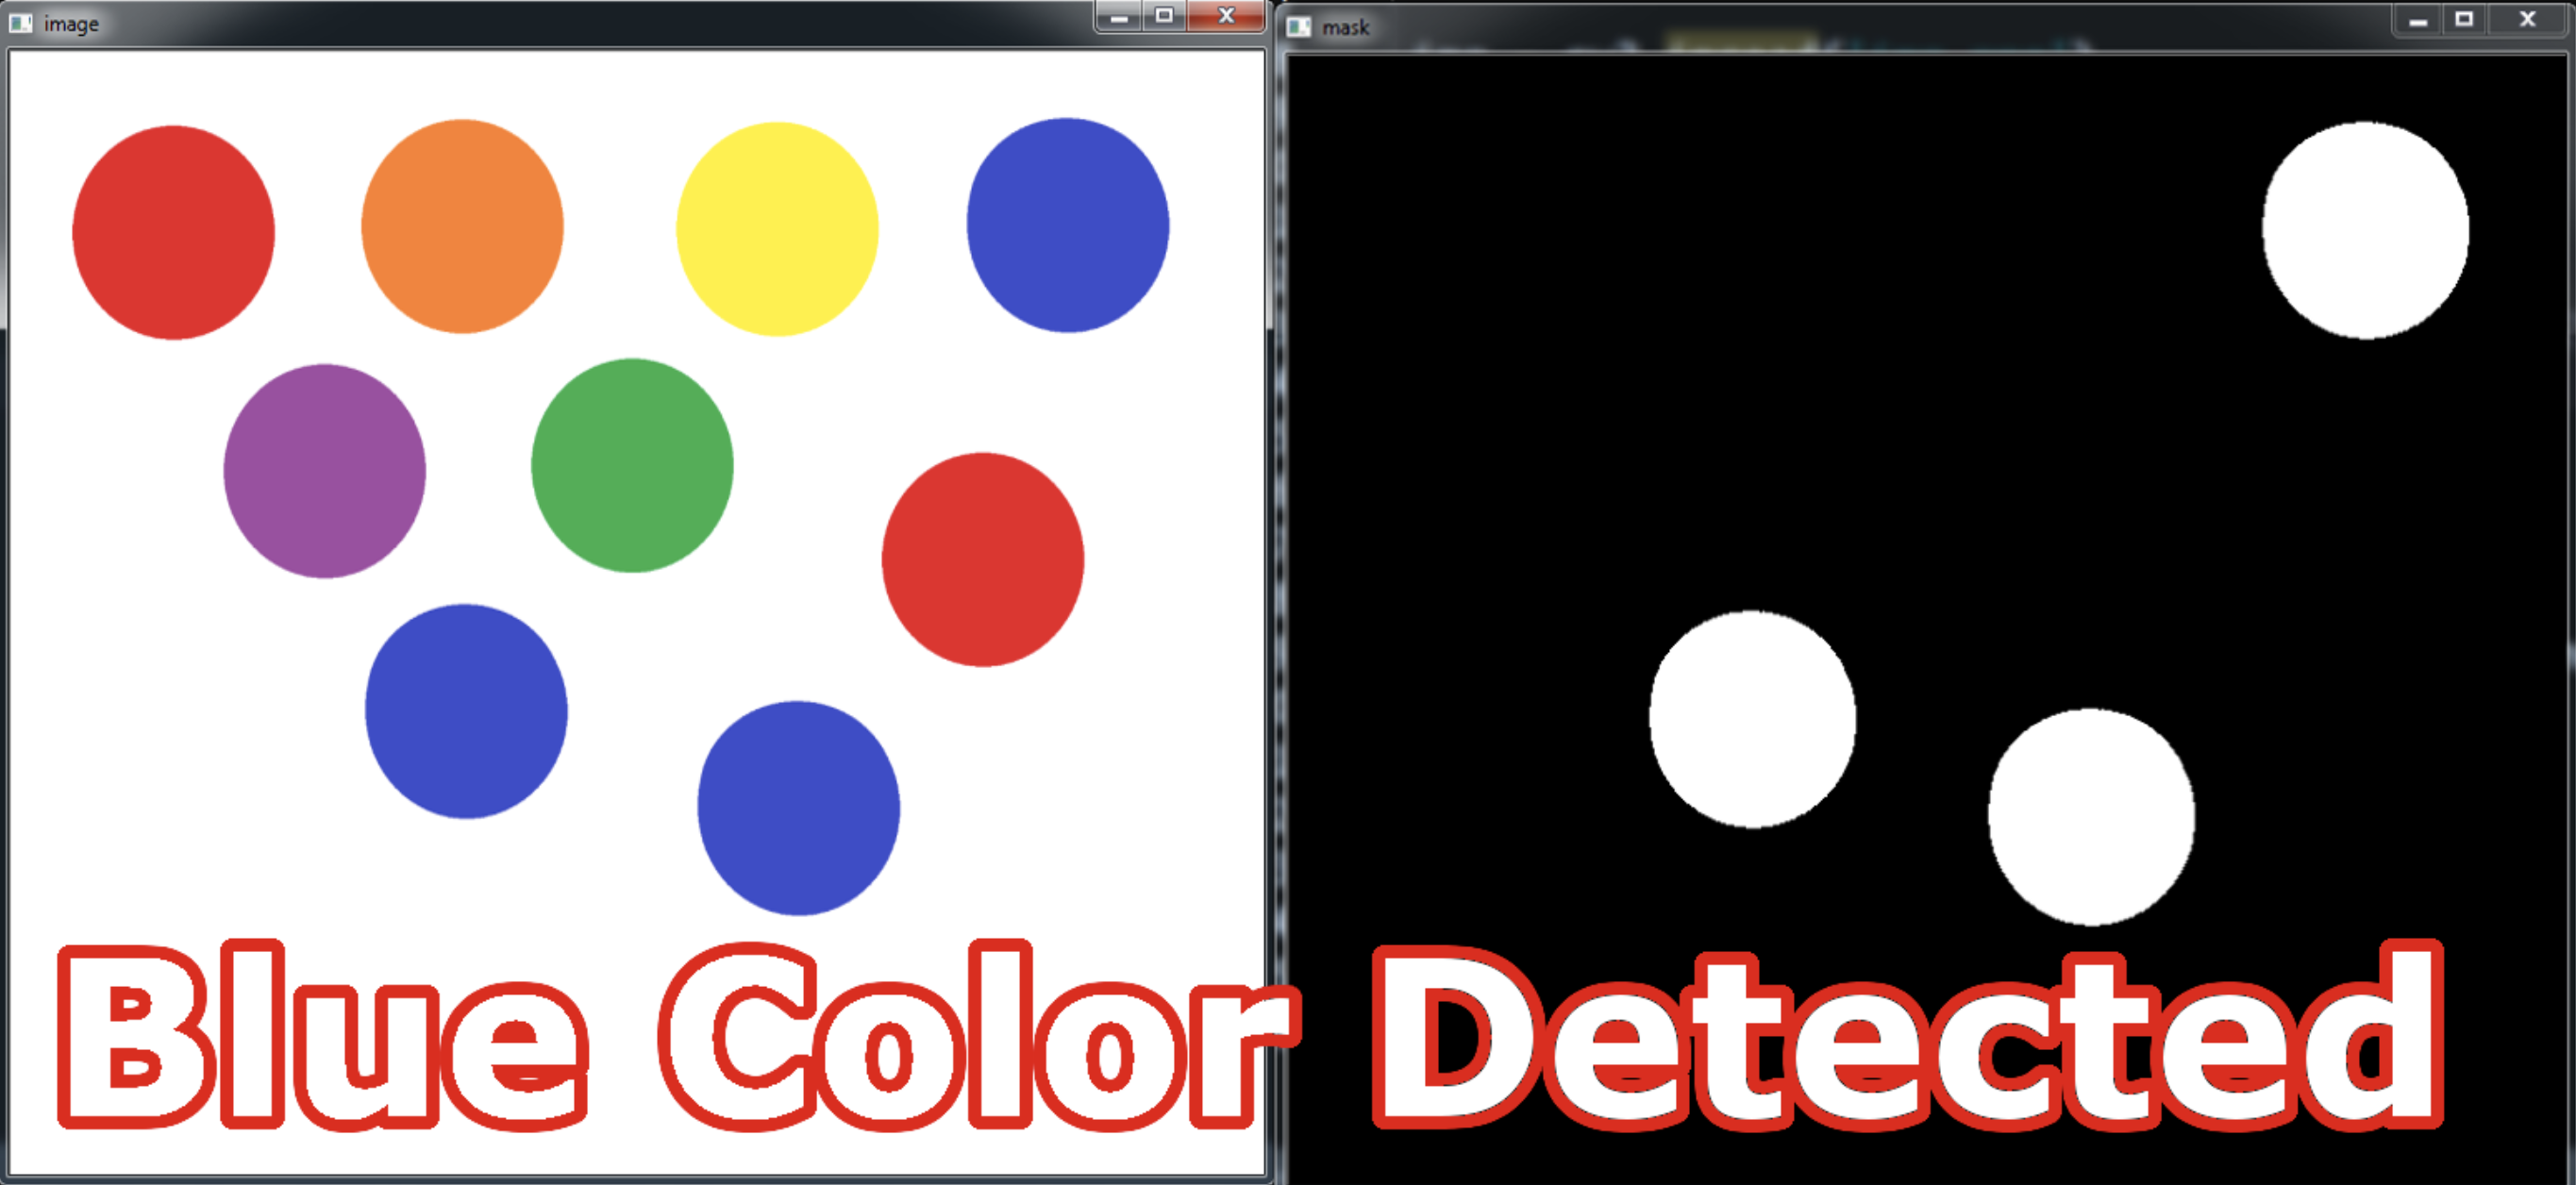
hsv_select('birdie.jpg')
Making a Mask
Different HSV values affect the types of colors we mask!
We can generate a mask based on the color specified using the function cv2.inRange. This function takes in the image and lower/upper bounds of the color we want to make a mask of. It has the following format:
mask = cv2.inRange(<image>, <hsv_lower>, <hsv_upper>)
Exercise
Let's mask the birdie's feet!
Hint: Use hsv_select to find the upper and lower HSV bounds!
Your mask should look something like this:
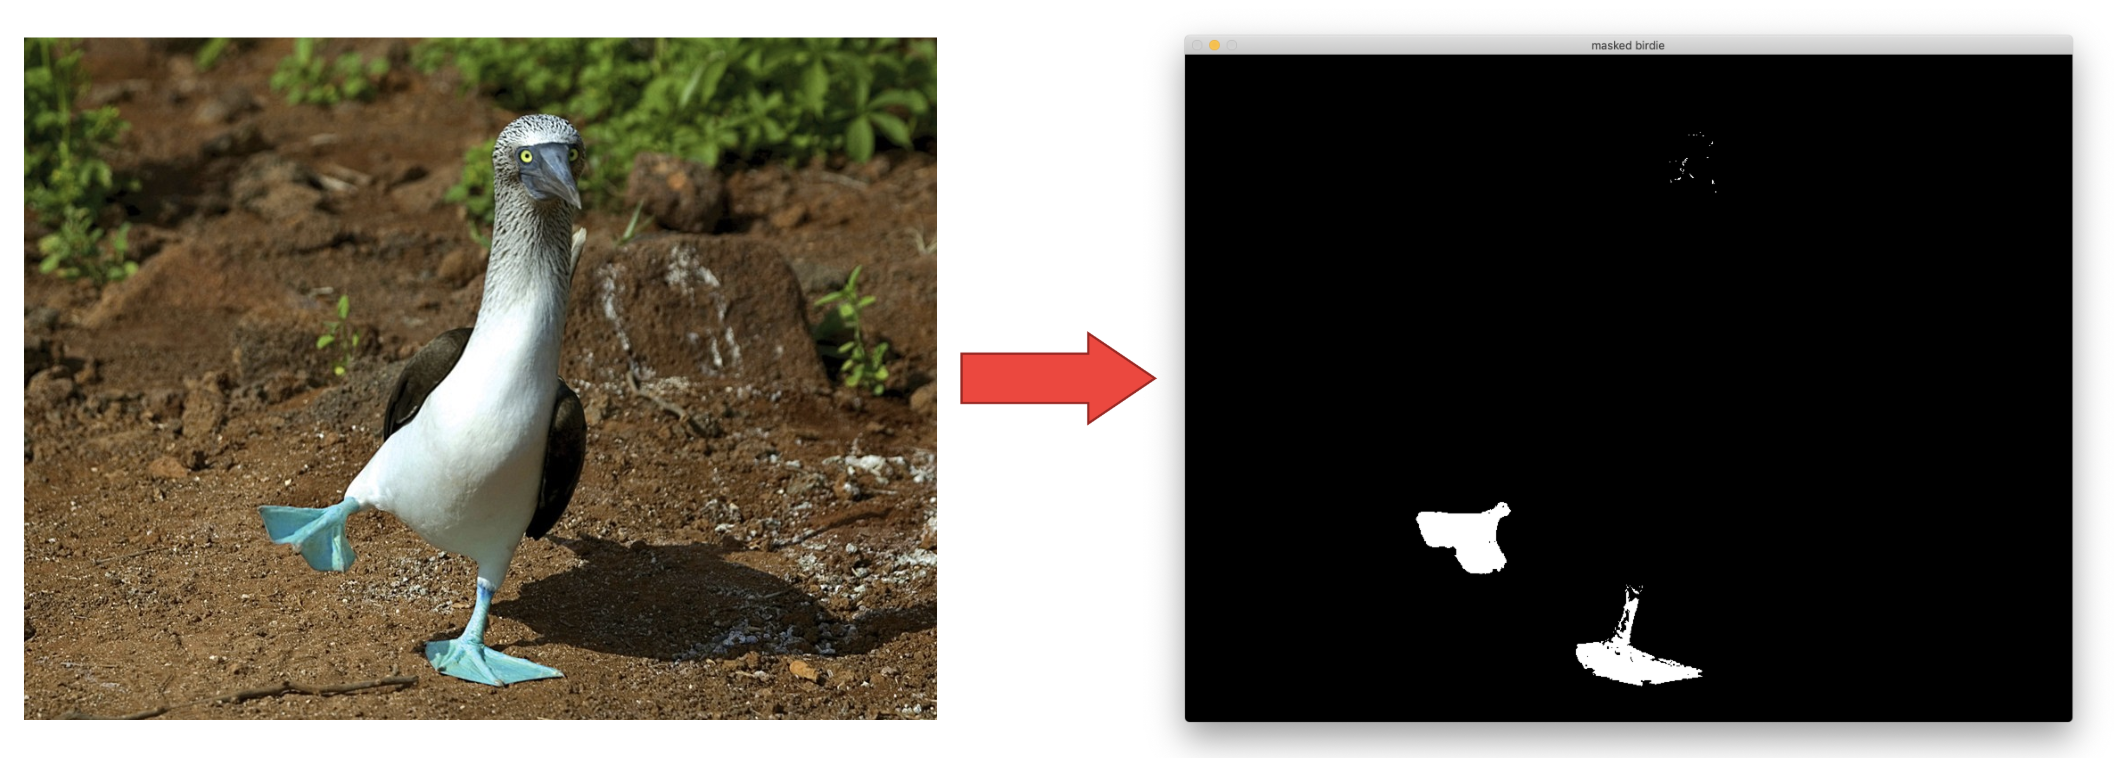
We're going to write and use a function to find the mask so that we can reuse our code.
# Run this function to find the HSV upper and lower bounds!
hsv_select('birdie.jpg')
def mask_birdie(hsv_lower, hsv_upper):
    # TASK 1: Read and save 'birdie.jpg'


    # TASK 2: Use cv2.cvtColor to convert the image to HSV


    # TASK 3: Create a mask for 'birdie.jpg' with cv2.inRange


    # TASK 4: Return the mask


# TASK 5: Find the HSV lower and upper bounds for the birdie's FEET
hsv_lower_feet = (None, None, None)    # Replace None with integers!
hsv_upper_feet = (None, None, None)    # Replace None with integers!

# TASK 6: Call the mask_birdie function (pass in the HSV bounds above!)


# TASK 7: Show the mask in a popup window


# TASK 8: Close the window
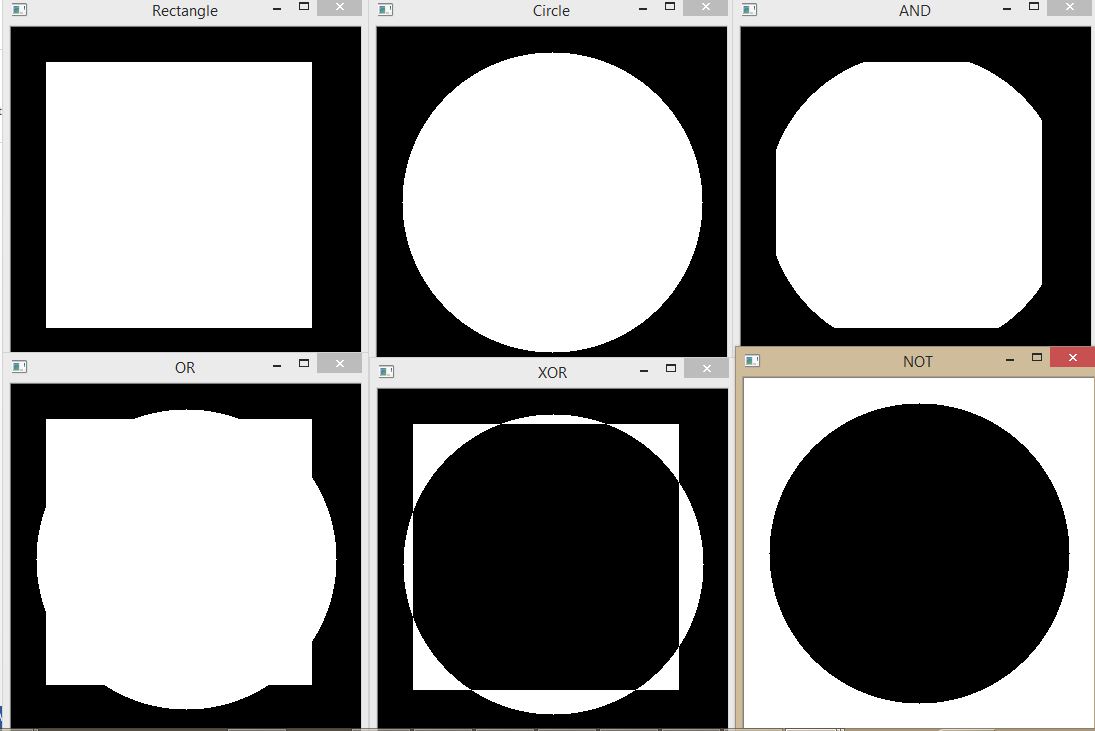
Applying Masks via Bitwise Operations!
Bitwise functions help us create masks of two or more colors!
cv2.bitwise_and show the real colors of a masked image. It has the following format:
color_mask = cv2.bitwise_and(<image1>, <image2>, mask=<input_mask>)
cv2.bitwise_not flips each pixel in a mask (turning True -> False and False -> True). This helps us control the colors we want to show. It has the following format:
inv_mask = cv2.bitwise_not(<mask_to_invert>)
Below are examples of different bitwise functions, and how they affect images.
Applying the Mask: cv2.bitwise_and
We can use cv2.bitwise_and to create a new image where True pixels on the mask will show real colors.
Exercise
Use cv2.bitwise_and to mask birdie.jpg to get its real colors!
Your mask should look something like this:
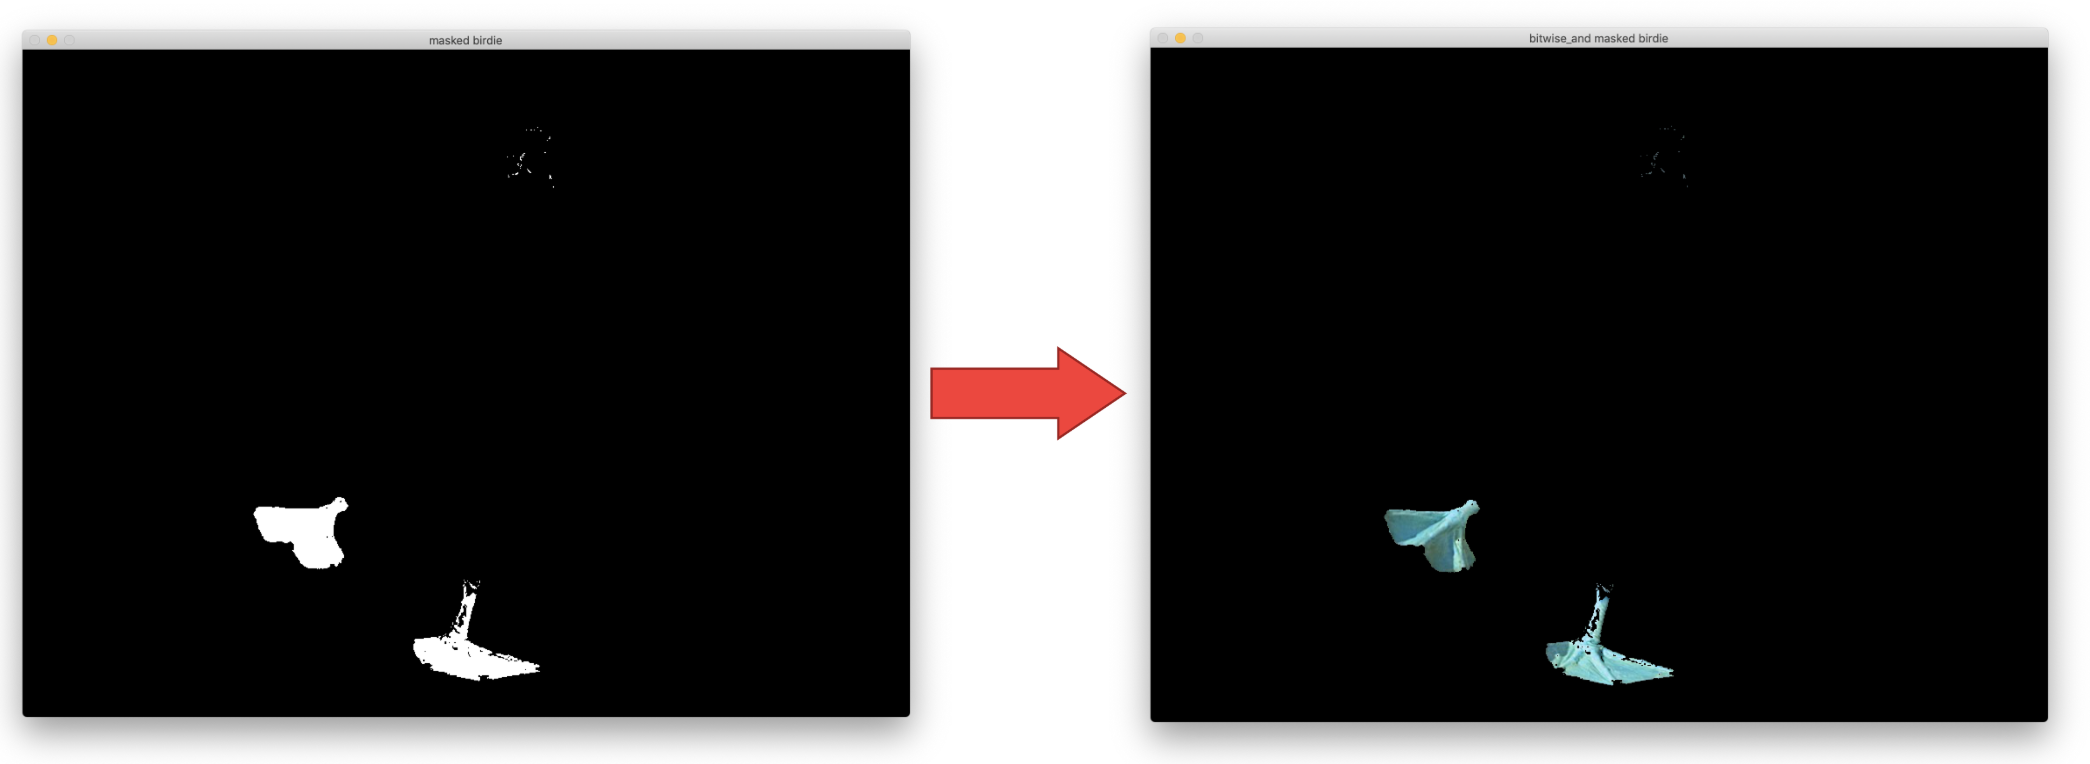
Useful Notes:
- Inputs
<image1>and<image2>should be the SAME image. Use the originalimg. - Use our masked birdie feet from the previous exercise as the input mask for:
mask=<input_mask>
def color_mask_birdie(mask):
    # TASK 1: Read 'birdie.jpg'
    img = cv2.imread('birdie.jpg')

    # TASK 2: Use cv2.bitwise_and to create a color mask


    # TASK 3: Return the color mask


# TASK 4: Use the color_mask_birdie function to create a color mask
#         Hint: Use the same mask you created before from "Making a Mask"! (It should still be saved)


# TASK 5: Show the color mask in a popup window


# TASK 6: Close the window
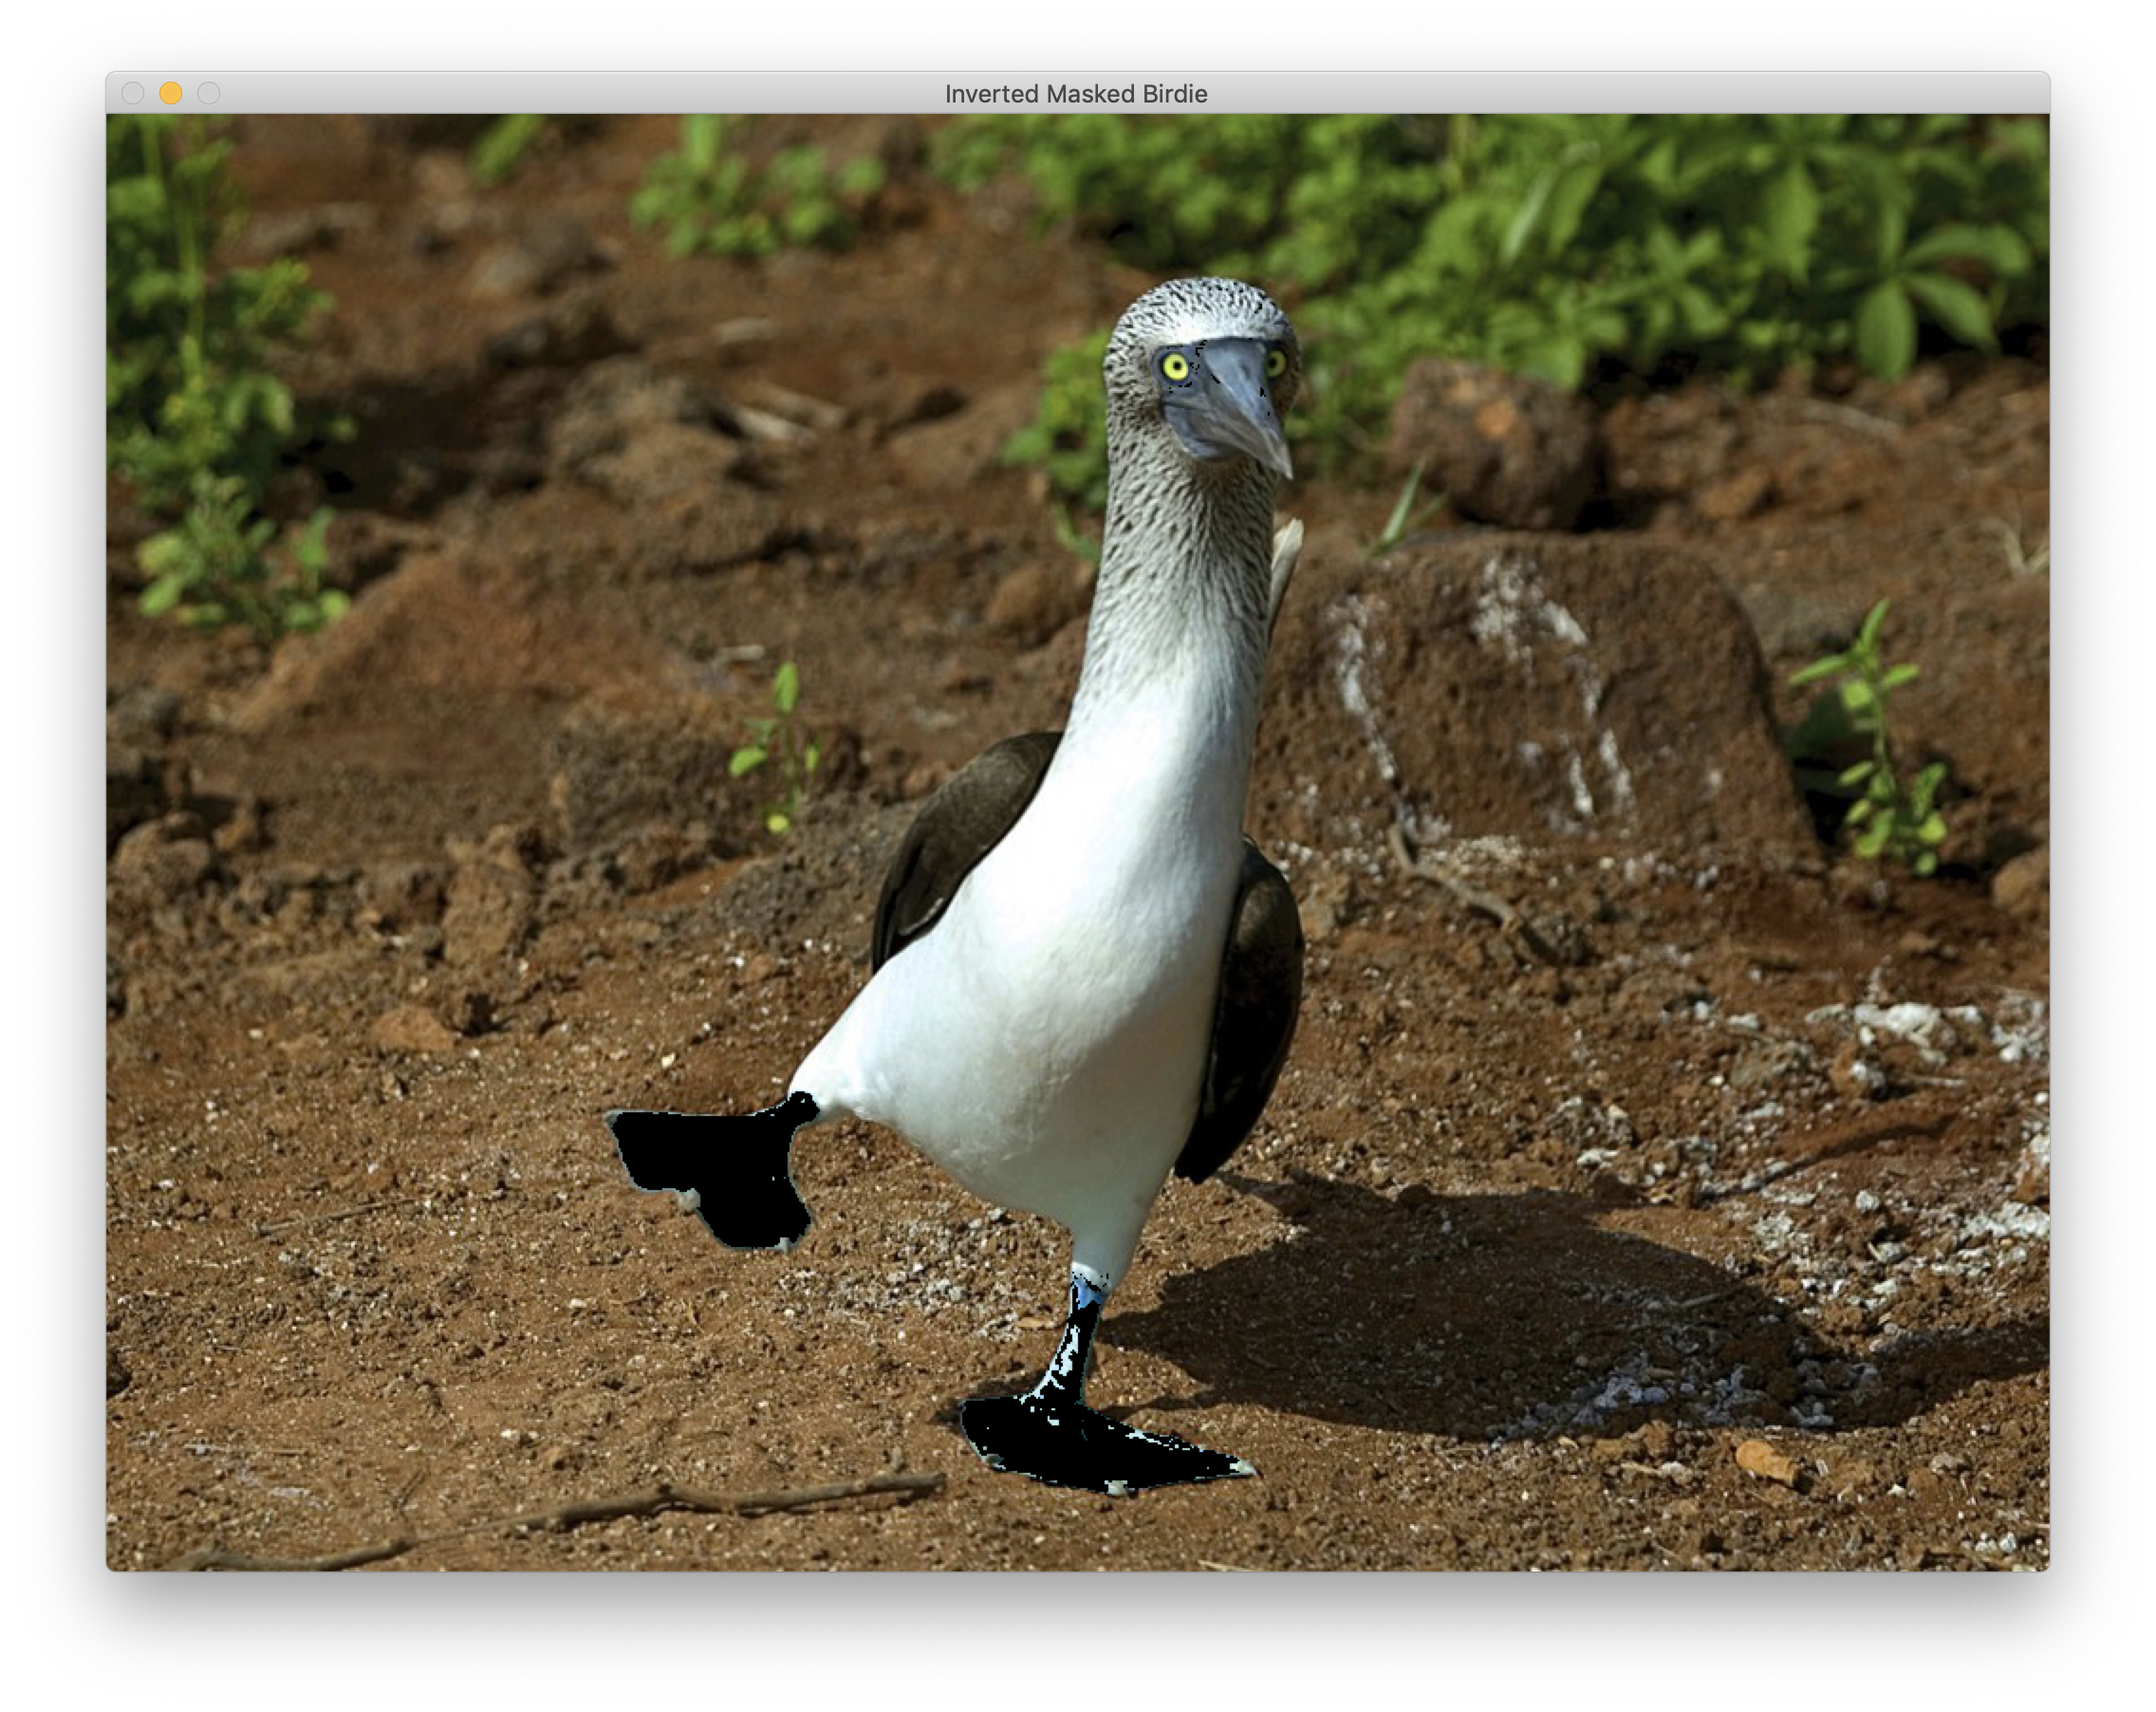
Inverting the Mask: cv2.bitwise_not
Exercise
Now let's reverse, or invert the mask using cv2.bitwise_not so we get the real color of the background instead of the birdie!
Hint: Use the combined mask you made in the Combining Masks exercise!
Your mask should look something like this:
# Make sure to run the previous cell blocks first!
# TASK 1: Use cv2.bitwise_not to invert the mask. Use the mask you made from "Making a Mask".


# TASK 2: Use color_mask_birdie to show the real colors


# TASK 3: Show the masked image in a popup window


# TASK 4: Close the window
CONGRATS!!! You can now pick out colors from images!
In the next lab, using the tools we've learned so far, we will make our very own green screens!