# FIRST import all the necessary libraries and modules!
import cv2               # import OpenCV
import numpy as np       # import NumPy

# import functions
import sys
sys.path.insert(0, '../..')
from utils import *
Intro to OpenCV
OpenCV helps us analyze and manipulate images.
In this lab, we will learn how to create, display, and draw on images!!
We will also learn how to use trackbars and mouse detection for user input.
Drawing Lab
Let's learn how to draw Mickey Mouse using OpenCV!
In this lab, we will learn how to:
- Create blank images
- Show popup and inline images
- Find coordinates in OpenCV
- Draw shapes
- Write text
Reading an Image
We can read an image using the function cv2.imread.
It has the following format:
img = cv2.imread(<image_filename>)
Note that <image_filename> is a string of the filepath to the image:
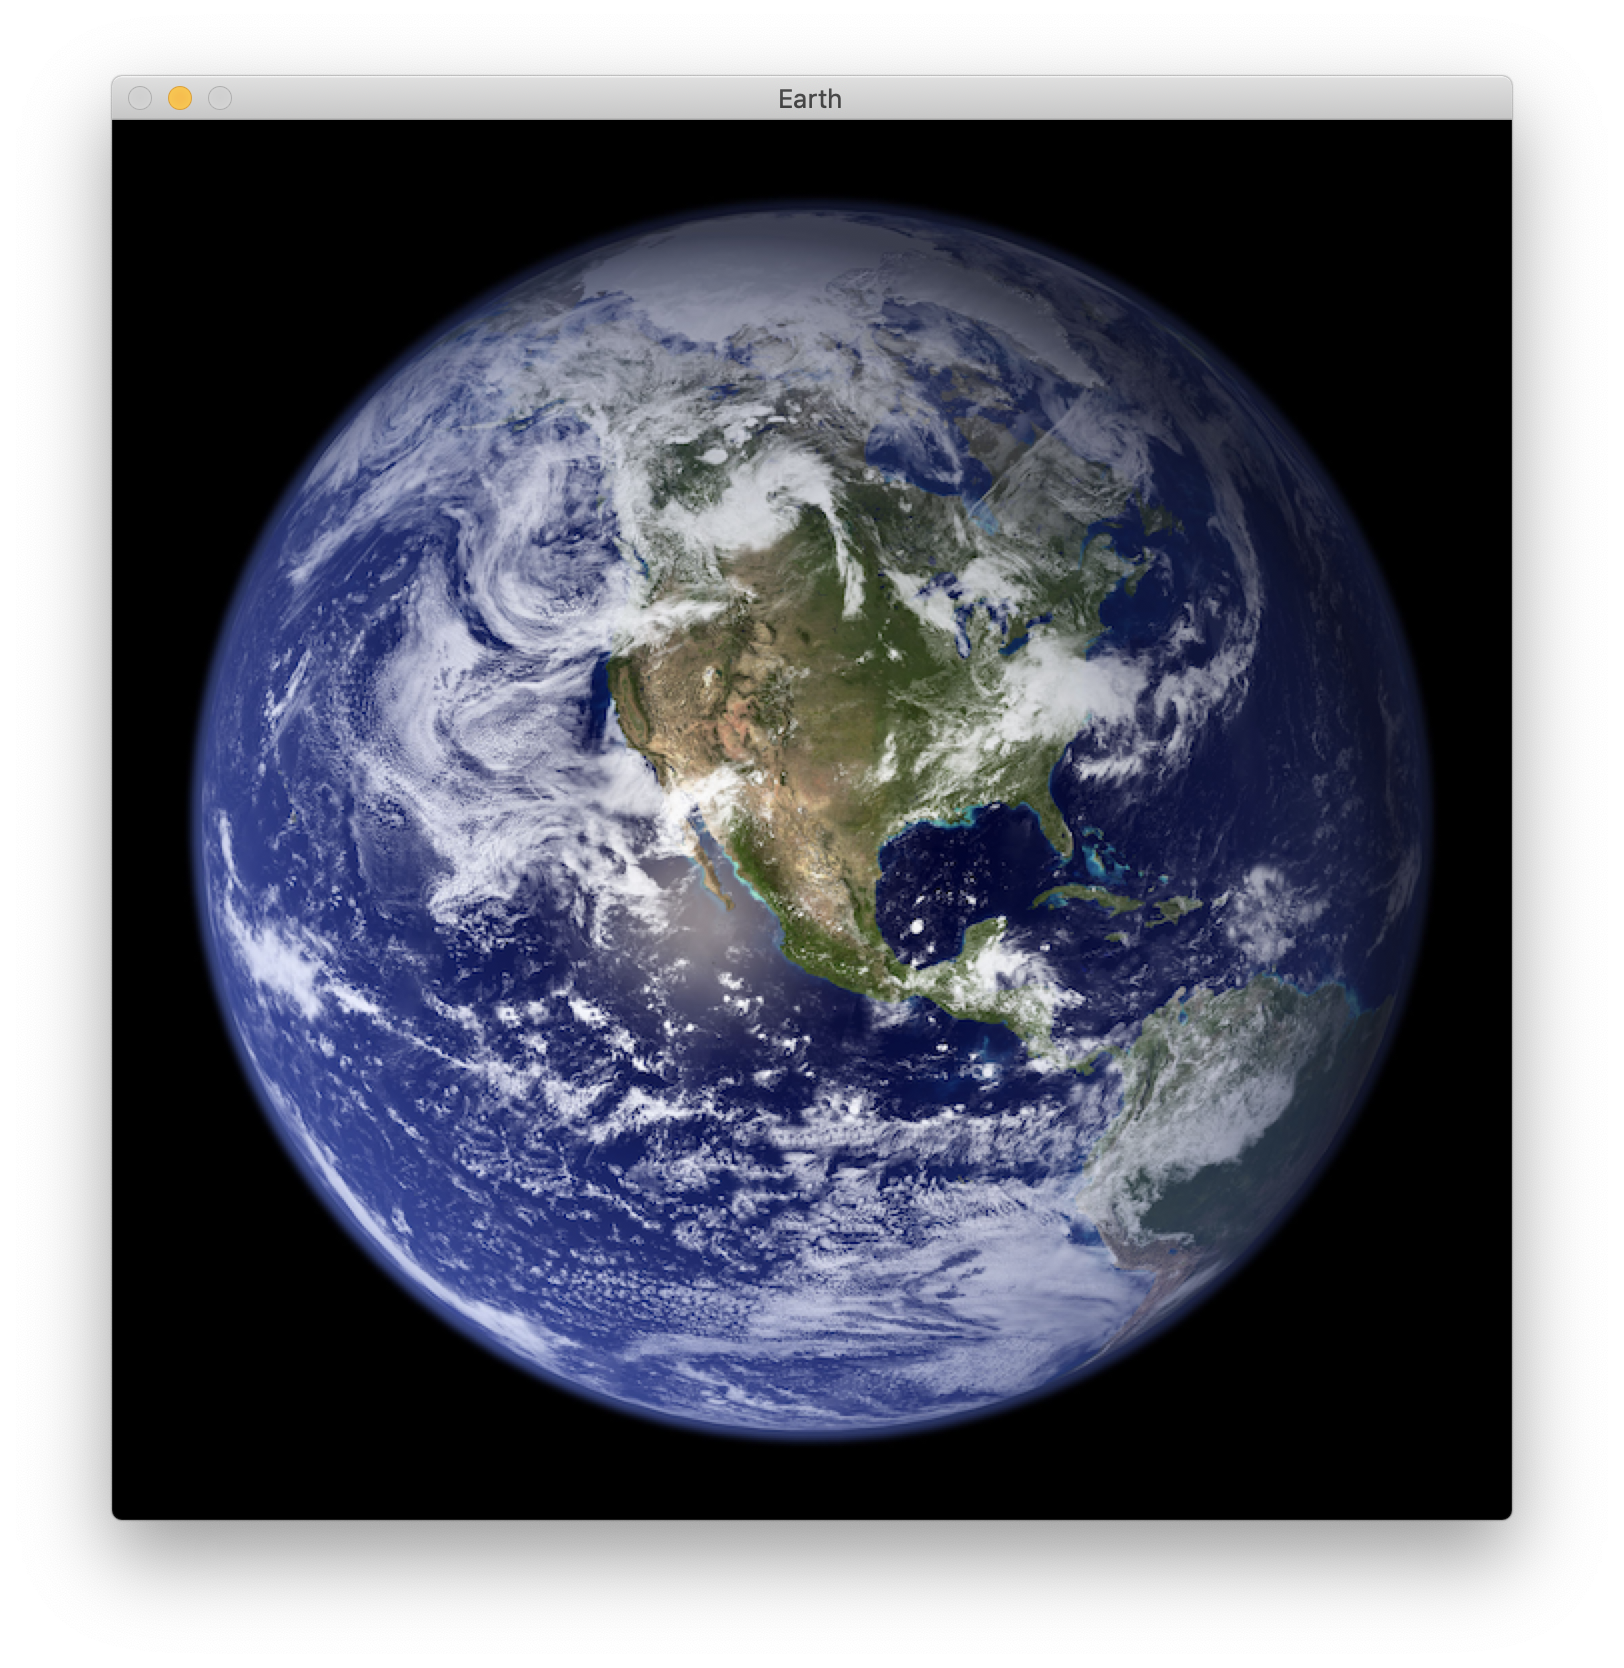
Exercise:
Read in and save the image earth.png below.
# TASK: Read in the image earth.png and save it in a variable
Displaying Images
There are two ways of displaying images:
- in a popup window
- inline (within this jupyter notebook)
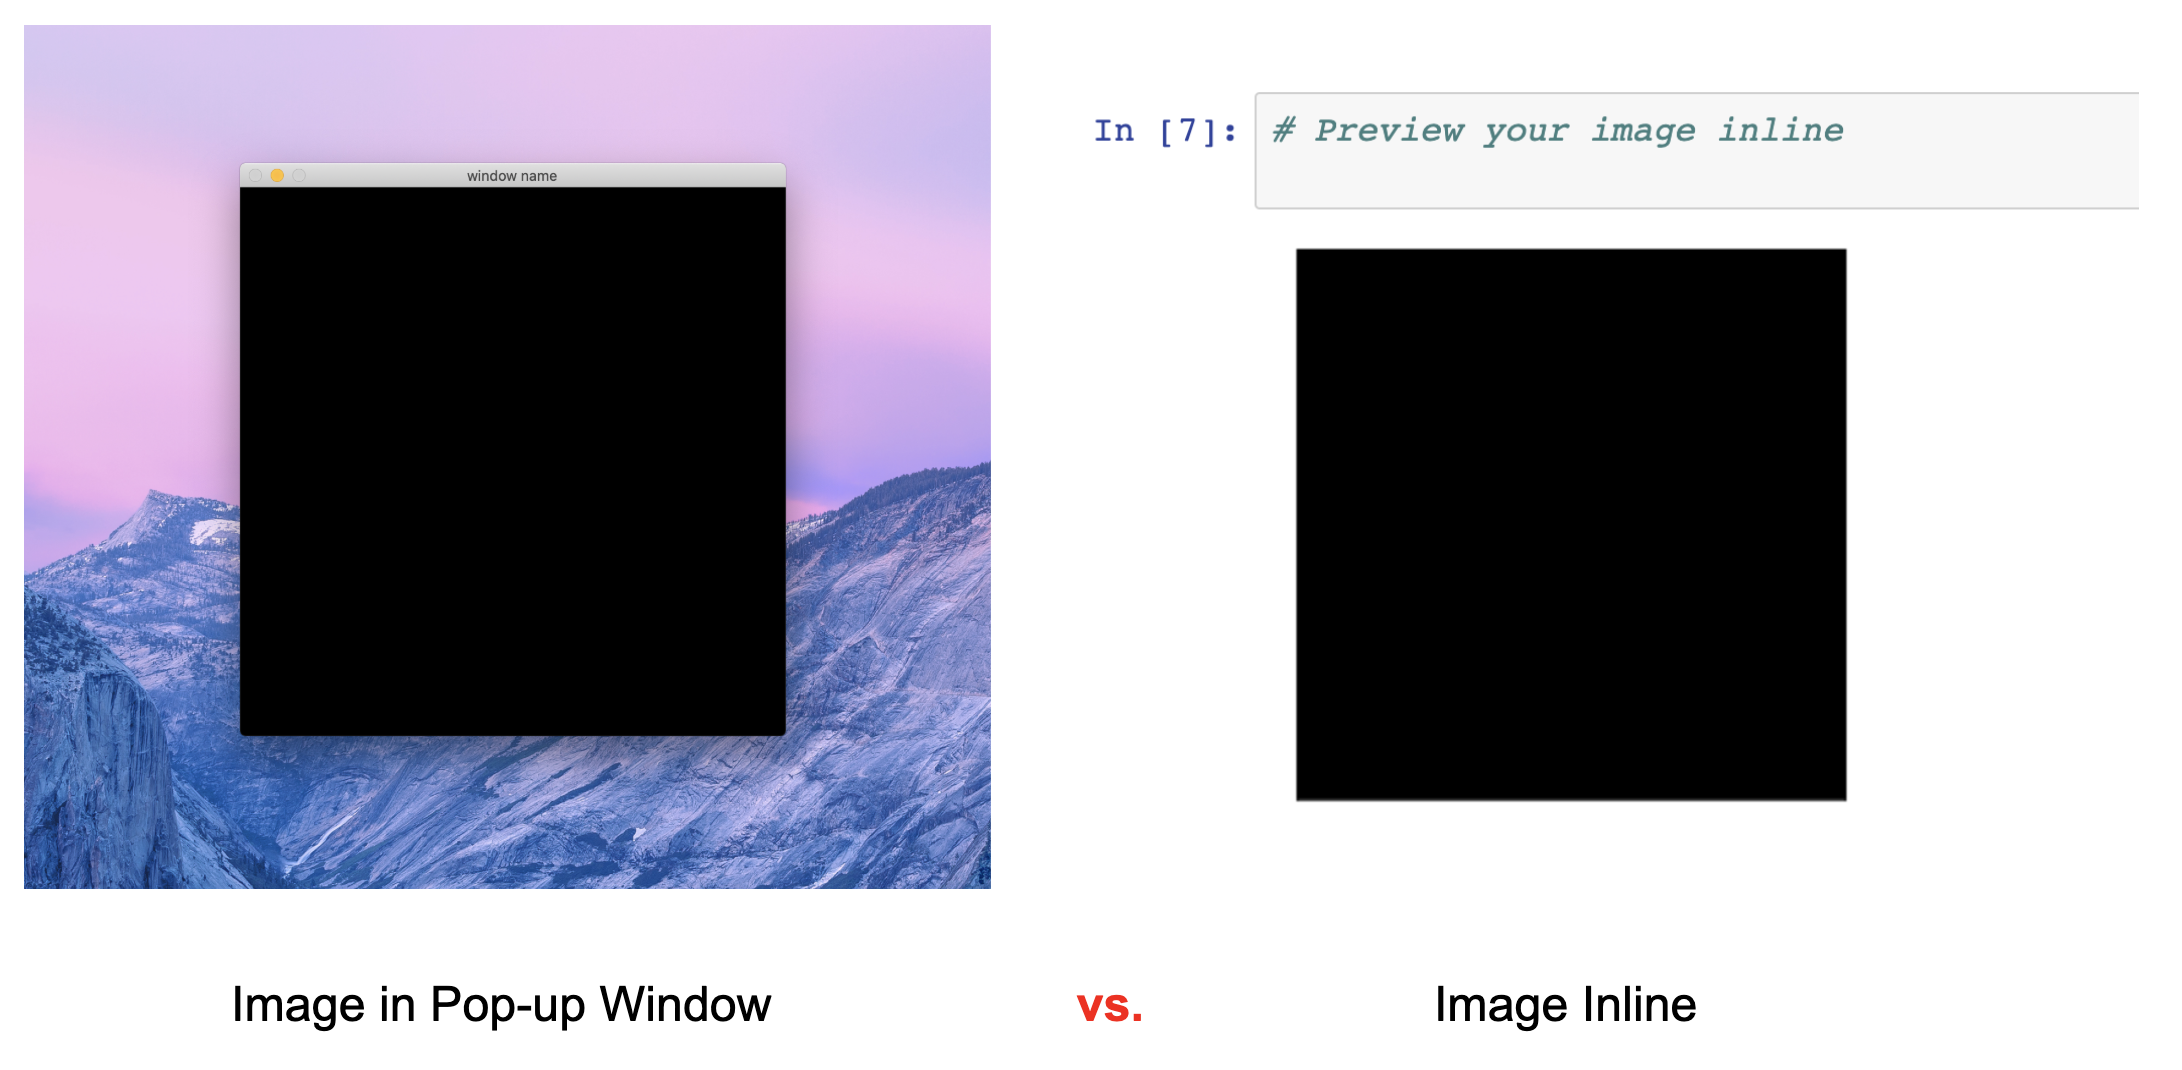
Display in Pop-Up Window
To display an image in a popup window, we can use the OpenCV function cv2.imshow followed by close_windows():
cv2.imshowshows the imageclose_windows()waits until the ESC key is pressed and then closes the window.
This pop-up window looks something like this:
Here is an example of using the two functions from above:
cv2.imshow('window name', <image>)
close_windows()
Exercise:
Display the image you read before in a popup window (use the same variable name).
Press 'ESC' to exit the pop-up window.
# TASK #1: Display the image you read and saved above


# TASK #2: Call close_windows()
Display Inline
The instructor-made function show_inline shows an image inline.
It is used like this:
show_inline(<image>)
Exercise:
Show your image inline below!
# TASK: Show the image you read inline
Create Blank Image
The following code uses a tool called NumPy to create a 500 by 500 black pixel image:
img = np.zeros((500, 500, 3), np.uint8)
Exercise:
Create a blank black image below.
# TASK: Create and save a blank image
Now show the image inline!
# TASK: Show your blank image inline
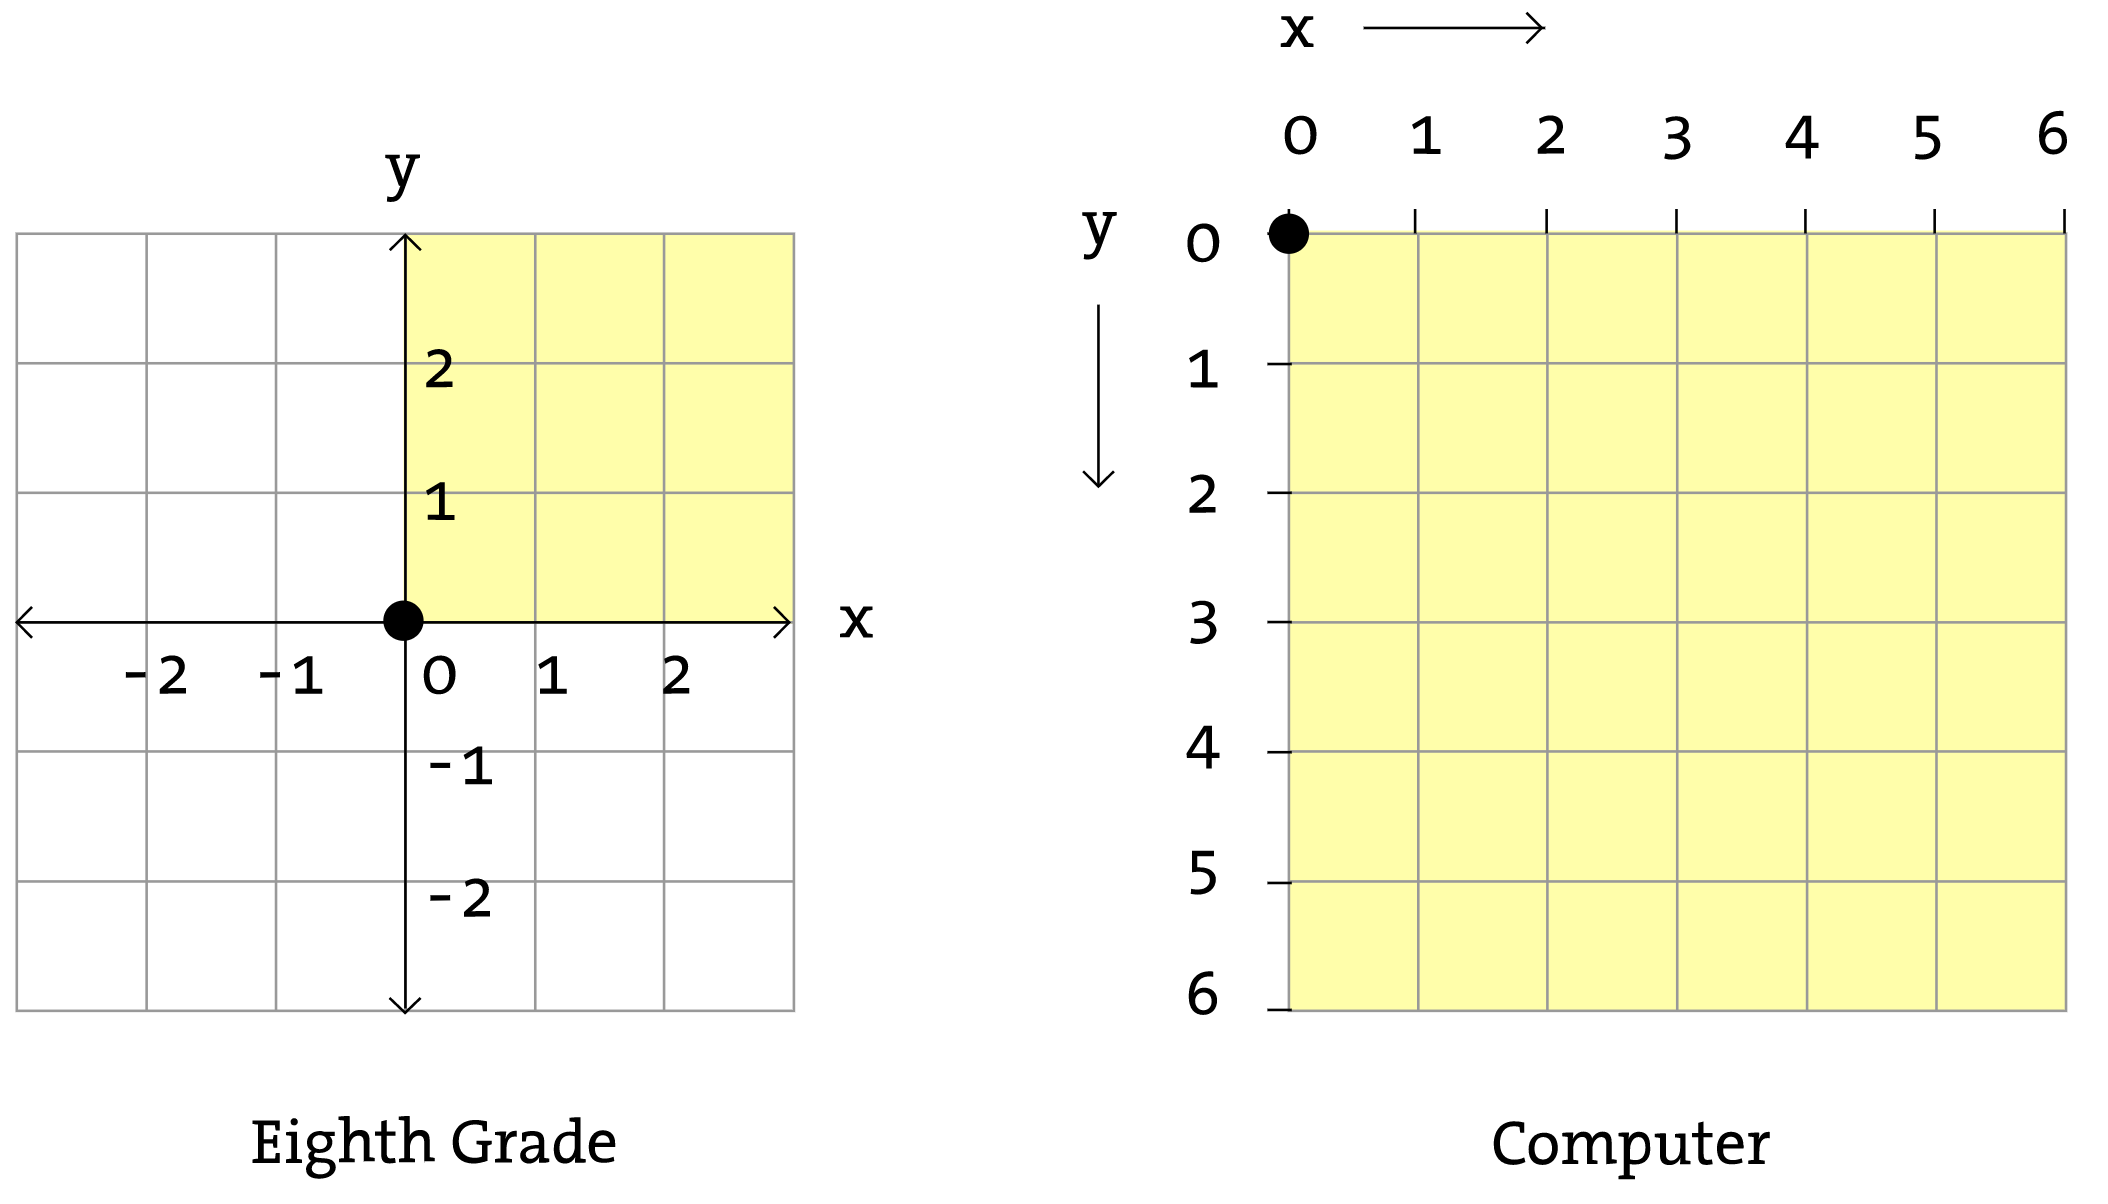
Coordinates
We can refer to individual pixels using x and y coordinates in the format (x, y).
In OpenCV, the upper left corner is (0, 0).
x increases horizontally, and y increases vertically as we move away from this corner.
Exercise:
Run the code below and move around the mouse to get familiar with x and y coordinates.
Press ESC to close.
You should get a pop-up that looks something like this:
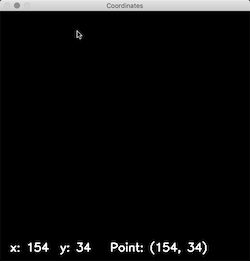
coordinates()
Draw a Line
The function cv2.line draws a line. It has the following format:
cv2.line(<image>, <start_coordinate>, <end_coordinate>, <color>, <thickness>)
OpenCV uses BGR color format, which means colors are in the format (<blue>, <green>, <red>), with each going from 0 to 255. We will learn more about color later.
Exercise:
Draw a red (0, 0, 255) line of thickness 5 across the middle of the image.
Show the image inline.
It should look like this:

img = np.zeros((500, 500, 3), np.uint8)  # blank black image

# TASK #1: Draw a red line of thickness 5 across the middle of the image you saved before


# TASK #2: Show the image inline
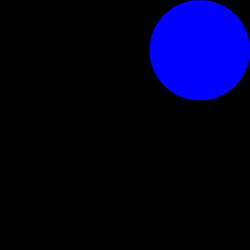
Draw a Circle
The function cv2.circle draws a circle. It has the following format:
cv2.circle(<image>, <center_coordinate>, <radius>, <color>, <thickness>)
For a circle and other closed shapes, a thickness of -1 fills in the shape.
Exercise:
Draw a filled-in blue (255, 0, 0) circle of radius 100 in the top right corner of the image.
Show the image inline.
It should look like this:
img = np.zeros((500, 500, 3), np.uint8)  # blank black image

# TASK #1: Draw a blue filled in circle in the top right corner


# TASK #2: Show the image inline
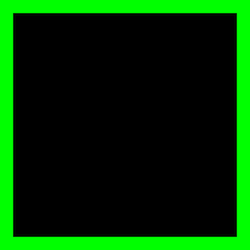
Draw a Rectangle
The function cv2.rectangle draws a rectangle. It has the following format:
cv2.rectangle(<image>, <topleft_coordinate>, <bottomright_coordinate>, <color>, <thickness>)
Exercise:
Draw a green (0,255,0) rectangle of thickness 50 around the border of the entire image.
Show the image inline.
It should look like this:
img = np.zeros((500, 500, 3), np.uint8)  # blank black image

# TASK #1: Draw a green rectangle of thickness 50 around the image


# TASK #2: Show the image inline
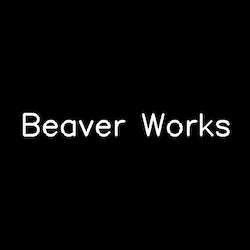
Draw Text
The function cv2.putText draws text. It has the following format:
cv2.putText(<image>, <text>, <bottomleft_coord>, <font>, <scale>, <color>, <thickness>)
Use 0 for to use the default font. Scale means the size of the text.
Exercise:
Write the text 'Beaver Works' in white (255, 255, 255) near the center of the image.
Use 0 for font, 2 for scale, and 3 for thickness.
Show the image inline.
It should look like this:
img = np.zeros((500, 500, 3), np.uint8)  # blank black image

# TASK #1: Draw a green rectangle of thickness 50 around the image


# TASK #2: Show the image inline
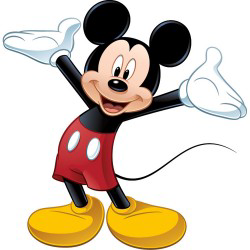
Let's Draw Mickey Mouse!!
Using the tools we have learned, let's draw Mickey Mouse!
Exercise:
You can choose to draw only his head, or part of his body.
Follow these steps:
- Sketch your design by hand. Use only lines, circles, and rectangles.
- Write down which functions and parameters you will use.
- Type in each function one by one.
- Show your image inline as you work, making adjustments as needed.
Color codes:
- Black:
(0,0,0) - White:
(255,255,255) - Blue:
(255,0,0) - Green:
(0,255,0) - Red:
(0,0,255) - Yellow:
(0,255,255)
Note: This time we created a blank white image to start.
img = np.full((500, 500, 3), (255,255,255), np.uint8)  # blank white image

# TASK #1: Create Mickey Mouse using the functions we have learned!


# TASK #2: Show your image inline