Educator News - A Django Tutorial
I have learned a lot from reading Hacker News over the last few years, and I have wished there was a similar forum for gathering and discussing articles related to education. I have seen at least one attempt at making a clone of HN for education, but the project did not go anywhere. This is an attempt to make an HN-inspired site for education. In the process, you will see how to build, deploy, and maintain a web application using the Django framework.
Overview
When creating a new project that you are excited about, it is tempting to jump right into writing code. This is rarely a recipe for success; it is almost always good to put some of your ideas and goals into writing first. Before writing any code it is good to lay out a clear vision, and then lay out a series of goals that you aim to achieve. This will help guide you into developing the product you want, rather than being pulled into something that is easy or satisfying to code but may be less useful.
One sentence
It is helpful to come up with a one-sentence description of your project. Here is a one-sentence description of Educator News:
"Educator News is a place to share and discuss articles of interest to educators, with a focus on improving the professionalism of the field as a whole."
This sentence, if written carefully, can help you evaluate whether you are staying true to your original vision as you begin to write code.
Elevator pitch
An elevator pitch is a slightly longer description that still gets at the heart of what the project should be. It answers the question, "If you were in an elevator for a brief ride with someone you really wanted on board your project, what would you say?" Here is an elevator pitch for Educator News:
"A professional sharing of ideas between educators is good for everyone. It allows teachers to do the best job possible, and it allows their students to have the best opportunity for learning. Most online communities for educators, however, devolve into online versions of a bad teachers' lounge. They are very negative, with a constant focus on complaints with little constructive and professional thinking. Educator News aims to help teachers and people interested in education share high-quality articles about the profession of teaching, and engage in constructive conversations about how to increase the professionalism of the education field."
Specifications
Good programming projects have a clear set of specifications that need to be met. These specifications are often open to revision as the project moves forward, but there should be a clear road map that outlines critical features and design parameters. It tells you what users of a project will see, and what they will be able to do.
Educator News - What users see
Here are the major goals of the Educator News project:
- A landing page will tell people what Educator News is, and why they should get involved.
- It will allow people to register.
- It will link to the "front page" of articles.
- A "submit" page will allow registered users to submit new articles.
- Users can submit a url and title.
- A "new" page will list the newest articles that have been submitted.
- Any registered user can upvote an article.
- Registered users with enough karma can downvote an article.
- Any registered user can comment on an article.
- A "front page" will list the top articles that have been submitted.
Development outline
The overall steps to make this happen are roughly the following:
- Set up a Django project within a virtual environment (virtualenv).
- Develop the user model.
- Build a landing page, allowing users to register.
- Deploy the landing page.
- This is mostly to start a realistic cycle of develop -> deploy -> revise -> deploy.
- In most projects, you'd do more local development before bothering to deploy.
- Use twitter bootstrap for styling.
- Develop the article model.
- Build the "submit" page.
- Deploy the submit page.
- Build the "new" page.
- Deploy the new page.
- Build the "front" page.
- Deploy the front page.
- Share with a small audience.
- Gauge initial interest.
- Gather initial feedback.
- Identify rest of needed features
- Build and deploy.
- Identify and start to implement other infrastructure:
- Monitoring traffic
- Issue tracker
- Backup routines
- Fighting spam
- Montoring quality of submissions
Other notes
A few other notes:
- This is an open-source project, which will be hosted on Github.
- This is a non-profit project. It will be free, and users will not see any ads.
Starting the project
Some of the terminology can be a little confusing when you first start working with Django. A site that is built in Django is called a project, and a project can be made up of any number of apps. Every project has at least one app.
When you start building a project in Django, your project will use a number of different packages. It is quite possible your system will evolve over the life of your project, so that your system's packages no longer match the packages you used in your Django project. To manage these kinds of issues, it is strongly recommended that you do your project work in a virtual environment.
A virtual environment is an isolated environment on your system that has a specific set of packages. This way you can even have projects that use different versions of Django on the same computer. This also allows you to choose when to upgrade the packages you use for a project, based on that particular project's schedule. You can update each project on its own timeframe, rather than having to upgrade everything on your system at once. You can also easily help other developers create an environment that is identical to your own, so that everyone involved in a project can be working with the exact same set of packages.
Setting up a virtual environment
First off, let's set up a virtual environment to contain this project:
$ mkdir -p /srv/projects/educator_news
$ cd /srv/projects/educator_news
$ virtualenv venv
$ source venv/bin/activate
(venv)$ pip install Django psycopg2 South dj-database-url
(venv)$ django-admin.py startproject educator_news
(venv)$ cd educator_news
(venv)educator_news$ python manage.py runserver
...
Starting development server at http://127.0.0.1:8000/
Quit the server with CONTROL-C.
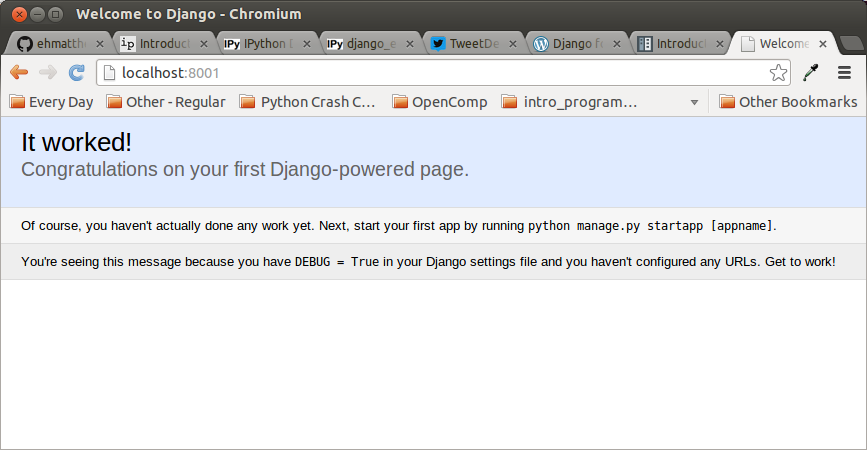
If this worked, you will see a browser tab showing an active, empty Django project:
Initial commit
Now let's make an initial commit on the project.
(venv)educator_news$ cd ..
(venv)$ touch .gitignore
Add the following lines to the .gitignore file. I tend to have a notes directory in many of my project directories, where I keep some working notes. I don't want these committed to my project, so they appear in my .gitignore. You can leave this line out if you don't have a notes directory.
venv/*
*.pyc
notes/*
This file makes sure that git does not track all the files in your virtualenv. That is not necessary, because you can always recreate your virtualenv easily if you are maintaining it properly. You don't need the .pyc files, because they are automatically generated.
(venv)$ git add .
(venv)$ git commit -am "Initial commit."
Setting up the database
Django will need access to a database in order to store all the information it receives. For this project, we are going to use Postgres. It doesn't matter what directory you do these steps from.
Create a user for the database
Make sure you decline the superuser role, allow the new user to create databases, and disallow the user from creating new roles/ users.
$ # Create a user for this project.
$ sudo -u postgres createuser -P django_user_ednews
Enter password for new role:
Enter it again:
Shall the new role be a superuser? (y/n) n
Shall the new role be allowed to create databases? (y/n) y
Shall the new role be allowed to create more new roles? (y/n) n
Create a database for the project
We need to create a database for this project, and make sure the user we just created owns the database. To create the database, perform the following steps:
- Switch to the postgres user;
- Start a postgres terminal session;
- Create the database;
- Exit the postgres terminal session;
- Switch back to your normal username.
Here is what these steps look like:
$ su postgres
Password:
$ psql template1
psql (9.1.10)
Type "help" for help.

template1=# CREATE DATABASE ednews_db OWNER django_user_ednews ENCODING 'UTF8';
CREATE DATABASE
template1=# \q
$ su ehmatthes
Password:
$
Configure the database
Postgres needs to be reconfigured to allow the new user to have access to the new database.
- Back up the original postgres configuration file.
- Modify the configuration file to allow the new user access. This consists of adding a line of the form
local *database_name* *database_user_name* md5. - Restart postgres.
$ sudo cp /etc/postgresql/9.1/main/pg_hba.conf /etc/postgresql/9.1/main/pg_hba.conf.original
$ sudo nano /etc/postgresql/9.1/main/pg_hba.conf
# Add the following line, after a similar line.
#  Don't delete any lines from pg_hba.conf
local ednews_db django_user_ednews md5
$ sudo /etc/init.d/postgresql restart
Configure Django to use the database
Open settings.py. Remove or comment out the DATABASES dictionary, and replace it with these two lines:
import dj_database_url
DATABASES = {'default': dj_database_url.config() }
Make a .env file in the main project directory (at the same level as venv):
DATABASE_URL=postgres://django_user_mysite:password@localhost/mysite_db
Add the following lines to the end of the /venv/bin/activate script:
# Use my env variables
export $(cat /srv/projects/mysite/.env)
Modify your .gitignore file, so that your environment variables do not get accidentally commited to a repository and pushed to a public repository.
# .gitignore
venv/*
*.pyc
notes/*
.env
Run syncdb once to create the initial tables. With an active virtual environment:
(venv)educator_news$ python manage.py syncdb
You will be prompted to create a superuser. Say yes. I use “mysite_su” for the superuser name. You can now refresh http://localhost:8000 in your browser, and you should see the same empty Django page.
Adding South to the project
There is one more thing we will do to set up our local project, before starting to code the actual site. We will set up South to handle changes to our database. Edit the settings.py file so the list of INSTALLED_APPS includes south.
INSTALLED_APPS = (
    'django.contrib.auth',
    ...

    # Utilities/ libraries
    'south',
)
Now we need to run syncdb one more time to install the tables South will need to manage our database. This is the last time we will use syncdb; after this we will put South in charge of managing changes to the database.
(venv)educator_news$ python manage.py syncdb
Visit your project in your browser at http://localhost:8000, and you should still see the empty Django project with no error messages.
Building the app
Django distinguishes between projects and apps, which can be a little confusing. You probably think of your entire project as a single app. Django considers an app a specific bit of functionality in your project. The point of Django's distinction between projects and apps is to allow you to develop reusable apps that can be used within different projects. So if you have a blog app, you can use it in any number of your projects. The people who maintain Django want you to be able to share your apps with other developers, and use common apps within your larger project.
This overall project is called educator_news. It is fine to write your overall project as a single app, especially if you are just starting out in web development, and are unsure how to break up a project into smaller apps. However, you can't have an app with the same name as your project, otherwise there would be naming conflicts in the actual code.
Let's make an app called ed_news. This will contain all of our models and page views.
From the directory that contains manage.py:
(venv)educator_news$ python manage.py startapp ed_news
This creates an app called ed_news, which is a part of the educator_news project. Most of the work we have to do will take place within the ed_news app, but we will also deal with some settings and project files in the educator_news project.
Creating an index page
There is a fair bit of work we have to do in order to get an index page displayed. This is routine work, so once you have built a few projects in Django this setup work will go very quickly. To get an initial static index page displayed, we need to:
- Modify urls.py so that ed_news urls map to their proper pages.
- Create a urls.py within the ed_news app, so that we can properly map all of the urls that will be part of the ed_news app. The root url, and the root url with /index needs to map to our index page.
- Write a function in ed_news/views.py that tells Django how to build the index page.
- Create an educator_news/static/templates/ed_news path, to hold our templates. Within this directory, we will need an index.py file, which is the template for the index page.
- Modify settings.py so that Django knows where to find the templates for this project.
Modify urls.py
Django maps each url to a view function, which then calls a template that is rendered as an html page. There is a file in the overall project called urls.py, which responds to the url request from each page. You could put all of your url designations in this file, but it is cleaner to put specific urls within the app directory. So, the project urls.py file needs to make a call to the app urls.py file. Here is what the project urls.py file should look like:
###highlight=[8,9]
from django.conf.urls import patterns, include, url

from django.contrib import admin
admin.autodiscover()

urlpatterns = patterns('',
    # My urls
    url(r'^', include('ed_news.urls', namespace='ed_news')),

    url(r'^admin/', include(admin.site.urls)),
)
The highlighted line pulls in any urls that are mapped in the ed_news app into the overall project. This frees you to define urls within the app itself.
Create a urls.py file within the ed_news app
When we created the ed_news app with python manage.py startapp ed_news, some files were created automatically for us. A project-specific urls.py file is not made automatically. So create a new file in the ed_news directory, and enter the followig lines:
from django.conf.urls import patterns, url

from ed_news import views

urlpatterns = patterns('',
    # My urls

    # --- Educator News home page ---
    url(r'^$', views.index, name='index'),

)
This file maps one url to a view function. It maps the url /index to the index view. This means if someone requests the url http://root_domain/index, this view will be called. Let's create that view.
Create an index function in views.py
Open the ed_news/views.py file, and enter the following lines:
from django.shortcuts import render_to_response
from django.template import RequestContext

def index(request):
    # Static index page for now.
    return render_to_response('ed_news/index.html',
                              {},
                              context_instance = RequestContext(request))
This imports the function render_to_response(), and the class RequestContext. It defines a view function called index, which maps to the index.html template. The index page does not need any custom information yet, so an empty dictionary is sent to render_to_response(). Sending a context_instance will make it easier to include forms and dynamic data on the pages shortly.
Make an index.html template
You need to make an actual template for the index.html page. This template needs to live somewhere, and Django needs to know how to find it. From the overall project directory, make a place for static files to live. Within that directory, make an empty file called index.html:
(venv)educator_news$ mkdir -p educator_news/static/templates/ed_news
(venv)educator_news$ touch educator_news/static/templates/ed_news/index.html
This file will build the home page for our project. The index.html file will contain one line for the moment:
Educator News
Modify settings.py to include templates
Django needs to know where to find your template files. Add the following lines to settings.py:
###highlight=[10,11,12,13]
# SECURITY WARNING: don't run with debug turned on in production!
DEBUG = True

TEMPLATE_DEBUG = True

ALLOWED_HOSTS = []
...

DIRNAME = os.path.dirname(__file__)
TEMPLATE_DIRS = (
    os.path.join(DIRNAME, 'static/templates'),
)

# Application definition

INSTALLED_APPS = (
    'django.contrib.admin',
    'django.contrib.auth',
    'django.contrib.contenttypes',
...
View the index.html page
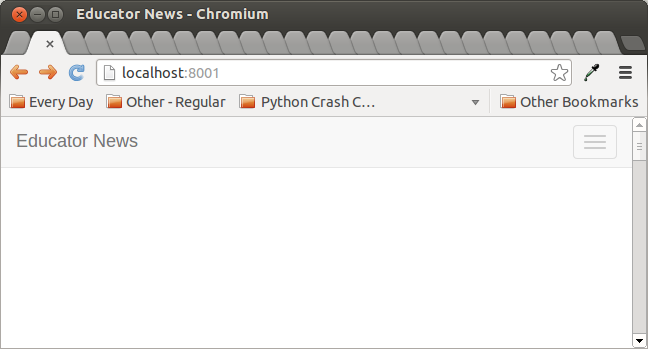
Now when you look at the page http://localhost:8000/, you should see a simple "Educator News" home page instead of the default Django homepage:

If this worked, congratulations. It's as simple as an html page can get, but it's your first page rendered through Django. Now let's make it a little more interesting.
Create a base.html template
Django helps you build coherent projects by allowing templates to inherit from one another. So before going any further, it would be good to create a base.html template, and have all pages inherit from this template. This base template will contain the boilerplate structure of a proper html file, and it will contain the parts of the page that are common to every page on the site: the navigation, the branding, and the overall page structure.
Make a file called base.html, and place it directly inside the templates directory you just created:
(venv)educator_news$ touch educator_news/educator_news/static/templates/base.html
For the moment, just put the following in base.html:
Educator News
Modify index.html so that it inherits from base.html:
{% extends base.html %}
Now visit http://localhost:8000 again, and you should see a simple page with the text "Educator News" on it just as you did before.
Modern browsers will attempt to build an html page even if it lacks proper structure, but it's not good practice to build such a page. Let's modify base.html to have a proper html structure:
<!DOCTYPE html>
<html lang="en">
  <head>
    <meta charset="utf-8">
    <title>Educator News</title>

  </head>

  <body>

  Educator News

  </body>

</html>
This establishes the structure of every page we create from now on. When you look at the page you won't see anything different, but behind the scenes there is a proper html file structure.
Let's add some more content and structure to our index page. Anything that is actually going to be part of every page will go in base.html, and anything that is unique to the home page will go in index.html.
Building a top bar
This project is an attempt to build a version of Hacker News for the education profession. It is not a clone of HN, but it is directly inspired by HN. Many of the design decisions will be made by simply copying the parts of HN that work, with the mindset that we are free to modify any aspects of HN that should be updated or improved.
One thing that we will certainly keep consistent with HN is the overall simplicity of the layout. So let's look at the top part of the HN home page, as it looks to a user who is not logged in:

Let's only build the parts that are going to work immediately, so that as we build the site everything that is on the screen is functional. I prefer this approach rather than laying everything out, and then adding functionality. The first functionality we will implement is a login, so let's add that. The login link will appear on every page, so we will put it in base.html rather than index.html.
In order to make this work, we need to jump into using css. Make a directory in the static folder to hold our css files, and make an empty site_styles.css file:
(venv)educator_news$ mkdir educator_news/educator_news/static/css
(venv)educator_news$ touch educator_news/educator_news/static/css/site_styles.css
Django needs to know where to look for this project's static files, so make the following changes to settings.py:
###highlight=[8,9,10,11,12,13,14,15]
...
USE_L10N = True

USE_TZ = True


# Static files (CSS, JavaScript, Images)
# https://docs.djangoproject.com/en/1.6/howto/static-files/

STATIC_URL = '/static/'

STATICFILES_DIRS = (
    os.path.join(DIRNAME, 'static'),
)
These lines tell Django to look in a directory called static within our project directory. You can store static files within an individual app as well, if you so choose.
The login link for HN allows users to log in or register; we will be a little more explicit and create a login/ register link on each page. Make the following changes to base.html:
###highlight=[9,10,11,17,18,19,20]
<!DOCTYPE html>
<html lang="en">,<!DOCTYPE html>
<html lang="en">
  <head>
    <meta charset="utf-8">
    <title>Educator News</title>

	 <!-- Styles -->
	 {% load staticfiles %}
	 <link href='{% static 'css/site_styles.css' %}' rel='stylesheet'>

  </head>

  <body>

    <div>
		<div id='project_title'>Educator News</div>
		<div id='login_links'>login | register</div>
	 </div>

  </body>

</html>
Finally, add the following to site_styles.css:
#project_title {
	 font-size: 24px;
}

#login_links {
	 text-align: right;
}
Now when you refresh http://localhost:8000, you should see something like the following:

Using bootstrap for styling
I understand basic css, but it is not my strength. So twitter's bootstrap is perfect for me. If you like to do your own css work, you can keep the current structure of the project and skip to the section on implementing a login and registration system, styling as you go. If you are happy to use bootstrap in your projects, follow along with this section and start using bootstrap.
If you like the idea of developing a project in a wireframe format first, you can skip all styling and just make sure all the functionality works. I know I want to deploy this project, so I want to be able to implement basic styling as we work through the project. I've done both methods, and with a project where I know pretty well what the final implementation should look like, I rather like having reasonable styling as I go. If this were a more original project and I were trying to work out the best functionality, I would probably go for a wireframe approach and leave styling until the project's functionality is more established.
Implementing bootstrap is not that difficult now that we have static files configured for the local project. We need to download bootstrap, copy the correct files to static/css and static/js, and then choose a bootstrap template. This bootstrap template will go into the base.html file, and then we will be free to use any bootstrap styling on new elements.
Download bootsrap, and copy files to static/css
First download the files for bootstrap. I prefer to download the source files to a directory outside of my project, and then move just the necessary bootstrap files to the actual project directory. There are some interesting resources in the bootstrap source distribution that are not in the smaller dist download.
In your static folder, make a directory called js alongside your css folder. Copy some of the bootstrap files to your static directory, so that your static directory ends up looking like this:
- static/css
- boostrap.css
- bootstrap.min.css
- bootstrap-theme.css
- bootstrap-theme.min.css
- navbar-static-top.css
- site_styles.css
- static/js
- bootstrap.js
- bootstrap.min.js
- jquery-1.10.2.min.js
Bootstrap templates call jquery from a remote resource, but I like to have the file right in my project. There are a number of ways you can get the jquery file into your project. You can download it from jquery directly. I pulled up the source from a bootstrap sample page, clicked on the link to the jquery resource, and copied the code directly into my educator_news project.
Bootstrap offers a number of sample templates that you can start using in your project. For Educator News, I'm going with the Static top navbar example. To use this example in your project, you copy the source of the example, and modify the code as needed for your project. I chose the Static top navbar template for its simplicity.
To start using the bootstrap template in our project, we need to:
- Copy the source of the bootstrap theme we want into our base.html file.
- Modify the base.html file by getting rid of any elements we don't want, and then adding in the content that is relevant to our project.
- Make sure the links to bootstrap's static files are rewritten to work within our Django project.
- Get rid of the syles we defined earlier in site_styles.css, but keep the empty file.
To get started, here is the source for the Static top navbar bootstrap template. The highlighted sections are going to be removed completely. We will also get rid of or hide most of the navbar, just keeping the structure of the navbar.
###highlight=[20,21,46, 47, 48, 49, 50, 51, 52, 53, 54, 55, 56, 57, 58, 59, 60,64,65,74,75,76,77,78,79,80,81,82]
<!DOCTYPE html>
<html lang="en">
<head>
<meta charset="utf-8">
<meta http-equiv="X-UA-Compatible" content="IE=edge">
<meta name="viewport" content="width=device-width, initial-scale=1.0">
<meta name="description" content="">
<meta name="author" content="">
<link rel="shortcut icon" href="../../docs-assets/ico/favicon.png">
<title>Static Top Navbar Example for Bootstrap</title>
<!-- Bootstrap core CSS -->
<link href="../../dist/css/bootstrap.css" rel="stylesheet">
<!-- Custom styles for this template -->
<link href="navbar-static-top.css" rel="stylesheet">
<!-- Just for debugging purposes. Don't actually copy this line! -->
<!--[if lt IE 9]><script src="../../docs-assets/js/ie8-responsive-file-warning.js"></script><![endif]-->
<!-- HTML5 shim and Respond.js IE8 support of HTML5 elements and media queries -->
<!--[if lt IE 9]>
<script src="https://oss.maxcdn.com/libs/html5shiv/3.7.0/html5shiv.js"></script>
<script src="https://oss.maxcdn.com/libs/respond.js/1.3.0/respond.min.js"></script>
<![endif]-->
</head>
<body>
<!-- Static navbar -->
<div class="navbar navbar-default navbar-static-top" role="navigation">
<div class="container">
<div class="navbar-header">
<button type="button" class="navbar-toggle" data-toggle="collapse" data-target=".navbar-collapse">
<span class="sr-only">Toggle navigation</span>
<span class="icon-bar"></span>
<span class="icon-bar"></span>
<span class="icon-bar"></span>
</button>
<a class="navbar-brand" href="#">Project name</a>
</div>
<div class="navbar-collapse collapse">
<ul class="nav navbar-nav">
<li class="active"><a href="#">Home</a></li>
<li><a href="#about">About</a></li>
<li><a href="#contact">Contact</a></li>
<li class="dropdown">
<a href="#" class="dropdown-toggle" data-toggle="dropdown">Dropdown <b class="caret"></b></a>
<ul class="dropdown-menu">
<li><a href="#">Action</a></li>
<li><a href="#">Another action</a></li>
<li><a href="#">Something else here</a></li>
<li class="divider"></li>
<li class="dropdown-header">Nav header</li>
<li><a href="#">Separated link</a></li>
<li><a href="#">One more separated link</a></li>
</ul>
</li>
</ul>
<ul class="nav navbar-nav navbar-right">
<li><a href="../navbar/">Default</a></li>
<li class="active"><a href="./">Static top</a></li>
<li><a href="../navbar-fixed-top/">Fixed top</a></li>
</ul>
</div><!--/.nav-collapse -->
</div>
</div>
<div class="container">
<!-- Main component for a primary marketing message or call to action -->
<div class="jumbotron">
<h1>Navbar example</h1>
<p>This example is a quick exercise to illustrate how the default, static and fixed to top navbar work. It includes the responsive CSS and HTML, so it also adapts to your viewport and device.</p>
<p>To see the difference between static and fixed top navbars, just scroll.</p>
<p>
<a class="btn btn-lg btn-primary" href="../../components/#navbar" role="button">View navbar docs »</a>
</p>
</div>
</div> <!-- /container -->
<!-- Bootstrap core JavaScript
================================================== -->
<!-- Placed at the end of the document so the pages load faster -->
<script src="https://code.jquery.com/jquery-1.10.2.min.js"></script>
<script src="../../dist/js/bootstrap.min.js"></script>
</body>
</html>
Copy and paste this into base.html, writing over the old version of the file.
After removing the content from this template that we don't need, we have a simpler structure to start working with:
<!DOCTYPE html>
<html lang="en">
  <head>
    <meta charset="utf-8">
    <meta http-equiv="X-UA-Compatible" content="IE=edge">
    <meta name="viewport" content="width=device-width, initial-scale=1.0">
    <meta name="description" content="">
    <meta name="author" content="">
    <link rel="shortcut icon" href="../../docs-assets/ico/favicon.png">

    <title>Static Top Navbar Example for Bootstrap</title>

    <!-- Bootstrap core CSS -->
    <link href="../../dist/css/bootstrap.css" rel="stylesheet">

    <!-- Custom styles for this template -->
    <link href="navbar-static-top.css" rel="stylesheet">

    <!-- HTML5 shim and Respond.js IE8 support of HTML5 elements and media queries -->
    <!--[if lt IE 9]>
      <script src="https://oss.maxcdn.com/libs/html5shiv/3.7.0/html5shiv.js"></script>
      <script src="https://oss.maxcdn.com/libs/respond.js/1.3.0/respond.min.js"></script>
    <![endif]-->
  </head>

  <body>

    <!-- Static navbar -->
    <div class="navbar navbar-default navbar-static-top" role="navigation">
      <div class="container">
        <div class="navbar-header">
          <button type="button" class="navbar-toggle" data-toggle="collapse" data-target=".navbar-collapse">
            <span class="sr-only">Toggle navigation</span>
            <span class="icon-bar"></span>
            <span class="icon-bar"></span>
            <span class="icon-bar"></span>
          </button>
          <a class="navbar-brand" href="#">Project name</a>
        </div>
        <div class="navbar-collapse collapse">
          <ul class="nav navbar-nav">
          </ul>
          <ul class="nav navbar-nav navbar-right">
            <li><a href="../navbar/">Default</a></li>
          </ul>
        </div><!--/.nav-collapse -->
      </div>
    </div>


    <div class="container">

    </div> <!-- /container -->


    <!-- Bootstrap core JavaScript
    ================================================== -->
    <!-- Placed at the end of the document so the pages load faster -->
    <script src="https://code.jquery.com/jquery-1.10.2.min.js"></script>
    <script src="../../dist/js/bootstrap.min.js"></script>
  </body>
</html>
Now we can add in our content:
###highlight=[12,39,45,46]
<!DOCTYPE html>
<html lang="en">
  <head>
    <meta charset="utf-8">
    <meta http-equiv="X-UA-Compatible" content="IE=edge">
    <meta name="viewport" content="width=device-width, initial-scale=1.0">
    <meta name="description" content="">
    <meta name="author" content="">
    <link rel="shortcut icon" href="../../docs-assets/ico/favicon.png">

    <title>Educator News</title>

    <!-- Bootstrap core CSS -->
    <link href="../../dist/css/bootstrap.css" rel="stylesheet">

    <!-- Custom styles for this template -->
    <link href="navbar-static-top.css" rel="stylesheet">

    <!-- HTML5 shim and Respond.js IE8 support of HTML5 elements and media queries -->
    <!--[if lt IE 9]>
      <script src="https://oss.maxcdn.com/libs/html5shiv/3.7.0/html5shiv.js"></script>
      <script src="https://oss.maxcdn.com/libs/respond.js/1.3.0/respond.min.js"></script>
    <![endif]-->
  </head>

  <body>

    <!-- Static navbar -->
    <div class="navbar navbar-default navbar-static-top" role="navigation">
      <div class="container">
        <div class="navbar-header">
          <button type="button" class="navbar-toggle" data-toggle="collapse" data-target=".navbar-collapse">
            <span class="sr-only">Toggle navigation</span>
            <span class="icon-bar"></span>
            <span class="icon-bar"></span>
            <span class="icon-bar"></span>
          </button>
          <a class="navbar-brand" href="/">Educator News</a>
        </div>
        <div class="navbar-collapse collapse">
          <ul class="nav navbar-nav">
          </ul>
          <ul class="nav navbar-nav navbar-right">
            <li><a href="">login</a></li>
            <li><a href="">register</a></li>
          </ul>
        </div><!--/.nav-collapse -->
      </div>
    </div>


    <div class="container">

    </div> <!-- /container -->


    <!-- Bootstrap core JavaScript
    ================================================== -->
    <!-- Placed at the end of the document so the pages load faster -->
    <script src="https://code.jquery.com/jquery-1.10.2.min.js"></script>
    <script src="../../dist/js/bootstrap.min.js"></script>
  </body>
</html>
Finally, we modify the links to static resources, and add in a link to the site_styles.css file we created earlier:
###highlight=[14, 15, 16, 17, 18, 19, 20, 21, 22, 23, 64, 65,66,67,68]
<!DOCTYPE html>
<html lang="en">
  <head>
    <meta charset="utf-8">
    <meta http-equiv="X-UA-Compatible" content="IE=edge">
    <meta name="viewport" content="width=device-width, initial-scale=1.0">
    <meta name="description" content="">
    <meta name="author" content="">
    <link rel="shortcut icon" href="../../docs-assets/ico/favicon.png">

    <title>Educator News</title>

    <!-- Styles -->
	{% load staticfiles %}
    <!-- Bootstrap core CSS -->
	<link href='{% static 'css/bootstrap.css' %}' rel='stylesheet'>

    <!-- Custom styles for this template -->
    <link href='{% static 'css/navbar-static-top.css' %}' rel='stylesheet'>

    <!-- Non-bootstrap styles -->
	<link href='{% static 'css/site_styles.css' %}' rel='stylesheet'>


    <!-- HTML5 shim and Respond.js IE8 support of HTML5 elements and media queries -->
    <!--[if lt IE 9]>
      <script src="https://oss.maxcdn.com/libs/html5shiv/3.7.0/html5shiv.js"></script>
      <script src="https://oss.maxcdn.com/libs/respond.js/1.3.0/respond.min.js"></script>
    <![endif]-->
  </head>

  <body>

    <!-- Static navbar -->
    <div class="navbar navbar-default navbar-static-top" role="navigation">
      <div class="container">
        <div class="navbar-header">
          <button type="button" class="navbar-toggle" data-toggle="collapse" data-target=".navbar-collapse">
            <span class="sr-only">Toggle navigation</span>
            <span class="icon-bar"></span>
            <span class="icon-bar"></span>
            <span class="icon-bar"></span>
          </button>
          <a class="navbar-brand" href="/">Educator News</a>
        </div>
        <div class="navbar-collapse collapse">
          <ul class="nav navbar-nav">
          </ul>
          <ul class="nav navbar-nav navbar-right">
            <li><a href="">login</a></li>
            <li><a href="">register</a></li>
          </ul>
        </div><!--/.nav-collapse -->
      </div>
    </div>


    <div class="container">

    </div> <!-- /container -->


    <!-- Bootstrap core JavaScript
    ================================================== -->
    <!-- Placed at the end of the document so the pages load faster -->
    <script src='{% static 'js/jquery-1.10.2.min.js' %}'></script>
	<script src='{% static 'js/bootstrap.min.js' %}'></script>

  </body>
</html>
We don't need the two styles we defined earlier in site_styles.css, but we will want to write some of our own styles later on. So keep the file, but delete everything from it at this point so it is an empty file. Notice that we include site_styles.css after the bootstrap css files in base.html, so that we can override any bootstrap defaults we wish to.
Now, when you visit http://localhost:8000 you should see the same file we had earlier, with a simple boostrap style:

The site is now responsive, as you can see by shrinking the window. If you shrink the window, the login and registration links shrink to a collapsed menu:
Now we can return to focusing on the functionality of the project, and style the project in a simple but responsive way as we make progress.
Authenticating users
Django provides a lot of default functionality for managing users, since it is a core need of any web app. We will use the default functionality whenever possible, to save ourselves some work.
In this section we will focus on allowing users to log in and log out. We need to:
- Create a User model.
- Add the ed_news app to INSTALLED_APPS.
- Migrate the database to incorporate this model.
- Make a login page, and a logout view.
- Update base.html to display different links for authenticated and unauthenticated users.
Create a User model, and add it to the database
Django comes with a default User model, which includes such fields as email, first name, last name, and a few other fields. We are definitely going to have custom fields such as karma, so we will extend this default model from the start.
Add the following to ed_news/views.py:
highlight=[2,3,4,5,6,7,8]
from django.db import models
from django.contrib.auth.models import User

# --- Educator News models ---

class UserProfile(models.Model):
    user = models.OneToOneField(User)
Now that we have a model defined, we need to add the ed_news app to INSTALLED_APPS in settings.py. Make the following changes to settings.py:
###highlight=[14,15]
...
INSTALLED_APPS = (
    'django.contrib.admin',
    'django.contrib.auth',
    'django.contrib.contenttypes',
    'django.contrib.sessions',
    'django.contrib.messages',
    'django.contrib.staticfiles',

    # Utilities/ libraries
    'south',

    # My apps
    'ed_news',
)
...
Now we need to update the database to include the ed_news app, and to include the UserProfile model. This is actually a migration, a move from one state of the database to another. The app South manages database migrations for us. Database migrations are often messy; South makes them as clean as they can be. From the manage.py directory, issue the following commands:
###highlight=[2,6]
(venv)educator_news$ python manage.py schemamigration ed_news --initial
 + Added model ed_news.UserProfile
Created 0001_initial.py. You can now apply this migration with: ./manage.py migrate ed_news

(venv)educator_news$  python manage.py migrate ed_news
educator_news$ python manage.py migrate ed_news
Running migrations for ed_news:
 - Migrating forwards to 0001_initial.
 > ed_news:0001_initial
 - Loading initial data for ed_news.
Installed 0 object(s) from 0 fixture(s)
Now visit your project at http://localhost:8000 again, and you should not see any errors. You should not see anything different, but there should be no errors.
Making a login/ logout page
Django provides a default login page, which we will use to start this project. We won't really need to make a logout page, but we will have to implement a logout function.
Let's start by updating the main urls.py file to include a link to the login and logout views:
###highlight=[3,14,15,16]
from django.conf.urls import patterns, include, url
from django.core.urlresolvers import reverse

from django.contrib import admin
admin.autodiscover()

urlpatterns = patterns('',
    # My urls
    url(r'^', include('ed_news.urls', namespace='ed_news')),

    url(r'^admin/', include(admin.site.urls)),

    # Auth urls
    url(r'^login/', 'django.contrib.auth.views.login', name='login'),
    url(r'^logout/', 'ed_news.views.logout_view', name='logout_view'),
)
To use Django's default login system, make a directory in educator_news/static/templates/ called registration, and save a new template called login.html there:
{% extends 'base.html' %}

{% block content %}

                <h2>log in:</h2>

                {% if form.errors %}
                <p>Your username and password didn't match. Please try again.</p>
                {% endif %}

                <form method="post" action="{% url 'django.contrib.auth.views.login' %}">
                  {% csrf_token %}

                  <p>{{ form.username.label_tag }}{{ form.username }}
                  <p>{{ form.password.label_tag }}{{ form.password }}

                  <p><input type="submit" value="login" />
                  <input type="hidden" name="next" value="/" />
                </form>

{% endblock %}
We need a view to call the logout function. Add the following to views.py:
###highlight=[4,5,14,15,16,17,18]
from django.shortcuts import render_to_response, redirect
from django.template import RequestContext
from django.contrib.auth import logout
from django.core.urlresolvers import reverse

def index(request):
    # Static index page for now.
    return render_to_response('ed_news/index.html',
                              {},
                              context_instance = RequestContext(request))


# Authentication views
def logout_view(request):
    logout(request)
    # Redirect to home page.
    return redirect('/')
Finally, we need to modify base.html and make the login and logout links active. This listing shows just the body, since there are no changes needed for the head section of the page:
###highlight=[14,21,22,23,24,25,26]
<body>

    <!-- Static navbar -->
    <div class="navbar navbar-default navbar-static-top" role="navigation">
      <div class="container">
        <div class="navbar-header">
          <button type="button" class="navbar-toggle" data-toggle="collapse" data-target=".navbar-collapse">
            <span class="sr-only">Toggle navigation</span>
            <span class="icon-bar"></span>
            <span class="icon-bar"></span>
            <span class="icon-bar"></span>
          </button>
          <a class="navbar-brand" href="{% url 'ed_news:index' %}">Educator News</a>
        </div>
        <div class="navbar-collapse collapse">
          <ul class="nav navbar-nav">
          </ul>
          <ul class="nav navbar-nav navbar-right">

				{% if user.is_authenticated %}
                <li><a href="{% url 'logout_view' %}">logout</a></li>
				{% else %}
                <li><a href="{% url 'login' %}">login</a></li>
                <li><a href="">register</a></li>
				{% endif %}

          </ul>
        </div><!--/.nav-collapse -->
      </div>
    </div>


    <div class="container">

		{% block content %}
		{% endblock %}

    </div> <!-- /container -->


    <!-- Bootstrap core JavaScript
    ================================================== -->
    <!-- Placed at the end of the document so the pages load faster -->
	 <script src='{% static 'js/jquery-1.10.2.min.js' %}'></script>
	 <script src='{% static 'js/bootstrap.min.js' %}'></script>

  </body>
</html>
Now when you should be able to visit http://localhost:8000, and click on the login link. It should take you to a page that looks like this:
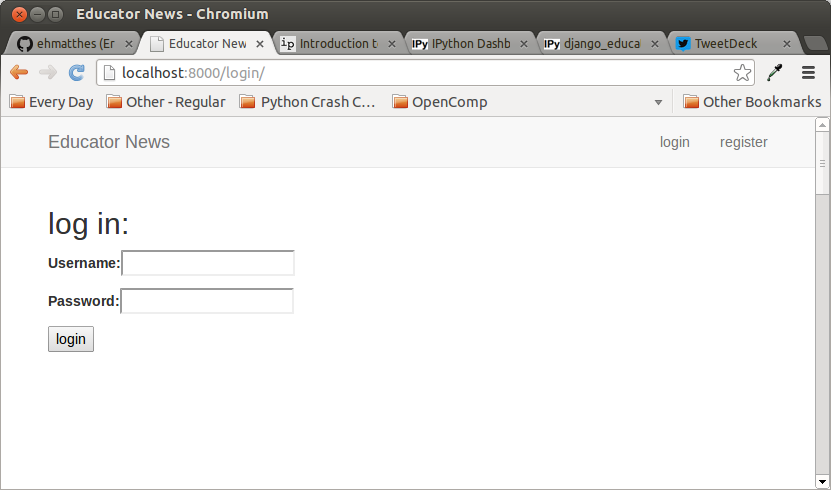
You should be able to log in using the superuser credentials you created earlier. If you do this, you should be taken back to the home page, and you should no longer see the login and register links. In their place, you should see a link that you can click to log out:
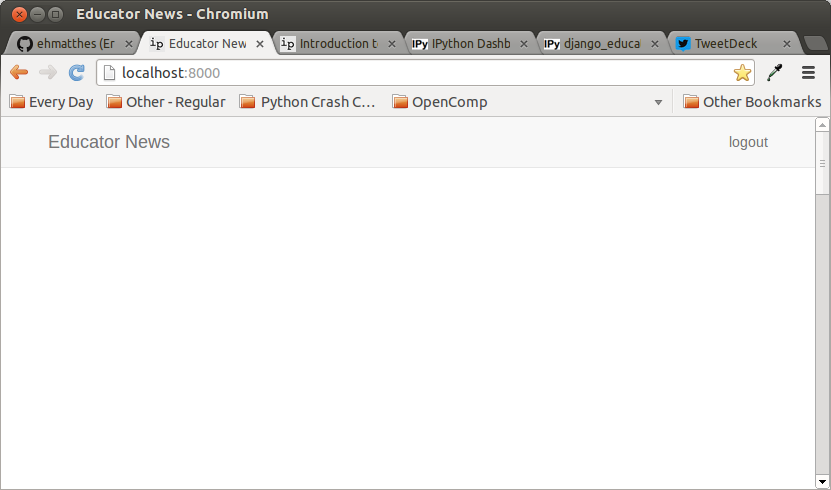
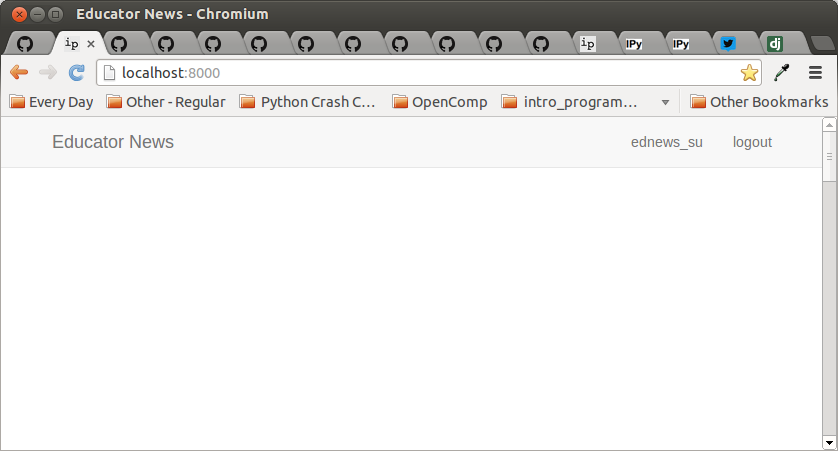
When you click the logout link, you should see the original home page.
Now we can move on to building a few pages that will allow users to manage their profile.
Making a profile page
Users of web apps need a way to view and manage their personal profiles. People need to verify and update email addresses, change passwords, and set options for their account. In this section, we will make a profile page, which will link to several other pages that allow users to take these management actions.
First, let's modify the home page to show a user's username when they are logged in. This username will link to their profile page. When a user is logged in, you can access their username through the variable {{ user.username }}. Let's add this to the base.html file:
###highlight=[20]
<!-- Static navbar -->
    <div class="navbar navbar-default navbar-static-top" role="navigation">
      <div class="container">
        <div class="navbar-header">
          <button type="button" class="navbar-toggle" data-toggle="collapse" data-target=".navbar-collapse">
            <span class="sr-only">Toggle navigation</span>
            <span class="icon-bar"></span>
            <span class="icon-bar"></span>
            <span class="icon-bar"></span>
          </button>
          <a class="navbar-brand" href="{% url 'ed_news:index' %}">Educator News</a>
        </div>
        <div class="navbar-collapse collapse">
          <ul class="nav navbar-nav">
          </ul>
          <ul class="nav navbar-nav navbar-right">

				{% if user.is_authenticated %}
				    <li><a href="{% url 'profile' %}">{{ user.username }}</a><li>
                    <li><a href="{% url 'logout_view' %}">logout</a></li>
				{% else %}
                    <li><a href="{% url 'login' %}">login</a></li>
                    <li><a href="">register</a></li>
				{% endif %}

          </ul>
        </div><!--/.nav-collapse -->
      </div>
    </div>
Now let's make a profile page that this will link to. Make a new file, educator_news/static/templates/registration/profile.html:
{% extends 'base.html' %}

{% block content %}

                <h3>Username: {{ user.username }}</h3>
                <h4>First Name: {{ user.first_name }}</h4>
                <h4>Last Name: {{ user.last_name }}</h4>
                <p>Email: {{ user.email }}</p>

{% endblock %}
Add this page to urls.py:
###highlight=[17]
from django.conf.urls import patterns, include, url
from django.core.urlresolvers import reverse

from django.contrib import admin
admin.autodiscover()

urlpatterns = patterns('',
    # My urls
    url(r'^', include('ed_news.urls', namespace='ed_news')),

    url(r'^admin/', include(admin.site.urls)),

    # Auth urls
    url(r'^login/', 'django.contrib.auth.views.login', name='login'),
    url(r'^logout/', 'ed_news.views.logout_view', name='logout_view'),
    url(r'^profile/', 'ed_news.views.profile', name='profile'),
)
Add a new view to views.py:
###highlight=[20,21,22,23]
from django.shortcuts import render_to_response, redirect
from django.template import RequestContext
from django.contrib.auth import logout
from django.core.urlresolvers import reverse

def index(request):
    # Static index page for now.
    return render_to_response('ed_news/index.html',
                              {},
                              context_instance = RequestContext(request))


# Authentication views
def logout_view(request):
    logout(request)
    # Redirect to home page.
    return redirect('/')

def profile(request):
    return render_to_response('registration/profile.html',
                              {},
                              context_instance = RequestContext(request))
Now when you are logged in, you should see your username in the header:
When you click on your username, you should see your user profile:

Now we can add the ability to change a user's password.
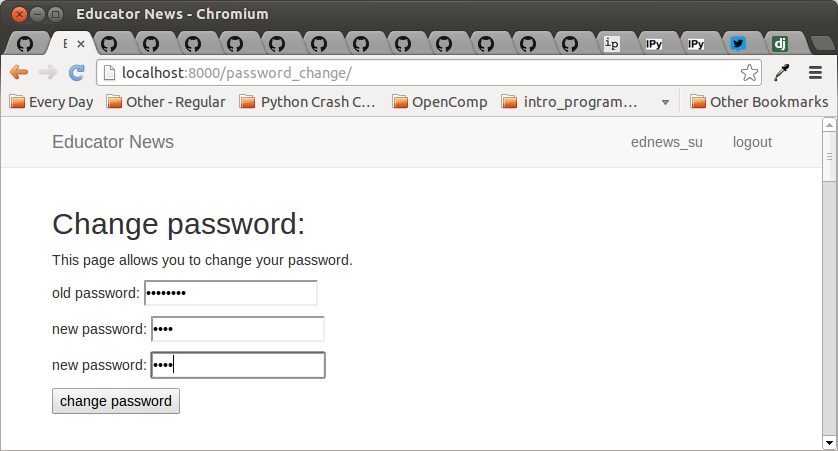
Letting users change their password
First, let's make a link to a password change page, on the profile page:
###highlight=[11]
{% extends 'base.html' %}

{% block content %}

    <h3>Username: {{ user.username }}</h3>
    <h4>First Name: {{ user.first_name }}</h4>
    <h4>Last Name: {{ user.last_name }}</h4>
    <p>Email: {{ user.email }}</p>

    <p><a href="{% url 'password_change_form' %}">Change password</a><p>

{% endblock %}
Now let's make a page where the user will enter their new password. This will be called password_change_form.html, and it should go in the educator_news/static/templates/registration/ directory:
{% extends 'base.html' %}

{% block content %}

    <h2>Change password:</h2>
    <p>This page allows you to change your password.</p>


    {% if form.errors %}
    <p>Please re-enter your passwords. You either entered the wrong current password, or your new passwords did not match.</p>
    {% endif %}

    <form method="post" action="{% url 'password_change_form' %}">
      {% csrf_token %}

      <p>old password: <input type='password' name='old_password'>
      <p>new password: <input type='password' name='new_password1'>
      <p>new password: <input type='password' name='new_password2'>

      <p><input type="submit" value="change password" />
    </form>

{% endblock %}
Now let's make the view for the password change page. The page will redirect to itself if there is an issue such as new passwords that don't match, or an incorrect entry of the current password. If the change is successful, the user will be redirected to a page confirming the success. This will be password_change_successful.
###highlight=[6,26,27,28,29,30,31,32,35,36,37,38]
from django.shortcuts import render_to_response, redirect
from django.template import RequestContext
from django.contrib.auth import logout
from django.core.urlresolvers import reverse
from django.contrib.auth.views import password_change

def index(request):
    # Static index page for now.
    return render_to_response('ed_news/index.html',
                              {},
                              context_instance = RequestContext(request))


# Authentication views
def logout_view(request):
    logout(request)
    # Redirect to home page.
    return redirect('/')

def profile(request):
    return render_to_response('registration/profile.html',
                              {},
                              context_instance = RequestContext(request))

def password_change_form(request):
    if request.method == 'POST':
        return password_change(request, post_change_redirect='/password_change_successful')
    else:
        return render_to_response('registration/password_change_form.html',
                                  {},
                                  context_instance = RequestContext(request))


def password_change_successful(request):
    return render_to_response('registration/password_change_successful.html',
                              {},
                              context_instance = RequestContext(request))
Now we need to make a template for password_change_successful, saved as educator_news/static/templates/registration/password_change_successful.html:
{% extends 'base.html' %}

{% block content %}

    <h2>Password changed.</h2>

    <p>Return to <a href="{% url 'profile' %}">profile</a> page.</p>

{% endblock %}
Finally, we need to update the main urls.py to include these pages:
###highlight=[18,19]
from django.conf.urls import patterns, include, url
from django.core.urlresolvers import reverse

from django.contrib import admin
admin.autodiscover()

urlpatterns = patterns('',
    # My urls
    url(r'^', include('ed_news.urls', namespace='ed_news')),

    url(r'^admin/', include(admin.site.urls)),

    # Auth urls
    url(r'^login/', 'django.contrib.auth.views.login', name='login'),
    url(r'^logout/', 'ed_news.views.logout_view', name='logout_view'),
    url(r'^profile/', 'ed_news.views.profile', name='profile'),
    url(r'^password_change/', 'ed_news.views.password_change_form', name='password_change_form'),
    url(r'^password_change_successful/', 'ed_news.views.password_change_successful', name='password_change_successful'),
)
Now, you should be able to click on a link on your profile, and change your password:
Now we can make a registration page, where new users can make an account for themselves.
Make a registration page
We now have a way for existing users to log in, but there is no way for new users to make an account. Let's make a page that lets people register an account. We will not deal with email registration at this point; anyone can make an account, and log in immediately.
- Make a link from the home page.
- Make a set of forms for User and UserProfile
- Make a view for the register page.
- Make a page to display the registration forms.
- Make an entry for the registration page url.
Add a link to the registration page on base.html:
###highlight=[25]
...
    <!-- Static navbar -->
    <div class="navbar navbar-default navbar-static-top" role="navigation">
      <div class="container">
        <div class="navbar-header">
          <button type="button" class="navbar-toggle" data-toggle="collapse" data-target=".navbar-collapse">
            <span class="sr-only">Toggle navigation</span>
            <span class="icon-bar"></span>
            <span class="icon-bar"></span>
            <span class="icon-bar"></span>
          </button>
          <a class="navbar-brand" href="{% url 'ed_news:index' %}">Educator News</a>
        </div>
        <div class="navbar-collapse collapse">
          <ul class="nav navbar-nav">
          </ul>
          <ul class="nav navbar-nav navbar-right">

				{% if user.is_authenticated %}
				    <li><a href="{% url 'profile' %}">{{ user.username }}</a><li>
                <li><a href="{% url 'logout_view' %}">logout</a></li>
				{% else %}
                <li><a href="{% url 'login' %}">login</a></li>
                <li><a href="{% url 'register' %}">register</a></li>
				{% endif %}

          </ul>
        </div><!--/.nav-collapse -->
      </div>
    </div>
...
Now we need a form for the registering person to enter their user information. This will reference the User class, but we also need to connect a UserProfile to this User class.
Make a new file ed_news/forms.py:
from django import forms
from django.contrib.auth.models import User
from ed_news.models import UserProfile

class UserForm(forms.ModelForm):
    password = forms.CharField(widget=forms.PasswordInput())

    class Meta:
        model = User
        fields = ('username', 'password')

class UserProfileForm(forms.ModelForm):
    class Meta:
        model = UserProfile
        fields = ()
Add the following to views.py:
###highlight=[7,41, 42, 43, 44, 45, 46, 47, 48, 49, 50, 51, 52, 53, 54, 55, 56, 57, 58, 59, 60, 61, 62, 63, 64, 65, 66, 67, 68, 69, 70, 71, 72, 73, 74, 75, 76, 77, 78, 79, 80, 81, 82, 83, 84]
from django.shortcuts import render_to_response, redirect
from django.template import RequestContext
from django.contrib.auth import logout
from django.core.urlresolvers import reverse
from django.contrib.auth.views import password_change
from ed_news.forms import UserForm, UserProfileForm

def index(request):
    # Static index page for now.
    return render_to_response('ed_news/index.html',
                              {},
                              context_instance = RequestContext(request))


# Authentication views
def logout_view(request):
    logout(request)
    # Redirect to home page.
    return redirect('/')

def profile(request):
    return render_to_response('registration/profile.html',
                              {},
                              context_instance = RequestContext(request))

def password_change_form(request):
    if request.method == 'POST':
        return password_change(request, post_change_redirect='/password_change_successful')
    else:
        return render_to_response('registration/password_change_form.html',
                                  {},
                                  context_instance = RequestContext(request))


def password_change_successful(request):
    return render_to_response('registration/password_change_successful.html',
                              {},
                              context_instance = RequestContext(request))

def register(request):
    # Assume registration won't work.
    registered = False

    if request.method == 'POST':
        user_form = UserForm(data=request.POST)
        profile_form = UserProfileForm(data=request.POST)

        if user_form.is_valid() and profile_form.is_valid():
            # Save user's form data.
            user = user_form.save()

            user.set_password(user.password)
            user.save()

            profile = profile_form.save(commit=False)
            profile.user = user
            profile.save()

            # Registration was successful.
            registered = True

            # Not requiring email validation yet, so log user in.
            #user = authenticate(username=user.username, password=user.password)
            #login(request, user)
            print 'un, pw', user.username,  user.password

        else:
            # Invalid form/s.
            # Print errors to console; should log these?
            print 'ufe', user_form.errors
            print 'pfe', profile_form.errors

    else:
        # Send blank forms.
        user_form = UserForm()
        profile_form = UserProfileForm()

    return render_to_response('registration/register.html',
                                  {'user_form': user_form,
                                   'profile_form': profile_form,
                                   'registered': registered,
                                   },
                                  context_instance = RequestContext(request))
Add a new file educator_news/static/templates/registration/register.html:
{% extends 'base.html' %}

{% block content %}

    <h2>Register:</h2>
    <p>This page allows you to register a new account.</p>

	 {% if registered %}
	     <p>Thank you for registering!</p>
	     <p>Return to the <a href="{% url 'ed_news:index' %}">homepage</a>.</p>

	 {% else %}
		  <form id='user_form' method="post" action="{% url 'register' %}" enctype='multipart/form-data'>
			 {% csrf_token %}

			 {{ user_form.as_p }}
			 {{ profile_form.as_p }}

			 <p><input type="submit" name='submit' value="Register" />
		  </form>

	 {% endif %}

{% endblock %}
Finally, modify urls.py:
###highlight=[20]
from django.conf.urls import patterns, include, url
from django.core.urlresolvers import reverse

from django.contrib import admin
admin.autodiscover()

urlpatterns = patterns('',
    # My urls
    url(r'^', include('ed_news.urls', namespace='ed_news')),

    url(r'^admin/', include(admin.site.urls)),

    # Auth urls
    url(r'^login/', 'django.contrib.auth.views.login', name='login'),
    url(r'^logout/', 'ed_news.views.logout_view', name='logout_view'),
    url(r'^profile/', 'ed_news.views.profile', name='profile'),
    url(r'^password_change/', 'ed_news.views.password_change_form', name='password_change_form'),
    url(r'^password_change_successful/', 'ed_news.views.password_change_successful', name='password_change_successful'),
    url(r'^register/', 'ed_news.views.register', name='register'),
)
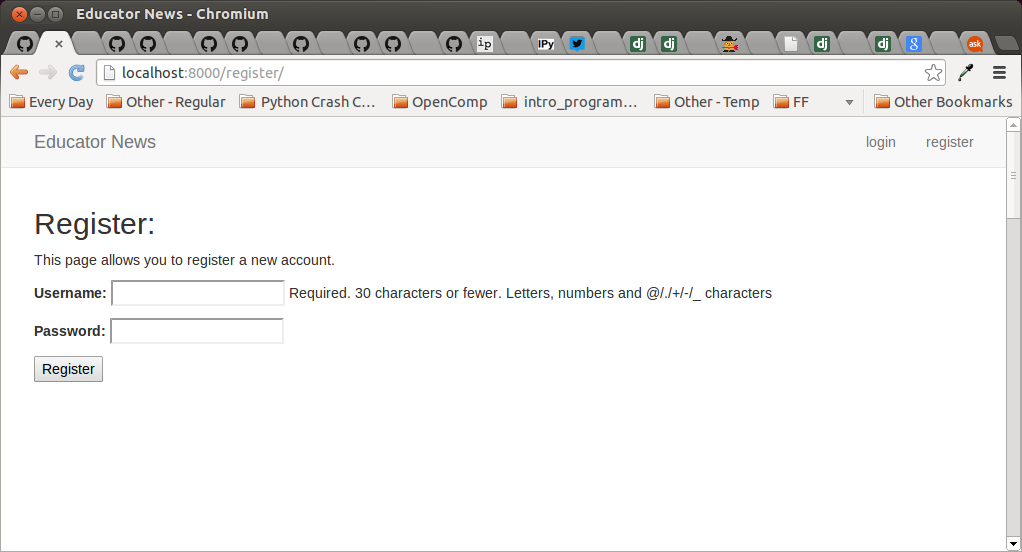
Now, new users can register an account:
After registration, the user will have an entry in our database for the User model, as well as the UserProfile model. Now we can take a look at the admin site, and see who our users are.
Using the admin site
One of the nice changes in Django 1.6 is that the admin site is set up automatically. The admin site is a collection of pages that makes it relatively easy for us as the developers of a project to access our data without having to write a bunch of code to do so. We basically register our models with the admin site, and the pages are created automatically for us. The User model is already included in the admin by default, so let's register the UserProfile model, and have a look at the data we have so far.
Modify ed_news/admin.py:
###highlight=[3,5]
from django.contrib import admin
from ed_news.models import UserProfile

admin.site.register(UserProfile)
Now if you go to http://localhost:8000/admin and log in using the superuser account you created earlier, you should be able to explore your data. Here is what I have so far for the UserProfile model:
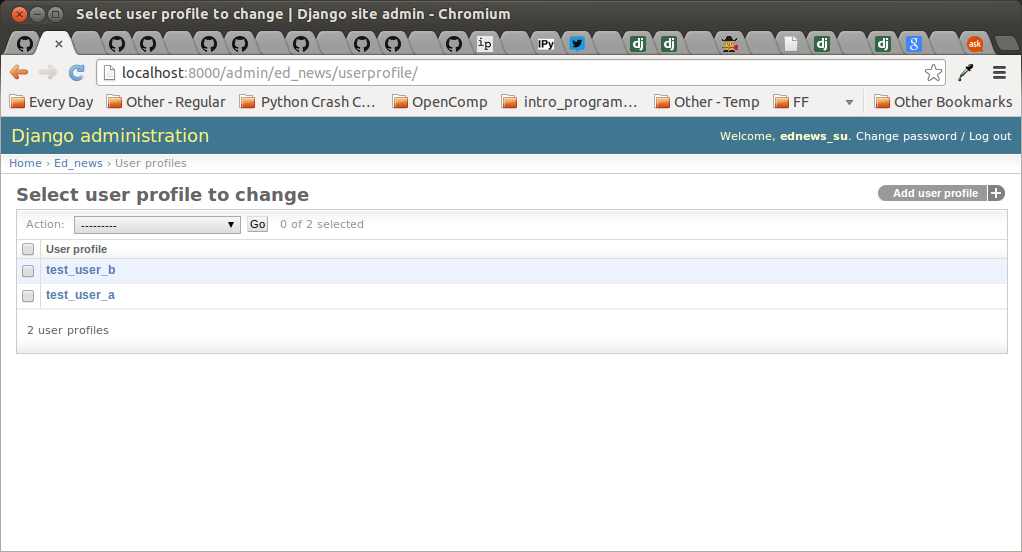
The admin pages can be customized, but they are not really meant to be user-facing. One simple use is to delete these kind of test accounts from your database as you are developing your project.
Building a submit page
The first piece of specific functionality we need is the ability for users to submit articles. To build this functionality, we will:
- Update models.py to include a model for submissions.
- Migrate the database to include these new models.
- Make a link to the submit page.
- Make an entry in ed_news/urls.py for the submit page.
- Write a form for submitting an article.
- Write a view for the submit page.
- Write the template for the submit.html page.
Add this to models.py:
...
class Submission(models.Model):
    """An abstract class for the two types of submission,
    which are an article and a text submission. Text submissions
    can be questions, ie Ask EN, or posts such as Show EN.
    """

    # Stick with programming 80-char limit for now.
    #  It's what HN uses, which fits nicely on mobile.
    title = models.CharField(max_length=80)
    author = models.ForeignKey(User)
    upvotes = models.IntegerField(default=0)
    downvotes = models.IntegerField(default=0)
    points = models.IntegerField(default=0)
    submission_time = models.DateTimeField(auto_now_add=True)

    class Meta:
        abstract = True

    def __unicode__(self):
        return self.title

class Article(Submission):
    url = models.URLField()
Migrate the db again:
(venv)educator_news$ python manage.py schemamigration --auto ed_news
(venv)educator_news$ python manage.py migrate ed_news
Include a link to the submit page in base.html:
###highlight=[16]
<!-- Static navbar -->
    <div class="navbar navbar-default navbar-static-top" role="navigation">
      <div class="container">
        <div class="navbar-header">
          <button type="button" class="navbar-toggle" data-toggle="collapse" data-target=".navbar-collapse">
            <span class="sr-only">Toggle navigation</span>
            <span class="icon-bar"></span>
            <span class="icon-bar"></span>
            <span class="icon-bar"></span>
          </button>
          <a class="navbar-brand" href="{% url 'ed_news:index' %}">Educator News</a>
        </div>
        <div class="navbar-collapse collapse">
          <ul class="nav navbar-nav">
				<li><a href="{% url 'ed_news:submit' %}">submit</a></li>
          </ul>
          <ul class="nav navbar-nav navbar-right">

				{% if user.is_authenticated %}
				    <li><a href="{% url 'profile' %}">{{ user.username }}</a><li>
                <li><a href="{% url 'logout_view' %}">logout</a></li>
				{% else %}
                <li><a href="{% url 'login' %}">login</a></li>
                <li><a href="{% url 'register' %}">register</a></li>
				{% endif %}

          </ul>
        </div><!--/.nav-collapse -->
      </div>
    </div>
Modify ed_news/urls.py:
###highlight=[11]
from django.conf.urls import patterns, url

from ed_news import views

urlpatterns = patterns('',
    # My urls

    # --- Educator News home page ---
    url(r'^$', views.index, name='index'),
    url(r'^submit/', views.submit, name='submit'),
)
Modify forms.py:
###highlight=[5,19,20,21,22]
from django import forms
from django.contrib.auth.models import User
from ed_news.models import UserProfile
from ed_news.models import Article

class UserForm(forms.ModelForm):
    password = forms.CharField(widget=forms.PasswordInput())

    class Meta:
        model = User
        fields = ('username', 'password')

class UserProfileForm(forms.ModelForm):
    class Meta:
        model = UserProfile
        fields = ()

class ArticleForm(forms.ModelForm):
    class Meta:
        model = Article
        fields = ('title', 'url',)
Modify views.py:
###highlight=[9,13, 14, 15, 16, 17, 18, 19, 20, 21, 22, 23, 24, 25, 26, 27, 28, 29, 30, 31, 32, 33, 34, 35, 36, 37, 38, 39, 40, 41, 42, 43, 44, 45, 46]
from django.shortcuts import render_to_response, redirect
from django.template import RequestContext
from django.contrib.auth import logout
from django.core.urlresolvers import reverse
from django.contrib.auth.views import password_change

from ed_news.forms import UserForm, UserProfileForm
from ed_news.forms import ArticleForm
...

...
# --- Educator News views ---
def submit(request):

    submission_accepted = False
    if request.method == 'POST':
        article_form = ArticleForm(data=request.POST)

        if article_form.is_valid():
            print 'af', article_form
            print 'afcd', article_form.cleaned_data
            print 'u', request.user
            print 'uid', request.user.id
            print 'utype', type(request.user)
            print article_form.cleaned_data['url']

            article = article_form.save(commit=False)
            article.author = request.user
            article.save()
            submission_accepted = True

        else:
            # Invalid form/s.
            #  Print errors to console; should log these?
            print 'ae', article_form.errors

    else:
        # Send blank forms.
        article_form = ArticleForm()

    return render_to_response('ed_news/submit.html',
                              {'article_form': article_form,
                               'submission_accepted': submission_accepted,
                               },
                              context_instance = RequestContext(request))
Make a new file submit.html:
{% extends 'base.html' %}

{% block content %}

    <h2>Submit</h2>
    <p>You can use this form to submit an article.</p>

	 {% if user.is_authenticated and submission_accepted %}
	     <p>Thank you for your submission!</p>

	 {% elif user.is_authenticated %}
	     <p>Submit form</p>
		  <form id='submission_form' method="post" action="{% url 'ed_news:submit' %}" enctype='multipart/form-data'>
			 {% csrf_token %}

			 {{ article_form.as_p }}

			 <p><input type="submit" name='submit' value="Submit" />
		  </form>

	 {% else %}
		  <p>You have to <a href="{% url 'login' %}">log in</a> or <a href="{% url 'register' %}">register</a> if you would like to make a submission.</p>

	 {% endif %}

{% endblock %}
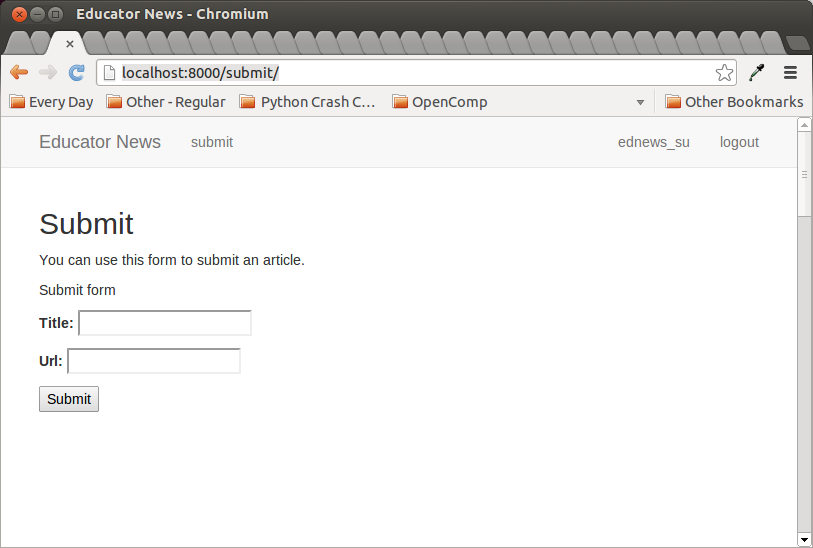
Now you should be able to submit an article:
Now we can move on to building a page to show the newest submissions.