Intro to Torch.ONNX—End-to-end AlexNet from PyTorch to Caffe2
Exporting model from PyTorch to ONNX.
In this tutorial, we describe how to use ONNX to convert a model defined in PyTorch into the ONNX format.
ONNX is natively supported in PyTorch. However, ONNX exporter is not yet part of the PyTorch repository as what they mentioned.
For working with this tutorial, you will need to install ONNX. You can get binary builds of ONNX with conda install onnx.
NOTE: ONNX is under active development so for the best support consider building PyTorch master branch which can be installed by following the instructions here or install PyTorch preview using conda install pytorch-nightly cuda92 -c pytorch.
We will export a pretrained AlexNet as defined in torchvision into ONNX. It runs a single round of inference and then saves the resulting traced model to alexnet.onnx file.
Invoking exporter
Pretty much it's a matter of replacing my_model(input) with torch.onnx.export(my_model, input, "my_model.onnx") in your script.
Limitations
The ONNX exporter is a trace-based exporter, which means that it operates by executing your model once, and exporting the operators which were actually run during this run. This means that if your model is dynamic, e.g., changes behavior depending on input data, the export won’t be accurate.
Similarly, a trace is might be valid only for a specific input size (which is one reason why we require explicit inputs on tracing). Most of the operators export size-agnostic versions and should work on different batch sizes or input sizes. We recommend examining the model trace and making sure the traced operators look reasonable.
import torch
import torchvision
Trying it out on AlexNet
If you already have your model built, it's just a few lines:
# Standard ImageNet input - 3 channels, 224x224,
# values don't matter as we care about network structure.
# But they can also be real inputs.
dummy_input = torch.rand(10, 3, 224, 224, device='cuda')
# Obtain your model, it can be also constructed in your script explicitly
model = torchvision.models.alexnet(pretrained=True).cuda()
Providing input and output names sets the display names for values within the model's graph. Setting these does not change the semantics of the graph; it is only for readability.
The inputs to the network consist of the flat list of inputs (i.e. the values you would pass to the forward() method) followed by the flat list of parameters. You can partially specify names, i.e. provide a list here shorter than the number of inputs to the model, and we will only set that subset of names, starting from the beginning.
input_names = ["actual_input_1"] + ["learned_%d" % i for i in range(16)]
output_names = ["output1"]
Invoke export:
torch.onnx.export(model, dummy_input, "alexnet.onnx", verbose=True, input_names=input_names,
                  output_names=output_names)
graph(%actual_input_1 : Float(10, 3, 224, 224)
      %learned_0 : Float(64, 3, 11, 11)
      %learned_1 : Float(64)
      %learned_2 : Float(192, 64, 5, 5)
      %learned_3 : Float(192)
      %learned_4 : Float(384, 192, 3, 3)
      %learned_5 : Float(384)
      %learned_6 : Float(256, 384, 3, 3)
      %learned_7 : Float(256)
      %learned_8 : Float(256, 256, 3, 3)
      %learned_9 : Float(256)
      %learned_10 : Float(4096, 9216)
      %learned_11 : Float(4096)
      %learned_12 : Float(4096, 4096)
      %learned_13 : Float(4096)
      %learned_14 : Float(1000, 4096)
      %learned_15 : Float(1000)) {
  %17 : Float(10, 64, 55, 55) = onnx::Conv[dilations=[1, 1], group=1, kernel_shape=[11, 11], pads=[2, 2, 2, 2], strides=[4, 4]](%actual_input_1, %learned_0, %learned_1), scope: AlexNet/Sequential[features]/Conv2d[0]
  %18 : Float(10, 64, 55, 55) = onnx::Relu(%17), scope: AlexNet/Sequential[features]/ReLU[1]
  %19 : Float(10, 64, 27, 27) = onnx::MaxPool[kernel_shape=[3, 3], pads=[0, 0, 0, 0], strides=[2, 2]](%18), scope: AlexNet/Sequential[features]/MaxPool2d[2]
  %20 : Float(10, 192, 27, 27) = onnx::Conv[dilations=[1, 1], group=1, kernel_shape=[5, 5], pads=[2, 2, 2, 2], strides=[1, 1]](%19, %learned_2, %learned_3), scope: AlexNet/Sequential[features]/Conv2d[3]
  %21 : Float(10, 192, 27, 27) = onnx::Relu(%20), scope: AlexNet/Sequential[features]/ReLU[4]
  %22 : Float(10, 192, 13, 13) = onnx::MaxPool[kernel_shape=[3, 3], pads=[0, 0, 0, 0], strides=[2, 2]](%21), scope: AlexNet/Sequential[features]/MaxPool2d[5]
  %23 : Float(10, 384, 13, 13) = onnx::Conv[dilations=[1, 1], group=1, kernel_shape=[3, 3], pads=[1, 1, 1, 1], strides=[1, 1]](%22, %learned_4, %learned_5), scope: AlexNet/Sequential[features]/Conv2d[6]
  %24 : Float(10, 384, 13, 13) = onnx::Relu(%23), scope: AlexNet/Sequential[features]/ReLU[7]
  %25 : Float(10, 256, 13, 13) = onnx::Conv[dilations=[1, 1], group=1, kernel_shape=[3, 3], pads=[1, 1, 1, 1], strides=[1, 1]](%24, %learned_6, %learned_7), scope: AlexNet/Sequential[features]/Conv2d[8]
  %26 : Float(10, 256, 13, 13) = onnx::Relu(%25), scope: AlexNet/Sequential[features]/ReLU[9]
  %27 : Float(10, 256, 13, 13) = onnx::Conv[dilations=[1, 1], group=1, kernel_shape=[3, 3], pads=[1, 1, 1, 1], strides=[1, 1]](%26, %learned_8, %learned_9), scope: AlexNet/Sequential[features]/Conv2d[10]
  %28 : Float(10, 256, 13, 13) = onnx::Relu(%27), scope: AlexNet/Sequential[features]/ReLU[11]
  %29 : Float(10, 256, 6, 6) = onnx::MaxPool[kernel_shape=[3, 3], pads=[0, 0, 0, 0], strides=[2, 2]](%28), scope: AlexNet/Sequential[features]/MaxPool2d[12]
  %30 : Long() = onnx::Constant[value={0}]()
  %31 : Dynamic = onnx::Shape(%29), scope: AlexNet
  %32 : Long() = onnx::Gather[axis=0](%31, %30), scope: AlexNet
  %33 : Long() = onnx::Constant[value={9216}]()
  %34 : Dynamic = onnx::Unsqueeze[axes=[0]](%32), scope: AlexNet
  %35 : Dynamic = onnx::Unsqueeze[axes=[0]](%33), scope: AlexNet
  %36 : int[] = onnx::Concat[axis=0](%34, %35), scope: AlexNet
  %37 : Float(10, 9216) = onnx::Reshape(%29, %36), scope: AlexNet
  %38 : Float(10, 9216), %39 : Dynamic = onnx::Dropout[ratio=0.5](%37), scope: AlexNet/Sequential[classifier]/Dropout[0]
  %40 : Float(10, 4096) = onnx::Gemm[alpha=1, beta=1, transB=1](%38, %learned_10, %learned_11)
  %41 : Float(10, 4096) = onnx::Relu(%40), scope: AlexNet/Sequential[classifier]/ReLU[2]
  %42 : Float(10, 4096), %43 : Dynamic = onnx::Dropout[ratio=0.5](%41), scope: AlexNet/Sequential[classifier]/Dropout[3]
  %44 : Float(10, 4096) = onnx::Gemm[alpha=1, beta=1, transB=1](%42, %learned_12, %learned_13)
  %45 : Float(10, 4096) = onnx::Relu(%44), scope: AlexNet/Sequential[classifier]/ReLU[5]
  %output1 : Float(10, 1000) = onnx::Gemm[alpha=1, beta=1, transB=1](%45, %learned_14, %learned_15)
  return (%output1);
}
That's it!
The resulting alexnet.onnx is a binary protobuf file which contains both
the network structure and parameters of the model you exported
(in this case, AlexNet). The keyword argument verbose=True causes the
exporter to print out a human-readable representation of the network:
Inspecting model
You can also use ONNX tooling to check the validity of the resulting model or inspect the details.
You can verify the protobuf using the ONNX library.
Install ONNX
First, we need to install ONNX library:
You can install onnx with conda:
conda install -c conda-forge onnx
import onnx
---------------------------------------------------------------------------
ModuleNotFoundError                       Traceback (most recent call last)
<ipython-input-5-6f9566fa2ea7> in <module>
----> 1 import onnx

ModuleNotFoundError: No module named 'onnx'
Fix the previous error
WARNING: Don't install onnx from conda-forge channel. Run this command instead:
conda install onnx
If it fails and you see these errors:
- "Solving environment: failed ...":
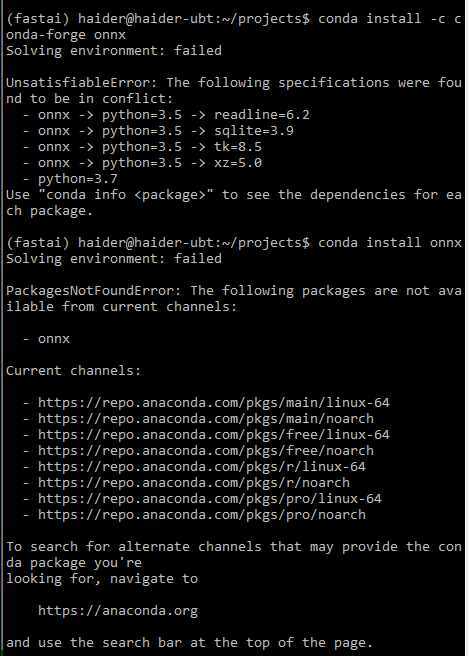
Some possible solutions:
- Ensure you are using Python version 3.6, not 3.7
- Create a clean (new) Conda environment and install PyTorch 1.0 preview (nightly) and nothing else
- Note: don't install 'onnx-caffe2'. This repo is deprecated.
If all else fails, please go to ONNX GitHub repo. Then follow the instructions there.
You will need an install of protobuf.
It will be a pain in the neck to install the correct version of protobuf that plays well with ONNX. A lot of factors can caused this step to fail. This highly depends on your system environment, such as the version of Ubuntu OS, are there any existing protobuf libraries installed by TensorFlow or even Ubuntu previously, etc.
What works for me is, first I make sure to install the Protobuf compiler before building and installing ONNX locally from source code (running the conda installation of onnx for some strange reason doesn't work for me).
git clone https://github.com/onnx/onnx.git
cd onnx
git submodule update --init --recursive
python setup.py install
For other ONNX issues that I experienced, see ONNX issues section below.
import onnx
Load the ONNX model:
model = onnx.load("alexnet.onnx")
Check that the IR is well formed:
onnx.checker.check_model(model)
Print a human readable representation of the graph:
print(onnx.helper.printable_graph(model.graph))
graph torch-jit-export (
  %actual_input_1[FLOAT, 10x3x224x224]
) initializers (
  %learned_0[FLOAT, 64x3x11x11]
  %learned_1[FLOAT, 64]
  %learned_2[FLOAT, 192x64x5x5]
  %learned_3[FLOAT, 192]
  %learned_4[FLOAT, 384x192x3x3]
  %learned_5[FLOAT, 384]
  %learned_6[FLOAT, 256x384x3x3]
  %learned_7[FLOAT, 256]
  %learned_8[FLOAT, 256x256x3x3]
  %learned_9[FLOAT, 256]
  %learned_10[FLOAT, 4096x9216]
  %learned_11[FLOAT, 4096]
  %learned_12[FLOAT, 4096x4096]
  %learned_13[FLOAT, 4096]
  %learned_14[FLOAT, 1000x4096]
  %learned_15[FLOAT, 1000]
) {
  %17 = Conv[dilations = [1, 1], group = 1, kernel_shape = [11, 11], pads = [2, 2, 2, 2], strides = [4, 4]](%actual_input_1, %learned_0, %learned_1)
  %18 = Relu(%17)
  %19 = MaxPool[kernel_shape = [3, 3], pads = [0, 0, 0, 0], strides = [2, 2]](%18)
  %20 = Conv[dilations = [1, 1], group = 1, kernel_shape = [5, 5], pads = [2, 2, 2, 2], strides = [1, 1]](%19, %learned_2, %learned_3)
  %21 = Relu(%20)
  %22 = MaxPool[kernel_shape = [3, 3], pads = [0, 0, 0, 0], strides = [2, 2]](%21)
  %23 = Conv[dilations = [1, 1], group = 1, kernel_shape = [3, 3], pads = [1, 1, 1, 1], strides = [1, 1]](%22, %learned_4, %learned_5)
  %24 = Relu(%23)
  %25 = Conv[dilations = [1, 1], group = 1, kernel_shape = [3, 3], pads = [1, 1, 1, 1], strides = [1, 1]](%24, %learned_6, %learned_7)
  %26 = Relu(%25)
  %27 = Conv[dilations = [1, 1], group = 1, kernel_shape = [3, 3], pads = [1, 1, 1, 1], strides = [1, 1]](%26, %learned_8, %learned_9)
  %28 = Relu(%27)
  %29 = MaxPool[kernel_shape = [3, 3], pads = [0, 0, 0, 0], strides = [2, 2]](%28)
  %30 = Constant[value = <Scalar Tensor []>]()
  %31 = Shape(%29)
  %32 = Gather[axis = 0](%31, %30)
  %33 = Constant[value = <Scalar Tensor []>]()
  %34 = Unsqueeze[axes = [0]](%32)
  %35 = Unsqueeze[axes = [0]](%33)
  %36 = Concat[axis = 0](%34, %35)
  %37 = Reshape(%29, %36)
  %38, %39 = Dropout[ratio = 0.5](%37)
  %40 = Gemm[alpha = 1, beta = 1, transB = 1](%38, %learned_10, %learned_11)
  %41 = Relu(%40)
  %42, %43 = Dropout[ratio = 0.5](%41)
  %44 = Gemm[alpha = 1, beta = 1, transB = 1](%42, %learned_12, %learned_13)
  %45 = Relu(%44)
  %output1 = Gemm[alpha = 1, beta = 1, transB = 1](%45, %learned_14, %learned_15)
  return %output1
}
Notice that all parameters are listed as graph's inputs but they also have stored values initialized in model.graph.initializers.
Caffe2
To run the following code with Caffe2, you will need to install Caffe2: If you don’t have one already, Please follow the install instructions.
NOTE: actually Caffe2 is already installed when you install PyTorch. And Caffe2 source code now lives in the PyTorch repository. The following describe why the confusion:
I referenced the following GitHub issues because of the discrepancies in current PyTorch docs and Caffe2 docs. The PyTorch docs lacks Caffe2 information, not clear enough or outdated. This confusing state has spawned out a large chunk of GitHub issues, for examples:
- Why it is so difficult to install caffe2??? (Jan 2018)
- How to intall and use Caffe2 from this Pytorch branch?
- Caffe2 Installation inside Pytorch
Once these are installed, you can use the backend for Caffe2:
# ...continuing from above
import caffe2.python.onnx.backend as backend
import numpy as np
---------------------------------------------------------------------------
ModuleNotFoundError                       Traceback (most recent call last)
<ipython-input-9-47e185e67870> in <module>
      1 # ...continuing from above
----> 2 import caffe2.python.onnx.backend as backend
      3 import numpy as np

~/anaconda3/envs/fastai-v1/lib/python3.6/site-packages/caffe2/python/onnx/backend.py in <module>
     25
     26 import caffe2
---> 27 from caffe2.python import core, workspace, rnn_cell, gru_cell
     28 from caffe2.python.compatibility import container_abcs
     29 from caffe2.python.model_helper import ModelHelper

~/anaconda3/envs/fastai-v1/lib/python3.6/site-packages/caffe2/python/core.py in <module>
      7
      8 from collections import namedtuple, OrderedDict, defaultdict
----> 9 from past.builtins import basestring
     10 from future.utils import viewitems, viewkeys, viewvalues
     11 from itertools import chain

ModuleNotFoundError: No module named 'past'
Fix the previous error by installing the future package:
conda install future
Ref: https://github.com/caffe2/caffe2/issues/712#issuecomment-305962653
# ...continuing from above
import caffe2.python.onnx.backend as backend
import numpy as np
rep = backend.prepare(model, device="CUDA:0") # or "CPU"
CUDA operators do not support 64-bit doubles, please use arr.astype(np.float32) or np.int32 for ints. Blob: actual_input_1 type: float64
Get Predictions by Running the Model
The results come back as a multidimensional array of probabilities. Essentially each row is a percentage chance that the object matches something that the neural net recognizes. For example, when you run the flower it should give you over 95% rating that the flower is a daisy.
# For the Caffe2 backend:
#     rep.predict_net is the Caffe2 protobuf for the network
#     rep.workspace is the Caffe2 workspace for the network
#       (see the class caffe2.python.onnx.backend.Workspace)
outputs = rep.run(np.random.randn(10, 3, 224, 224).astype(np.float32))
# To run networks with more than one input, pass a tuple
# rather than a single numpy ndarray.
print(outputs[0])
[[ 0.18165639 -1.3775781  -0.92282146 ... -1.0521079  -1.2983803
   1.0103724 ]
 [ 0.01864959 -1.3792061  -1.3302151  ... -1.2658304  -0.76998174
   0.9446579 ]
 [ 0.07622778 -1.1739718  -1.3213743  ... -1.0105549  -0.7218681
   1.1605347 ]
 ...
 [-0.4785444  -1.2650945  -1.1094304  ... -1.1017692  -1.1647667
   1.1024661 ]
 [ 0.11569691 -1.1947066  -1.456512   ... -1.3352914  -0.87671846
   1.0735546 ]
 [-0.4444798  -1.4828541  -1.5199043  ... -1.2288797  -1.0344319
   1.1123722 ]]
outputs[0].shape # 10 inputs and predictions (ImageNet 1000 classes) for each input
(10, 1000)
========================== END OF TUTORIAL ==========================
More on ONNX
LIMITATIONS
- The ONNX exporter is a trace-based exporter, which means that it operates by executing your model once, and exporting the operators which were actually run during this run. This means that if your model is dynamic, e.g., changes behavior depending on input data, the export won’t be accurate. Similarly, a trace is likely to be valid only for a specific input size (which is one reason why we require explicit inputs on tracing.) We recommend examining the model trace and making sure the traced operators look reasonable.
- PyTorch and Caffe2 often have implementations of operators with some numeric differences. Depending on model structure, these differences may be negligible, but they can also cause major divergences in behavior (especially on untrained models.) In a future release, we plan to allow Caffe2 to call directly to Torch implementations of operators, to help you smooth over these differences when precision is important, and to also document these differences.
SUPPORTED OPERATORS
The following operators are supported:
- add (nonzero alpha not supported)
- sub (nonzero alpha not supported)
- mul
- div
- cat
- mm
- addmm
- neg
- sqrt
- tanh
- sigmoid
- mean
- sum
- prod
- t
- expand (only when used before a broadcasting ONNX operator; e.g., add)
- transpose
- view
- split
- squeeze
- ...and many more
The operator set above is sufficient to export the following models:
- AlexNet
- DCGAN
- DenseNet
- Inception (warning: this model is highly sensitive to changes in operator implementation)
- ResNet
- SuperResolution
- VGG
- word_language_model
Adding export support for operators is an advance usage. To achieve this, developers need to touch the source code of PyTorch. Please follow the instructions for installing PyTorch from source. If the wanted operator is standardized in ONNX, it should be easy to add support for exporting such operator (adding a symbolic function for the operator). To confirm whether the operator is standardized or not, please check the ONNX operator list.
If the operator is an ATen operator, which means you can find the declaration of the function in torch/csrc/autograd/generated/VariableType.h (available in generated code in PyTorch install dir), you should add the symbolic function in torch/onnx/symbolic.py and follow the instructions listed as below:
- Define the symbolic function in torch/onnx/symbolic.py. Make sure the function has the same name as the ATen operator/function defined in
VariableType.h. - The first parameter is always the exported ONNX graph. Parameter names must EXACTLY match the names in
VariableType.h, because dispatch is done with keyword arguments. - Parameter ordering does NOT necessarily match what is in
VariableType.h, tensors (inputs) are always first, then non-tensor arguments. - In the symbolic function, if the operator is already standardized in ONNX, we only need to create a node to represent the ONNX operator in the graph.
- If the input argument is a tensor, but ONNX asks for a scalar, we have to explicitly do the conversion. The helper function
_scalarcan convert a scalar tensor into a python scalar, and_if_scalar_type_ascan turn a Python scalar into a PyTorch tensor.
If the operator is a non-ATen operator, the symbolic function has to be added in the corresponding PyTorch Function class. Please read the following instructions:
- Create a symbolic function named
symbolicin the corresponding Function class. - The first parameter is always the exported ONNX graph.
- Parameter names except the first must EXACTLY match the names in
forward. - The output tuple size must match the outputs of
forward. - In the symbolic function, if the operator is already standardized in ONNX, we just need to create a node to represent the ONNX operator in the graph.
Symbolic functions should be implemented in Python. All of these functions interact with Python methods which are implemented via C++-Python bindings, but intuitively the interface they provide looks like this:
def operator/symbolic(g, *inputs):
  """
  Modifies Graph (e.g., using "op"), adding the ONNX operations representing
  this PyTorch function, and returning a Value or tuple of Values specifying the
  ONNX outputs whose values correspond to the original PyTorch return values
  of the autograd Function (or None if an output is not supported by ONNX).

  Arguments:
    g (Graph): graph to write the ONNX representation into
    inputs (Value...): list of values representing the variables which contain
        the inputs for this function
  """

class Value(object):
  """Represents an intermediate tensor value computed in ONNX."""
  def type(self):
    """Returns the Type of the value."""

class Type(object):
  def sizes(self):
    """Returns a tuple of ints representing the shape of a tensor this describes."""

class Graph(object):
  def op(self, opname, *inputs, **attrs):
    """
    Create an ONNX operator 'opname', taking 'args' as inputs
    and attributes 'kwargs' and add it as a node to the current graph,
    returning the value representing the single output of this
    operator (see the `outputs` keyword argument for multi-return
    nodes).

    The set of operators and the inputs/attributes they take
    is documented at https://github.com/onnx/onnx/blob/master/docs/Operators.md

    Arguments:
        opname (string): The ONNX operator name, e.g., `Abs` or `Add`.
        args (Value...): The inputs to the operator; usually provided
            as arguments to the `symbolic` definition.
        kwargs: The attributes of the ONNX operator, with keys named
            according to the following convention: `alpha_f` indicates
            the `alpha` attribute with type `f`.  The valid type specifiers are
            `f` (float), `i` (int), `s` (string) or `t` (Tensor).  An attribute
            specified with type float accepts either a single float, or a
            list of floats (e.g., you would say `dims_i` for a `dims` attribute
            that takes a list of integers).
        outputs (int, optional):  The number of outputs this operator returns;
            by default an operator is assumed to return a single output.
            If `outputs` is greater than one, this functions returns a tuple
            of output `Value`, representing each output of the ONNX operator
            in positional.
    """
The ONNX graph C++ definition is in torch/csrc/jit/ir.h.
Here is an example of handling missing symbolic function for elu operator. We try to export the model and see the error message as below:
UserWarning: ONNX export failed on elu because torch.onnx.symbolic.elu does not exist
RuntimeError: ONNX export failed: Couldn't export operator elu
The export fails because PyTorch does not support exporting elu operator. We find virtual Tensor elu(const Tensor & input, Scalar alpha, bool inplace) const override; in VariableType.h. This means elu is an ATen operator. We check the ONNX operator list, and confirm that Elu is standardized in ONNX. We add the following lines to symbolic.py:
def elu(g, input, alpha, inplace=False):
    return g.op("Elu", input, alpha_f=_scalar(alpha))
Now PyTorch is able to export elu operator.
There are more examples in symbolic.py, tensor.py, padding.py.
The interface for specifying operator definitions is experimental; adventurous users should note that the APIs will probably change in a future interface.
FUNCTIONS
torch.onnx.export(*args, **kwargs). Source
ONNX Issues
I experienced the following issues related to ONNX or the old ONNX-Caffe2 integration along the way in this task:
- [RESOLVED] Error: "ONNX checker Bad node spec" and GitHub issues referenced:
- [RESOLVED] Error: "onnx_cpp2py_export.cpython-36m-x86_64-linux-gnu.so: undefined symbol: ZNK6google8protobuf7Message11GetTypeNameB5cxx11Ev" and GitHub issues referenced:
Protocol Buffer Required by ONNX
I experienced the following issues related to protobuf along the way in this task:
- I am using Ubuntu 16.04 LTS. It came with a default protobuf library,
protobuf.so.9. This is causing some serious conflicts wth the one ONNX trying to install and link to. I have not tested this with Ubuntu 18.04 LTS yet. - [RESOLVED] Error: "... SIGABRT ..."
- https://github.com/BVLC/caffe/issues/5711
- [RESOLVED] Error: "Segmentation Fault on ONNX"
- [RESOLVED] Error: "ValueError: The graph does not have an ir_version set properly."
For Debugging Purposes
Conda environment on AWS p2.xlarge instance:
!conda env list
# conda environments:
#
base                     /home/ubuntu/anaconda3
caffe2                *  /home/ubuntu/anaconda3/envs/caffe2
fastai                   /home/ubuntu/anaconda3/envs/fastai
fastai-edge              /home/ubuntu/anaconda3/envs/fastai-edge
fastai-v1                /home/ubuntu/anaconda3/envs/fastai-v1
mxnet                    /home/ubuntu/anaconda3/envs/mxnet
tensorflow               /home/ubuntu/anaconda3/envs/tensorflow
!conda info
     active environment : caffe2
    active env location : /home/ubuntu/anaconda3/envs/caffe2
            shell level : 1
       user config file : /home/ubuntu/.condarc
 populated config files :
          conda version : 4.5.11
    conda-build version : 3.0.27
         python version : 3.6.3.final.0
       base environment : /home/ubuntu/anaconda3  (writable)
           channel URLs : https://repo.anaconda.com/pkgs/main/linux-64
                          https://repo.anaconda.com/pkgs/main/noarch
                          https://repo.anaconda.com/pkgs/free/linux-64
                          https://repo.anaconda.com/pkgs/free/noarch
                          https://repo.anaconda.com/pkgs/r/linux-64
                          https://repo.anaconda.com/pkgs/r/noarch
                          https://repo.anaconda.com/pkgs/pro/linux-64
                          https://repo.anaconda.com/pkgs/pro/noarch
          package cache : /home/ubuntu/anaconda3/pkgs
                          /home/ubuntu/.conda/pkgs
       envs directories : /home/ubuntu/anaconda3/envs
                          /home/ubuntu/.conda/envs
               platform : linux-64
             user-agent : conda/4.5.11 requests/2.18.4 CPython/3.6.3 Linux/4.4.0-59-generic ubuntu/16.04 glibc/2.23
                UID:GID : 1000:1000
             netrc file : None
           offline mode : False
!conda list
# packages in environment at /home/ubuntu/anaconda3/envs/caffe2:
#
# Name                    Version                   Build  Channel
asn1crypto                0.24.0                   py36_0
backcall                  0.1.0                    py36_0
blas                      1.0                         mkl
bleach                    3.0.2                    py36_0
ca-certificates           2018.03.07                    0
certifi                   2018.10.15               py36_0
cffi                      1.11.5           py36he75722e_1
chardet                   3.0.4                    py36_1
cryptography              2.3.1            py36hc365091_0
cuda92                    1.0                           0    pytorch
cycler                    0.10.0                   py36_0
cymem                     2.0.2            py36hfd86e86_0
cytoolz                   0.9.0.1          py36h14c3975_1
dataclasses               0.6                        py_0    fastai
dbus                      1.13.2               h714fa37_1
decorator                 4.3.0                    py36_0
dill                      0.2.8.2                  py36_0
entrypoints               0.2.3                    py36_2
expat                     2.2.6                he6710b0_0
fastprogress              0.1.10                     py_0    fastai
fontconfig                2.13.0               h9420a91_0
freetype                  2.9.1                h8a8886c_1
future                    0.16.0                   py36_0
glib                      2.56.2               hd408876_0
gmp                       6.1.2                h6c8ec71_1
gst-plugins-base          1.14.0               hbbd80ab_1
gstreamer                 1.14.0               hb453b48_1
icu                       58.2                 h9c2bf20_1
idna                      2.7                      py36_0
intel-openmp              2019.0                      118
ipykernel                 5.1.0            py36h39e3cac_0
ipython                   7.0.1            py36h39e3cac_0
ipython_genutils          0.2.0                    py36_0
ipywidgets                7.4.2                    py36_0
jedi                      0.13.1                   py36_0
jinja2                    2.10                     py36_0
jpeg                      9b                   h024ee3a_2
jsonschema                2.6.0                    py36_0
jupyter                   1.0.0                    py36_7
jupyter_client            5.2.3                    py36_0
jupyter_console           6.0.0                    py36_0
jupyter_core              4.4.0                    py36_0
kiwisolver                1.0.1            py36hf484d3e_0
libedit                   3.1.20170329         h6b74fdf_2
libffi                    3.2.1                hd88cf55_4
libgcc-ng                 8.2.0                hdf63c60_1
libgfortran               3.0.0                         1    conda-forge
libgfortran-ng            7.3.0                hdf63c60_0
libopenblas               0.3.3                h5a2b251_3
libpng                    1.6.35               hbc83047_0
libprotobuf               3.6.0                hdbcaa40_0
libsodium                 1.0.16               h1bed415_0
libstdcxx-ng              8.2.0                hdf63c60_1
libtiff                   4.0.9                he85c1e1_2
libuuid                   1.0.3                h1bed415_2
libxcb                    1.13                 h1bed415_1
libxml2                   2.9.8                h26e45fe_1
markupsafe                1.0              py36h14c3975_1
mistune                   0.8.4            py36h7b6447c_0
mkl                       2019.0                      118
mkl_fft                   1.0.6            py36h7dd41cf_0
mkl_random                1.0.1            py36h4414c95_1
msgpack-python            0.5.6            py36h6bb024c_1
murmurhash                1.0.1            py36he6710b0_0
nbconvert                 5.3.1                    py36_0
nbformat                  4.4.0                    py36_0
ncurses                   6.1                  hf484d3e_0
ninja                     1.8.2            py36h6bb024c_1
notebook                  5.7.0                    py36_0
numpy                     1.15.3           py36h1d66e8a_0
numpy-base                1.15.3           py36h81de0dd_0
olefile                   0.46                     py36_0
onnx                      1.3.0                     <pip>
openblas                  0.3.3                ha44fe06_1    conda-forge
openssl                   1.0.2p               h14c3975_0
pandoc                    2.2.3.2                       0
pandocfilters             1.4.2                    py36_1
parso                     0.3.1                    py36_0
pcre                      8.42                 h439df22_0
pexpect                   4.6.0                    py36_0
pickleshare               0.7.5                    py36_0
pillow                    5.3.0            py36h34e0f95_0
pip                       10.0.1                   py36_0
plac                      0.9.6                    py36_0
preshed                   2.0.1            py36he6710b0_0
prometheus_client         0.4.2                    py36_0
prompt_toolkit            2.0.6                    py36_0
protobuf                  3.6.0            py36hf484d3e_0
ptyprocess                0.6.0                    py36_0
pycparser                 2.19                     py36_0
pygments                  2.2.0                    py36_0
pyopenssl                 18.0.0                   py36_0
pyparsing                 2.2.2                    py36_0
pyqt                      5.9.2            py36h05f1152_2
pysocks                   1.6.8                    py36_0
python                    3.6.6                h6e4f718_2
python-dateutil           2.7.3                    py36_0
pytorch-nightly           1.0.0.dev20181022 py3.6_cuda9.2.148_cudnn7.1.4_0  [cuda92]  pytorch
pytz                      2018.5                   py36_0
pyyaml                    3.13             py36h14c3975_0
pyzmq                     17.1.2           py36h14c3975_0
qt                        5.9.6                h8703b6f_2
qtconsole                 4.4.2                    py36_0
readline                  7.0                  h7b6447c_5
regex                     2018.08.29       py36h7b6447c_0
requests                  2.19.1                   py36_0
send2trash                1.5.0                    py36_0
setuptools                40.4.3                   py36_0
simplegeneric             0.8.1                    py36_2
sip                       4.19.8           py36hf484d3e_0
six                       1.11.0                   py36_1
sqlite                    3.25.2               h7b6447c_0
terminado                 0.8.1                    py36_1
testpath                  0.4.2                    py36_0
tk                        8.6.8                hbc83047_0
toolz                     0.9.0                    py36_0
torchvision-nightly       0.2.1                      py_0    fastai
tornado                   5.1.1            py36h7b6447c_0
tqdm                      4.26.0           py36h28b3542_0
traitlets                 4.3.2                    py36_0
typing                    3.6.4                    py36_0
typing-extensions         3.6.6                     <pip>
ujson                     1.35             py36h14c3975_0
urllib3                   1.23                     py36_0
wcwidth                   0.1.7                    py36_0
webencodings              0.5.1                    py36_1
wheel                     0.32.2                   py36_0
widgetsnbextension        3.4.2                    py36_0
wrapt                     1.10.11          py36h14c3975_2
xz                        5.2.4                h14c3975_4
yaml                      0.1.7                had09818_2
zeromq                    4.2.5                hf484d3e_1
zlib                      1.2.11               ha838bed_2
!nvidia-smi
Fri Nov  2 01:50:07 2018
+-----------------------------------------------------------------------------+
| NVIDIA-SMI 410.66       Driver Version: 410.66       CUDA Version: 10.0     |
|-------------------------------+----------------------+----------------------+
| GPU  Name        Persistence-M| Bus-Id        Disp.A | Volatile Uncorr. ECC |
| Fan  Temp  Perf  Pwr:Usage/Cap|         Memory-Usage | GPU-Util  Compute M. |
|===============================+======================+======================|
|   0  Tesla K80           Off  | 00000000:00:1E.0 Off |                    0 |
| N/A   35C    P8    30W / 149W |      0MiB / 11441MiB |      0%      Default |
+-------------------------------+----------------------+----------------------+

+-----------------------------------------------------------------------------+
| Processes:                                                       GPU Memory |
|  GPU       PID   Type   Process name                             Usage      |
|=============================================================================|
|  No running processes found                                                 |
+-----------------------------------------------------------------------------+
Verify if you've installed PyTorch properly:
# PyTorch 1.0 preview (nightly)

import torch
print(torch.__version__)
1.0.0.dev20181022
Verify if you’ve installed GPU drivers properly:
# You should see more than 0 in the output of this command.

print(torch.cuda.device_count())
1
Protocol Buffers compiler version:
!protoc --version
libprotoc 3.6.0