Lecture 0: Tools for Scientific Computing 0 (1.5 Hours)
ABSTRACT
Lecture 0 is the set-up-and-install-everything lecture. Here we will:
- learn what a shell is and how to interact with the command line,
- install and learn about package managers,
- install and explore two great examples of modern text editors,
- install and set up Python for the following lectures.
Using the Command Line (20 Minutes)
In the process of learning about scientific computing, we will encounter many examples of using a command line to interact with our computing environments. You may be more familiar with a graphical user interface (GUI), where interactions occur primarily by manipulating information in a graphical manner. In contrast, command lines mostly consist of typing text to be read by a special program called a shell. In Linux and macOS/OS X, one especially common shell is called bash, while PowerShell and cmd.exe are much more common shells on Windows.
NB: Both bash and PowerShell are each available on all three major operating systems, but in this Lecture, we'll focus only on those command lines installed by default on each. If you have and want to use bash on Windows or PowerShell on macOS/OS X, then please adapt the instructions accordingly.

|
|
|

|
Using a command line presents a range of different benefits, most importantly that it takes much less work to make and maintain a powerful command-line interface than a graphical interface.
Let's get started by launching a command line session.
NB: PowerShell and bash are very different shells, but in this tutorial, we'll focus on the parts of each that work in similar ways.
- Windows (7 or later): Open the Start Menu or Start Screen, type "PowerShell," then press enter.
- macOS/OS X: Press ⌘+Space to launch Spotlight, and type "Terminal," then press enter.
- Ubuntu: Press the Launcher button, and type "Terminal," then press enter.

|

|

|
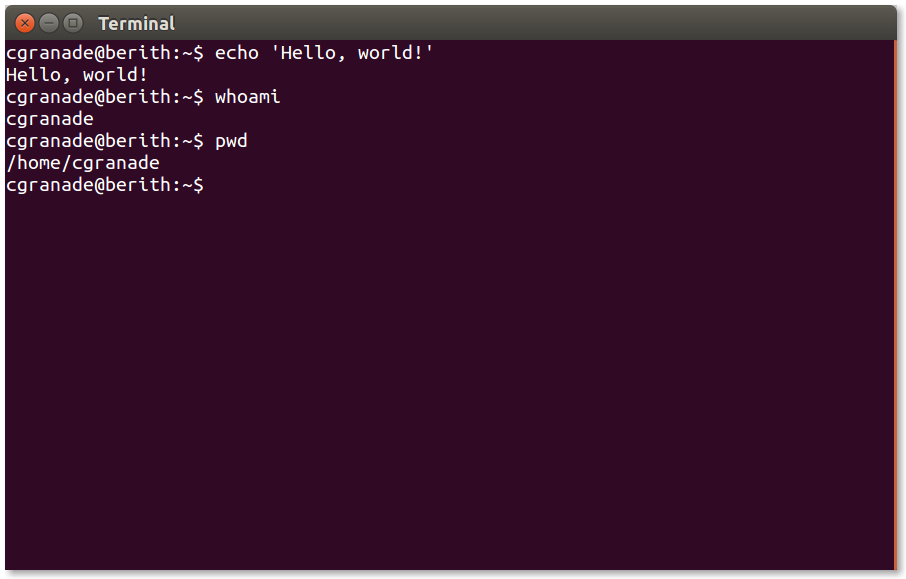
This should bring up a command-line window much like those above, complete with a prompt. A prompt is a string of text on the screen where you type your commands. Further, a prompt indicates different useful information. For instance, on bash, the default prompt might like look something like this (don't worry if yours is a little different):
cgranade@berith:~$
On PowerShell, the default prompt looks more like:
PS C:\Users\cgranade>
NB: For the rest of this tutorial, I'll use bash-style prompts except when PowerShell and bash differ. Often, for the sake of brevity, I will write out bash prompts with only the final dollar sign $. This is a common convention in various documentation and tutorials elsewhere online.
In either case, the prompt indicates the name of the current working directory, which is a location on your computer where the command line is currently running. Consider it a loose analogy to looking at a particular folder in File Explorer, Windows Explorer, Finder, or Nautilus. A useful command is then pwd, which prints your current working directory. Let's try it now.
$ pwd
/home/cgranade
Another useful command is ls, short for "list". This command prints out a list of files and folders located in the current directory:
$ ls
a  b
NB: On bash, ls will not show files whose names start with a dot (.), known as hidden files. To show all files, run ls -a* instead.*
On Windows, this will look a bit different:
PS C:\Users\cgranade\example> ls


    Directory: C:\Users\cgranade\example


Mode                LastWriteTime         Length Name
----                -------------         ------ ----
d-----       2016-10-13   2:28 PM                a
d-----       2016-10-13   2:28 PM                b
This is because PowerShell's ls is actually an alias to Get-ChildItem. In general, PowerShell commands take the form of Verb-Noun for a short list of approved verbs. For compatibility and convenience, PowerShell defines a few built-in aliases. Run Get-Alias to list them.
NB: On PowerShell, the arguments to ls to show hidden files look a bit different. Run ls -Force instead.
This tells us that the current directory has two things in it, a and b. (Whether these are files or folders may be indicated by color, on Ubuntu and macOS/OS X, or by a "d" in the "Mode" column on Windows. However, for technical reasons, the indicator colors are not shown in this Jupyter notebook tutorial.)
Of course, the directories on your computer may be quite different, so let's make a new directory we can use for this tutorial. This is handled by the mkdir command:
$ mkdir foo
$ ls
a  b  foo
NB: foo, bar and occasionally baz are meaningless names that programmers will often use in example code. Though there are some just-so-stories for their history, such as a supposed but dubious origin in the rather impolite acronym "f★★★ed up beyond all recognition" used by the US Army throughout WWII, there's no universal consensus on where these names came from. We'll use them through out these Lectures to indicate that a particular variable, object, string or whatever is itself meaningless, and is used only as an example.
To go into our new directory, we use the command cd (short for "change directory"— don't ask where the "w" went, I have no idea).
$ cd foo
$ pwd
/home/cgranade/foo
The command cd accepts a path that tells the command line where to find the directory you'd like to change to. In the above example, foo is an example of a relative path, which says to start in the current directory and then find a child directory called foo. By contrast, we can also specify absolute paths. For very, very annoying historical reasons, paths look quite different on Windows from other operating systems. On each OS the following are examples of absolute paths that specify the home folder for the user cgranade.
- Windows:
C:\Users\cgranade - macOS/OS X:
/Users/cgranade - Ubuntu:
/home/cgranade
On macOS/OS X and Ubuntu, we can tell that these are absolute paths because they start from the root folder, named /. On Windows, we must also specify a drive letter, typically C:\.
NB: Windows uses \ to separate different directories in a path, while everything else uses /. This causes no small amount of annoyance and pain in the world. Thankfully, PowerShell will often convert / to \, making it easier to switch between.
The home folder can also be referred to by the special path ~
$ cd ~
$ pwd
/home/cgranade
Other important paths include . (the current directory) and .. (the parent directory - the directory above the current directory).
$ cd ..
$ pwd
/home
$ cd ~/../..
$ pwd
/
$ cd .
$ pwd
/
You may have noticed that typing command, file, and folder names can get a bit tedious, as can repeating commands that you've already typed. Thankfully, there are a few common shortcuts that make using command lines much easier.
- The up and down arrow keys recall the previous and next commands, respectively.
- Pressing Tab will complete a command, file, or folder name. On Windows, this selects the first name that matches, and pressing Tab again will cycle through other matches. On bash, this will select a name only if it is unambiguous. Pressing Tab twice will print a list of matching completions.
- Ctrl+C and Ctrl+V don't do what you expect in the terminal. Ctrl+C stops the currently evaluating code immediately, and Ctrl+V may not paste. In most terminal applications, if you want to paste you can right mouse click or use Ctrl+Shift+C and Ctrl+Shift+V (NB: on macOS/OS X ⌘+C* and ⌘+V do copy/paste, since they don't directly conflict with Ctrl+C and Ctrl+V*).
Now that we're a bit more familiar, let's try out a few more commands. Below, I've used italics to indicate arguments that you can substitute accordingly.
rmfilename: Permanently removes the filefilename, without first moving to Trash or the Recycle Bin.mvoldfilenamenewfilename: Moves the file or folderoldfilenametonewfilename.rmdirdirname: Removes an empty directorydirname.catfilename: Prints the contents offilenameto the screen. Don't use on anything other than plain text!morefilename(PowerShell) orlessfilename(bash): Prints the contents offilenameto the screen one page at a time. Press Space to advance, or q to quit.
NB: If someone tries to convince you to run rm -rf /, they are not your friend— that bash command will delete all files you have access to.
One more thing we should briefly mention is Environment variables. All computer operating systems have these in some form, and they serve as a way to provide information to running processes. This could be where to find commands or files on the system, how many processors the computer has, or what operating system the machine is running. Examples of such environment variable are:
PATHindicates where to find the commands the user is trying to runTEMPindicates the directory where temporary files are storedHOME(Unix) /USERPROFILE(Windows) indicates where to find the user's home file directory
You can try looking up your user file directory by typing in your shell:
- Windows:
PS> Write-Output $env:HOMEPATH - macOS/OS X:
echo $HOME - Ubuntu:
echo $HOME
They are not strictly a command-line concept, but we'll need to modify these variables later when installing things.
We now have what we need to get up and running with a wide range of command-line tools. We'll encounter a few more things as we go, but this gives us a good basis going forward.
Package Management (15 Minutes)
One nice use of the command line is to help us install software in a more automated fashion, using package managers. A package manager is a piece of software which installs, updates, uninstalls, and otherwise helps us manage pieces of software called packages. Unfortunately, not everything can be easily installed using a package manager, and we'll see a few annoying examples of such along the way in this workshop. That said, when possible, keeping things within the formalism of package management makes it much simpler to deal with dependencies and updates, and nearly eliminates the giant security hole that is "find and run a random *.exe file from somewhere on the Web." (Albeit at the cost of other, smaller security holes. Alas.) For the moment, macOS/OS X users can kick back and follow along - SSH is pre-installed by default, and Git is installed by the Xcode installer, so we won't need a package manager to proceed.
NB: There are good package managers out there for macOS / OS X, such as the Homebrew project, but they work differently enough from Ubuntu and Windows package managers that we won't cover them in more detail here.
Ubuntu: the Debian package manager is installed by default and is used to manage almost all software provided with the OS.
Windows: the Chocolatey project (so named for its relation to the NuGet project, which itself is named as a "new way to get" software) provides a third-party package manager and a wide range of pre-built packages for common open source software projects. To install Chocolatey, we need to first run a PowerShell session as the Administrator. To do so, open the Start Menu or Screen and type "PowerShell" as usual, but instead of pressing enter, right-click the PowerShell menu item and select "Run as administrator."

You will then be presented with a User Account Control (UAC) prompt asking you if you want to run PowerShell with elevated permissions. Press OK.
From the new PowerShell window, run the following command to enable running signed scripts from the web. Note that this policy will last only as long as the current PowerShell session, as indicated by -Scope Process.
PS > Set-ExecutionPolicy -Scope Process RemoteSigned
If you're running PowerShell 3 or later (this is the default on Windows 8 and above, but may also be the present on Windows 7 if you've updated PowerShell), then you can use the iwr command (Invoke-WebRequest) to download the Chocolatey installer, and run it with iex (Invoke-Expression).
PS > iwr https://chocolatey.org/install.ps1 -UseBasicParsing | iex
NB: the | above is a "pipe" character, typed on most keyboards by Shift+**. On both bash and PowerShell, the pipe character takes the output of one command and feeds it as input to the next, but the mechanism by which piping works on each shell is quite different.
On PowerShell version 2, the iwr command doesn't exist, so the actual command we need to run is a bit less straightforward:
PS > iex ((New-Object System.Net.WebClient).DownloadString('https://chocolatey.org/install.ps1'))
In either case, once the install command finishes, you should have Chocolatey installed. Close the PowerShell window and open a new session (also as Administrator) to make Chocolatey commands available.
Installing SSH and Git
Now that we have installed package managers, let's use them to install two pieces of software - SSH and Git - which we'll use in the next lecture.
- Windows (7 or later):
PS > choco install git openssh putty
If a package has already been installed, Chocolatey will print out a warning like openssh v0.0.1.0 already installed. Though we won't cover how to use it in these tutorials, you may also want to install extensions for PowerShell that present additional information and provide Tab-completion:
PS > choco install poshgit
NB: On some versions of Chocolatey, you must type a number in response to prompts, instead of y or n.
- macOS/OS X:
SSH and Git come pre-installed.
- Ubuntu:
$ sudo apt-get install ssh git
On Ubuntu, sudo allows you to run a command with admin privileges (that is, it runs your command "as root"). You may be prompted for your password at this point. If you see an example in documentation that uses # instead of $ as the bash prompt, this indicates that the command normally requires root privileges. If ssh or git is already installed, you may see something like ssh is already the newest version printed out.
Modern Text Editors (25 Minutes)
We need one more important tool before actually getting to Python, which is the ever-useful text editor. A text editor is simply a piece of software that allows you to create files composed entirely of text, such as a Python program/script, a LaTeX file to be compiled into a PDF detailing your latest research breakthrough in weak value amplification, or a readme.md file for the workshop you might currently be organizing.
Modern text editors sit somewhere between a traditional, bare-bones text editor (such as Notepad or TextEdit) and a full-fledged software development platform. The real strength of the newer text editors (such as the two that we will be looking at here, Sublime Text and VS Code) is that they also have their own packages/plugins that also have their own pacakge manager! Yeah I know, how many package managers can one possibly need...? Anyway, these packages allow the text editor to hook up to compilers for your code (LaTeX, C, etc.), they can help you with version control (see lecture 1), and most importantly they allow you to customize almost anything!
NB: There are several of non-GUI-based text editors that we might encounter, such as the default editor on macOS/OS X called vim* and another called nano. Occasionally the command line will open a file in one of these editors, each of which has its own set of keystrokes to execute commands. In the next Lecture we will address this where necessary.*
Sublime Text 3: Installing
- Windows (7 or later):
Start by running the .exe you have already downloaded from here. Install Sublime to the default path C:\Program Files\Sublime Text 3, and if you want Open with Sublime to show up in your right click menu in folders, you can check the box add to explorer context menu. Let it complete the install and you are done.

- macOS/OS X:
Start by running the .dmg you have already downloaded from here. Drag the Sublime Text icon into the Applications Folder and you are done.

- Ubuntu:
Run the .deb you have already downloaded from here.
Sublime Text: Installing Packages
Now that we have Sublime installed, let's give it a spin! As was mentioned before, part of the power of these modern text editors is that they support packages...so let's install a package manager. Newer versions of Sublime often have this already part of the base install, and you can check this by opening the command palette (Ctrl+Shift+P on Windows and Linux, ⌘+Shift+P on macOS/OS X, or simply Tools → Command Palette...) and start typing Package control. If you see lots of options listed below, then it is already installed and you are good to move on. If not, follow the instructions here to get it installed.

Now we're prepared to install two packages to make Sublime useful for common scientific tasks: one for LaTeX and one to help link Sublime to Git. Open the command palette (forgot how? Directions in paragraph above) and type:
Package Control: Install Package
The command palette now allows us to search the list of packages available for Sublime, but the one we are looking for is LaTeXTools. Select it and hit enter (or simply click it) to install. The GitHub page for this package is here where you can find exhaustive documentation about what it can do. In a nutshell, the most useful features are:
- you can build the PDF directly from within Sublime using Ctrl+B
- full back- and forward-searching between PDF and source
- tab complete for many LaTeX commands
- customizing galore!
NB: This installs LaTeX support for Sublime Text, not LaTeX itself. On Windows, run choco install miktex; on Linux, run sudo apt-get install texlive-latex-recommended. On macOS / OS X, MacTeX should work.
Now let's install the Git package by following the same process. For now we will just install these packages and use them later in the workshop.
Sublime Text: Using
Start by opening a folder on your computer with some text files (like this example TeX document) by clicking File → Open Folder... and selecting the folder where you downloaded input-output-theory.tex to. When you open a folder rather than a file, this opens a file-browser sidebar, making it easy to open files from within Sublime. NB: To open a file from the side bar, double click on the file, else it just shows you a preview and will close it as soon as you click on another file. Every file that is open is shown on the tab bar at the top of the window, just like tabs in a web browser.
Open the file input-output-theory.tex, and let's take a look at the Sublime environment.
The tiny text (called a minimap) next to the scroll bar on the right is an overview of the open file to help you navigate a large document quickly. This can be turned on/off via View->View/Hide Minimap.

The status bar at the bottom of the window shows the position of the cursor, the document type/language Sublime assumes is the open document is (click on it to see other possible languages/encodings), and how the Tab key is being interpreted. This is an important setting for us here as we will primarily be using Python and we want Sublime to automatically interpret a Tab key press as 4 spaces (which is recommended/required for Python language syntax). Whenever you are editing Python documents in Sublime, you can check this is set correctly if you click on the Tab Size section and make sure Indent Using Spaces and Tab Width: 4 are both checked.


Another useful things to know about sublime is that you can save you current setup (open files, folders, view settings, etc.) as a project so that when you want to work on the same thing again you do not have to re-setup the editor. Once you have a state of the editor you would like to save, click in the menubar at the top: Project → Save Project As.... Then when you want to work on this project again you can from the same menu, Open Project and everything about Sublime will return to that state! This is really handy when you are working on multiple papers or coding projects so that you can more easily get back to work when starting the task.
One last note about Sublime is that if you want to change any settings, it is as easy as editing a text file. This makes it very easy to sharing Sublime settings with collaborators, or move them to another computer. From the menu bar select Preferences → Settings.... This opens a new Sublime editor window with two files, Preferences.sublime-settings — Default on the left and Preferences.sublime-settings — User on the right. Having both open is useful because you can see what each setting does (and its current setting) in the Default settings tab. To change a particular setting, copy and paste the setting you wish to change to the user file. This user setting will persist even if there is an update to Sublime itself.
Let's try this out. Type Ctrl+F (or ⌘+F on macOS/OS X) to open a "find" search bar and begin typing the setting name, "translate_tabs_to_spaces": false. After locating the setting, copy/paste it to the user file, then change the setting value to true. This will make sure that the Tab setting we changed before in the status bar applies to any file we open. After changing this setting, your User preferences should look something like this:
{
    "translate_tabs_to_spaces": true
}
(You may have other settings there as well.)
Finally, Sublime Text supports heaps of useful keyboard shortcuts. Rather than overwhelm you with a massive list here, we just want you to know that keyboard shortcuts are your friend (to be overwhelmed: Windows/Linux cheat sheet and macOS/OS X cheat sheet).
VS Code: Installing
In the interest in not seeming biased in our presentation, we will now look at another modern text editor called Visual Studio Code (henceforth VS Code since it has nothing to do with the other product called Visual Studio). This is an open-source project from Microsoft wait, what? that has a lot of the same features that Sublime has but presented in different ways. You are invited to explore these two text editors (as well as others!) to see what you like working with best.
- Windows:
Start by runing the .exe you have already downloaded from here. Install VS Code to the default path C:\Program Files (x86)\Microsoft VS Code, let it make a start menu folder. For the additional tasks, we suggest checking all but the top one, but if you want a desktop icon go for it. Let it complete the install and have it launch when you are done.


- macOS/OS X:
Start by running the .dmg you have already downloaded from here. Drag the VS Code application from its location (Downloads folder) into the Applications folder, and you're done installing.
Not only can VS Code be launched from the Finder, but we can also launch it directly from the Terminal. To enable this function, first run VS Code and then open the Command Palette by typing ⌘+Shift+P. Type shell command and the autosearch will find a menu item Shell Command: Install 'code' command in PATH. Select it and hit enter. Restart the Terminal, and you will be able to launch VS Code from the Terminal with the command code.

- Ubuntu:
Run the .deb you have already downloaded from here.
VS Code: Using
The good news is that using VS Code is very similar to Sublime. They both use text files to store settings, have the ability to install packages/extensions, and can interact with version control (Git) well. They differ mostly in layout - VS Code has an additional View Bar on the left most part of the screen that changes what is displayed in the window. We will briefly go over how to use VS Code; Microsoft has a very good and complete guide here.
Let's start by opening a folder File → Open Folder.... In the sidebar we are shown the files in that folder that we can open and edit by double clicking. Open files are shown on the tab bar at the top of the window, just like tabs in a web browser.

The status bar at the bottom of the window indicates things like the position of the cursor, what language VS Code is assuming the currently open document is (just click on it to see other possible languages/encodings), as well as how the tab key is being interpreted (all of this sound a little familiar?). The stuff on the right is related to the Git plugin that we will install shortly.

Looking at the far left part of the window we see the view bar:

This bar has tabs for (from top to bottom): Opening files and folders, searching, Git version control, debugging tools, and a extension (package) manager. Click on the extension manager tab and in the search box at the top look for Python. Probably the first one will be called Python, made by Don Jayamanne. Click the install button. Now search for LaTeX compile and install the package called LaTeX compile by mathiasfrohlich. Lastly, search for LaTeX Language Support by Microsoft and install it. Now, close and re-open VS Studio (or click Enable and agree). VS Code is now more helpful (and, as importantly, fancier!) for writing Python and LaTeX. If you are writing in another language, search for it in the packages to see if there is an extension.
For completeness, VS Code has a command palette activated by Ctrl+Shift+P on Windows and Linux or ⌘+Shift+P on macOS/OS X (no coincidence it's the same command as in Sublime on all three) that allows you to run tasks from installed extensions, do bulk editing, and much more. To read more about what you can do with the command palette, look here.

Python with the Anaconda Distribution (30 Minutes)
We're now ready to go on and install Python itself. We'll do so using the Anaconda distribution, which bundles Python together with many other useful tools for scientific computation. Hopefully, you already have the installer for Anaconda downloaded, and we just need to run it. For reasons we'll discuss in the next lecture, we will install different versions of Anaconda on Windows from on macOS/OS X or Linux. That is, we install Anaconda for Python 2.7 on Windows, and Anaconda for 3.5 everywhere else.
NB: If you're running Ubuntu or macOS / OS X, you already have Python installed as a core part of your operating system, so why Anaconda? One main reason is to allow us to provide (for the most part) one set of instructions for everyone, exploiting that Anaconda is cross-platform and includes packages for important tools such as compilers, not just Python packages. Moreover, Anaconda strives to be up to date, making it well suited for including new scientific computing tools. By contrast, Ubuntu's packages focus on making sure older software works in a well-tested and stable way. Both approaches are valuable, but we want something closer to cutting-edge here, so that we can get everything that's exciting about Python and Jupyter.
- Windows:
Open Windows Explorer (Windows 8.1 and earlier) or File Explorer (Windows 10 and later) by pressing +E, then navigate to where you downloaded the Anaconda installer (from here) and double-click it. You will then be presented with a "wizard-style" installer. Make sure to select "Just Me," and to ensure that the Anaconda installer adds Python to the system PATH variable (this is the default option, but it's good to double-check).

After the install completes, launch a new PowerShell session, and check that Python is installed correctly by running Get-Command. You should see something like the following.
PS > Get-Command python

CommandType     Name                                               Version    Source
-----------     ----                                               -------    ------
Application     python.exe                                         0.0.0.0    C:\Anaconda2\python.exe
- macOS/OS X:
You should already have the installer downloaded from here, and all you need to do is double click to run it. Agree to the license and let it install in the default location. It will take maybe a minute or two, but then you are done.
- Ubuntu:
NB: If you are using Windows 10 with the Windows Subsystem for Linux installed, then these instructions also work for Bash on Ubuntu on Windows.
From bash, navigate using the cd command to whichever directory where you downloaded the installer (from here). Once you are in the right directory, run the following command (you can use tab-completion to enter in the name of the Anaconda installer).
$ bash Anaconda3-4.2.0-Linux-x86_64.sh
NB: Do not* run the Anaconda installer with sudo, as we will be installing for a current user only.*
This will start the Anaconda installer at the command line. Press Enter to view the license agreement, which will load in less. Once you've read it to your satisfaction, press q to return to the installer. If you agree, type yes and press Enter to proceed. Select the default installation location by pressing Enter; Anaconda will then start the installation properly. After the installer copies everything over, you'll be presented with one last prompt:
Do you wish the installer to prepend the Anaconda3 install location
to PATH in your /home/cgranade/.bashrc ? [yes|no]
[no] >>>
Despite the default of [no] listed here, we *strongly* encourage typing yes instead. This will make the Anaconda installation available to command line sessions automatically, saving a lot of confusion later on.
After Anaconda has installed, we'll need to update $PATH, the environment variable that bash uses to find commands. We can do this either by closing and reopening the terminal window, or by running source ~/.bashrc. In either case, confirm that the python command is the version installed by Anaconda by using which:
$ which python
/home/cgranade/anaconda3/bin/python
If you instead see something similar to /usr/bin/python, then your $PATH environment variable points to the system version of Python.
Managing Python Packages with pip and conda
Package managers are very useful, as we've seen above. In fact, they are so useful that programmers have an extremely "fun" habit of writing new ones for each task. Indeed, this state of affairs is extreme enough that Microsoft one-upped everybody entirely by making a package manager manager that manages other package managers, but doesn't manage any sort of package directly. Computers are "fun," because people are "fun."
In any case, the operational definition of "fun" being what it is, Python and the Anaconda distribution each come with their own package managers, called pip and conda respectively. The conda package manager has the advantage of supporting scientific software packages in other languages (currently R and JavaScript) as well as Python, and also has richer support for compiled code. On the other hand, pip works with Python distributions other than Anaconda, and thus enjoys much wider support. Our strategy moving forward will thus be to prefer conda packages when they exist, and otherwise use pip.
Thankfully, both pip and conda are quite simple to use for the tasks we care about. Let's go on and try each by installing some packages that we'll need in the rest of the lectures.
NB for Windows users: Both pip and conda work the same way on both bash and PowerShell, so we'll display bash-style prompts from here on out.
$ conda install seaborn ipyparallel future pandas click pyqt=4.11.4
$ pip install quantities qinfer instrumentkit pint
These commands install several other packages that are needed as dependencies, saving us from having to manually figure out what requires what.
NB: For the curious, the installed packages are:
- seaborn: improved statistical plotting
- ipyparallel: interactive parallel and distributed Python computing
- future: to ensure compatibility between Python 2 and 3 code
- pandas: provides powerful R-style data manipulation.
- click: utilities to make it easier to write your own command-line tools in Python
- pyqt: a package that connects python to Qt (cross-platform GUI dev) which makes the demo instrument for lecture 6
- quantities and pint: manipulating physical units and conversions between them
- qinfer: Bayesian inference for quantum mechanics (much more in Lecture 5)
- instrumentkit: interaction with laboratory hardware (much more in Lecture 6)
As a final digression for this Lecture, the discussion of the proliferation of package managers aside, pip and conda each have a major advantage over system package managers that is quite worth mentioning: environments. Though this is a more advanced feature, it's worth being aware of what environments can do. In particular, environments are a way of managing parallel installations of Python, such that packages can be installed into a particular environment without conflicting with each other. This is a huge benefit for reproducible research, as one can simply distribute a description of what pip and conda packages are needed to build an environment. In conda, such descriptions are given by the file environment.yml, while pip calls it requirements.txt.