#!/usr/bin/env python
# coding: utf-8
# # 수업 보충 자료
# ## 12. E-learning 22, 23 보충 자료
# - 보충 내용 없음
# ## 11. E-learning 21 보충 자료
# 1) Python 에서 Java에서 문법적으로 제공되는 것과 비슷하게 abstract class를 생성할 수 있나?
# - Python 문법 자체적으로 abstract class 지원하지 않음
# - abc 모듈을 활용하여 abstract class 생성할 수 있음 (참고적으로만 알아둘 것)
# - http://zaiste.net/2013/01/abstract_classes_in_python/
# 2) Python 에서 Java에서 문법적으로 제공되는 것과 비슷하게 interface를 생성할 수 있나?
# - Python 문법 자체적으로 interface 지원하지 않음
# - interface를 지원하는 모듈도 존재하지 않음
# ## 10. E-learning 19, 20 보충 자료
# - 보충 내용 없음
# ## 9. E-learning 17, 18 보충 자료
# ### 1) 특정 객체 내부에 지니고 있는 이름 알아보기
# - dir(객체)
# : 이름 리스트 리스트 반환
# - 객체.\_\_dict\_\_
# : 이름 및 해당 이름에 할당된 객체의 repr (또는 str) 형태를 사전으로 지님
# In[3]:
import string
print dir(string)
print string.__dict__.keys()
# In[17]:
for name, val in string.__dict__.items():
print 'name = %-20s, type = %s' % (name, type(val))
# ### 2) 모듈의 재적재
# - 이미 메모리에 적재되어 있는 모듈은 다시 import 하더라도 기존에 적재되어 있는 모듈이 그대로 다시 이용된다.
# In[4]:
import mymath
mymath.mypi = 6.2 # 값 수정(원래 모듈 파일에 정의된 값은 3.14)
import mymath # 다시 import
print mymath.mypi # 3.14가 아니라 6.2 -> 즉 이미 적재되어 있는 모듈 그냥 이용
# - reload(모듈)
# - 메모리에 등록된 것과 관계없이 해당 모듈의 파일에서 새롭게 다시 메모리에 재적재 시키는 내장 함수
# In[5]:
print mymath.mypi
reload(mymath)
print mymath.mypi
# ## 8. E-learning 15, 16 보충 자료
# ### 1) 함수 정의시에 예상할 수 없는 키워드 인수 처리하기
# - 함수를 정의할 때 예측할 수 없는 인수를 선언하여 사전 타입으로 그러한 인수를 받을 수 있다.
# - 함수 정의시에 **var 형태의 인수 정의
# In[10]:
def f(width, height, **kw):
print width, height
print kw
value = 0
for key in kw:
value += kw[key]
return value
print f(width=10, height=5, depth=10, diamension=3)
# In[13]:
print f(10, 5, depth=10, diamension=3)
# - 첫 두 개의 인수 다음에는 반드시 키워드 인수로만 함수 호출 가능
# In[11]:
print f(width=10, height=5, 10, 3)
# In[12]:
print f(10, 5, 10, 3)
# - 함수 선언시에 예상할 수 없는 키워드 인수는 맨 마지막에 선언해야 한다.
# - 함수 선언시 인수 선언 나열 방법
# - 일반 인수 -> 키워드 인수 -> 가변 인수 -> 예상치 못하는 키워드 인수
# In[18]:
def g(a, b, k = 1, *args, **kw):
print a, b
print args
print kw
g(1, 2, 3, 4, 5, c=6, d=7)
# ### 2) 함수 호출시에 사용 가능한 튜플 인수 및 사전 인수
# - 함수 호출에 사용될 인수값들이 튜플에 있다면 "*튜플변수"를 이용하여 함수 호출이 가능
# In[19]:
def h(a, b, c):
print a, b, c
args = (1, 2, 3)
h(*args)
# - 함수 호출에 사용될 인수값들이 사전에 있다면 "**사전변수"를 이용하여 함수 호출이 가능
# In[20]:
dargs = {'a':1, 'b':2, 'c':3}
h(**dargs)
# - 튜플 인수와 사전 인수를 동시에 사용
# In[21]:
args = (1,2)
dargs = {'c':3}
h(*args, **dargs)
# ### 3) 람다 함수 보충
# - 다음 4가지 프로그램은 동일함
# In[1]:
def f1(x):
return x*x + 3*x - 10
def f2(x):
return x*x*x
def g(func):
return [func(x) for x in range(-10, 10)]
print g(f1)
print g(f2)
# In[4]:
def g(func):
return [func(x) for x in range(-10, 10)]
print g(lambda x: x*x + 3*x - 10)
print g(lambda x: x*x*x)
# In[5]:
print [(lambda x: x*x + 3*x - 10)(x) for x in range(-10, 10)]
print [(lambda x: x*x*x)(x) for x in range(-10, 10)]
# In[7]:
print map(lambda x: x*x + 3*x - 10, range(-10, 10))
print map(lambda x: x*x*x, range(-10, 10))
# ### 4) map 및 filter 함수 보충
# - map함수에 시퀀스 자료형을 두 개 이상 할당할 수 있다.
# - 시퀀스 자료형이 n개 이면 function의 인자도 n개 이어야 함
# In[28]:
Y1 = map(lambda x, y: x + y, [1, 2, 3, 4, 5], [6, 7, 8, 9, 10])
Y2 = map(lambda x, y, z: x + y + z, [1, 2, 3], [4, 5, 6], [7, 8, 9])
print Y1
print Y2
# - 두 개 이상의 시퀀스 자료형들에 대해 map 함수를 사용하여 순서쌍 만들기
# - function 인자를 None으로 할당
# In[1]:
a = ['a', 'b', 'c', 'd']
print map(None, a)
# In[2]:
a = ['a', 'b', 'c', 'd']
b = [1, 2, 3, 4]
print map(None, a, b)
# In[3]:
a = ['a', 'b', 'c', 'd']
b = [1, 2, 3, 4]
c = [5, 6, 7, 8]
print map(None, a, b, c)
# - 두 개의 시퀀스 자료형의 원소의 개수가 다르면 부족한 원소에는 None을 할당
# In[4]:
a = ['a', 'b']
b = [1, 2, 3, 4]
print map(None, a, b)
# - 순서쌍을 만드는 전용 내장 함수 zip은 None을 추가하지 않고 짧은 인자를 기준으로 나머지는 버린다.
# In[5]:
a = ['a', 'b']
b = [1, 2, 3, 4]
print zip(a, b)
# In[6]:
print zip([1, 2, 3], [4, 5, 6, 7, 8])
# - filter의 첫 인자의 함수로서 None을 할당하면 seq 자료형에 있는 각 원소값 자체들을 평가하여 참인 것들만 필터링한다.
# In[34]:
L = ['high', False, 'level', '', 'built-in', '', 'function', 0, 10]
L = filter(None, L)
print L
# ### 6) 함수 객체의 속성
# - 함수도 객체이며 속성을 지닌다.
# - \_\_doc\_\_, func_doc: 문서 문자열
# - \_\_name\_\_, func_name: 함수 이름
# - func_defaults: 기본 인수 값들
# In[35]:
def f(a, b, c=1):
'func attribute testing'
localx = 1
localy = 2
return 1
# In[42]:
print f.__doc__ # 문서 문자열
print f.func_doc
print
print f.__name__ # 함수의 이름
print f.func_name
print
print f.func_defaults # 기본 인수값들
# ## 7. E-learning 13, 14 보충 자료
# ### 1) text file vs. binary file
# - 참고: http://stackoverflow.com/questions/2665866/what-is-the-wb-mean-in-this-code-using-python
#
# - On Unix systems (Linux, Mac OS X, etc.), binary mode does nothing - they treat text files the same way that any other files are treated. On Windows, however, text files are written with slightly modified line endings. This causes a serious problem when dealing with actual binary files, like exe or jpg files. Therefore, when opening files which are not supposed to be text, even in Unix, you should use wb or rb. Use plain w or r only for text files.
#
#
# ### 2) with ~ as ~
# - 자동으로 자원 해제
# In[1]:
s = """Its power: Python developers typically report
they are able to develop applications in a half
to a tenth the amount of time it takes them to do
the same work in such languages as C."""
with open('t.txt', 'w') as f: # f = open('t.txt', 'w')과 동일
f.write(s)
# f.close() 작성할 필요 없음. 자동으로 닫힘
# ### 3) os.work
# In[ ]:
import os
os.chdir('/Users/yhhan/git/python-e-learning')
print os.getcwd()
print
for path, subdirs, files in os.walk(os.getcwd()):
print path, " *** ", subdirs, " *** ", files
# ### 4) 프로그램 예제-1
# #### 임의의 텍스트 파일 내 문자 수를 출력하는 프로그램을 작성하라.
# - 해법 1
# In[3]:
f = open('supplement-2016-09.ipynb')
print len(f.read())
f.close()
# - 해법 2
# In[4]:
import os
os.path.getsize('supplement-2016-09.ipynb')
# - 윈도우즈에서 만든 파일에 위 예제들을 수행하면 os.path.getsize('t.txt')가 라인수만큼 더 큼
# - 이유
# - 리눅스와 Mac에서는 라인 구분 제어 문자로 '\012' 한 문자를 사용
# - 윈도우즈에서는 라인을 구분하는 제어 문자로 '\015\012' 두 개의 문자를 사용함
# In[5]:
import os
os.linesep
# - 
# ### 5) 프로그램 예제-2
# #### 임의의 텍스트 파일 내 단어 수를 출력하는 프로그램을 작성하라. 여기서 단어란, 공백으로 분리된 문자의 모임을 뜻한다.
# - 해법 1
# In[6]:
f = open('supplement-2016-09.ipynb')
s = f.read()
n = len(s.split())
print n
f.close()
# - 해법 2
# In[7]:
n = len(open('supplement-2016-09.ipynb').read().split())
print n
# ### 6) 프로그램 예제-3
# #### 임의의 텍스트 파일 내 라인 수를 출력하는 프로그램을 작성하라.
# - 해법 1
# In[8]:
f = open('supplement-2016-09.ipynb')
s = f.read()
print s.count('\n')
f.close()
# - 해법 2
# In[9]:
f = open('supplement-2016-09.ipynb')
print len(f.readlines())
f.close()
# - 해법 3
# In[10]:
print open('supplement-2016-09.ipynb').read().count('\n')
# - 해법 4
# In[11]:
print len(open('supplement-2016-09.ipynb').readlines())
# ### 7) 다양한 파일 처리 모드
# - open 내장 함수의 두번째 인자 mode 설명
# - 두번째 인자 mode 생략시에는 읽기 전용(r) 모드로 설정
#
# | Mode | 간단 설명 | 자세한 설명
# |--------|-----------------------------|------------|
# | 'r' | 읽기 전용(기본 모드) | 파일 객체를 읽기 모드로 생성하고, 파일 포인터를 파일 처음 위치에 놓는다.|
# | 'w' | 쓰기 전용(기존 파일 내용 삭제) | 파일이 존재하지 않으면 새로운 파일을 쓰기 모드로 생성하고, 해당 파일이 이미 존재하면 내용을 모두 없에면서 쓰기 모드로 생성하고, 파일 포인터를 파일 처음 위치에 놓는다. |
# | 'a' | 파일 끝에 추가(쓰기 전용) | 파일이 존재하지 않으면 새롭게 파일을 생성하면서 쓰기 모드로 생성하고, 해당 파일이 이미 존재하면 파일 객체을 쓰기 모드로 생성하면서 파일 포인터를 파일의 마지막 위치에 놓는다 (그래서, 이후 작성되는 내용은 파일의 뒷 부분에 추가).|
# | 'r+' | 읽고 쓰기 | 파일 객체를 읽고 쓸 수 있도록 생성한다. 파일 포인터를 파일 처음 위치에 놓는다. |
# | 'w+' | 읽고 쓰기(기존 파일 내용 삭제) | 파일 객체를 읽고 쓸 수 있도록 생성한다. 파일이 존재하지 않으면 새로운 파일을 생성하고, 해당 파일이 이미 존재하면 내용을 모두 없에면서 생성하고, 파일 포인터를 파일 처음 위치에 놓는다.|
# | 'a+' | 읽고 쓰기(파일 끝에 추가) | 파일 객체를 읽고 쓸 수 있도록 생성한다. 파일이 존재하지 않으면 새롭게 파일을 생성하고, 해당 파일이 이미 존재하면 파일 객체을 생성하면서 파일 포인터를 파일의 마지막 위치에 놓는다 (그래서, 이후 작성되는 내용은 파일의 뒷 부분에 추가). |
#
#
# - 이진 파일로 저장을 위해서는 아래 모드 사용
#
# | Mode | 간단 설명 |
# |--------|-----------------------------|
# | 'rb' | 이진 파일 읽기 전용 |
# | 'wb' | 이진 파일 쓰기 전용(기존 파일 내용 삭제) |
# | 'ab' | 이진 파일 끝에 추가(쓰기 전용) |
# | 'rb+' | 이진 파일 읽고 쓰기 |
# | 'wb+' | 이진 파일 읽고 쓰기(기존 파일 내용 삭제) |
# | 'ab+' | 이진 파일 끝에 추가(읽기도 가능) |
#
#
#
# ## 6. E-learning 11, 12 보충 자료
# ### 1) 프로그램 예제
# - 100개의 소문자를 랜덤하게 생성하여 출력한다.
# - 생성된 각 소문자의 개수를 카운트하여 출력한다.
# In[2]:
import random
def getRandomLowerCaseLetter():
return chr(random.randint(ord('a'), ord('z')))
def createList():
'''
소문자를 랜덤하게 생성하여 담은 리스트를 반환한다.
'''
chars = []
for i in range(100):
chars.append(getRandomLowerCaseLetter())
#위 코드는 아래 코드와 동일
#chars = [getRandomLowerCaseLetter() for i in range(100)]
return chars
def displayList(chars):
'''
리스트에 포함된 문자를 한 행에 20개씩 출력한다.
'''
for i in range(len(chars)):
if (i + 1) % 20 == 0:
print chars[i]
else:
print chars[i],
def countLetters(chars):
'''
0으로 초기화된 26개의 정수리스트를 생성한 후 인자로 주어진 chars에 있는 각 문자들의 개수를 저장한다.
'''
counts = [0] * 26
for i in range(len(chars)):
counts[ord(chars[i]) - ord('a')] += 1
return counts
def displayCounts(counts):
'''
각 문자별로 카운트를 한 행에 10개씩 출력한다.
'''
for i in range(len(counts)):
if (i + 1) % 10 == 0:
print chr(i + ord('a')), counts[i]
else:
print chr(i + ord('a')), counts[i],
if __name__ == '__main__':
chars = createList()
displayList(chars)
print
counts = countLetters(chars)
displayCounts(counts)
# ### 2) 집합의 성능
# In[7]:
import random
import time
NUMBER_OF_ELEMENTS = 10000
lst = list(range(NUMBER_OF_ELEMENTS))
random.shuffle(lst)
print lst[0:10]
s = set(lst)
# 해당 원소가 집합/리스트에 포함되어 있는지 검사
startTime = time.time()
for i in range(NUMBER_OF_ELEMENTS):
i in s
endTime = time.time()
runTime = int((endTime - startTime) * 1000)
print 'The elapsed time to check into a set is %s ms' % runTime
startTime = time.time()
for i in range(NUMBER_OF_ELEMENTS):
i in lst
endTime = time.time()
runTime = int((endTime - startTime) * 1000)
print 'The elapsed time to check into a list is %s ms' % runTime
# 해당 원소를 집합/리스트로 부터 제거
startTime = time.time()
for i in range(NUMBER_OF_ELEMENTS):
s.remove(i)
endTime = time.time()
runTime = int((endTime - startTime) * 1000)
print 'The elapsed time to remove each element from a set is %s ms' % runTime
startTime = time.time()
for i in range(NUMBER_OF_ELEMENTS):
lst.remove(i)
endTime = time.time()
runTime = int((endTime - startTime) * 1000)
print 'The elapsed time to remove each element from a list is %s ms' % runTime
# ### 3) 단어 세기
# - 다음 주어진 문자열 s에서 ,와 .을 제거하고
# - 모든 문자를 소문자로 변경하고
# - 각각의 단어의 출현 빈도를 출력하시오.
# In[9]:
# -*-coding:utf-8 -*-
s = "We propose to start by making it possible to teach progra\
mming in python, an existing scripting language, and to focus \
on creating a new development enviroment and teaching \
materials for it."
# 대치 과정
s=s.replace(',','')
s=s.replace('.','')
s=s.lower()
#공백 단위로 단어 쪼개고 단어 넣을 딕셔너리 선언
listSplited = s.split()
words = {}
#단어 쪼개놓은 리스트에서 각각 단어의 개수 세기
for i in listSplited:
if not i in words.keys():
words[i]=1
else:
words[i]=words[i]+1
#포맷을 이용한 출력
format = "%s : %d"
for i in words:
print format % (i, words[i])
# ## 5. E-learning 9, 10 보충 자료
#
#
# ### 1) 리스트를 배열처럼 활용하기
# - 1차원 배열처럼 활용하기
# In[2]:
a = [1, 2, 3, 4, 5]
b = range(10)
print a
print a[0]
print b
print b[2]
# - 0으로 초기화된 사이즈 10인 1차원 배열 생성
# In[4]:
a = [0] * 10
a
# - 2차원 배열처럼 활용하기
# In[6]:
mat = [[1, 2, 3],
[4, 5, 6],
[7, 8, 9]]
print mat
print mat[1][2]
# ### 2) 리스트 내포
# - 다음은 고등학교 수학에서 배운 집합의 표기 방법이다.
# - A = {x^2 | x in {0, ..., 9}}
# - B = {1, 2, 4, 8, 16, ..., 2^16}
# - C = {x | x in S and x is odd}
#
# - 파이썬의 리스트 내포(list comprehension)는 바로 위 집합 표기법과 유사한 방식의 리터럴이다.
# - 위 집합들을 리스트 내포 방식으로 표현하면 다음과 같다.
# - A = [x**2 for x in range(10)]
# - B = [2**i for i in range(17)]
# - C = [x for x in S if x % 2 == 1]
# - 예 1. 피타고라스 삼각형의 각 3변의 길이 리스트 (조건: 각 변 x, y, z의 길이는 30 보다 작아야 하며, x <= y <= z 이어야 함)
# In[8]:
k = [(x,y,z) for x in range(1,30) for y in range(x,30) for z in range(y,30) if x**2 + y**2 == z**2]
print k
# - 바로 위 코드는 아래와 동일하다.
# In[12]:
l = []
for x in range(1,30):
for y in range(x,30):
for z in range (y, 30):
if x**2 + y**2 == z**2:
l.append((x, y, z))
print l
# - 예 2. 중첩 리스트 내포
# In[10]:
list_a = ['A', 'B']
list_b = ['C', 'D']
print [x + y for x in list_a for y in list_b]
print
print [[x + y for x in list_a] for y in list_b]
# - 바로 위 코드는 아래와 동일하다.
# In[13]:
l = []
for y in list_b:
l2 = []
for x in list_a:
l2.append(x+y)
l.append(l2)
print l
# - 예 3. 리스트 내포를 활용한 2차원 배열 생성
# In[14]:
mat = [ [0]*4 for x in range(3)]
print mat
mat[0][0] = 100
print mat
# ### 3) 특별 속성
# - 특별 속성: 파이썬 내에 존재하는 모든 객체 마다 부여되는 특별한 Read-only 속성
# - [참고]: https://docs.python.org/2/library/stdtypes.html#object.__dict__
# In[15]:
print __name__ # 로컬 이름
print
print __doc__ # 로컬에 지정된 문서문자열
print
# In[23]:
import math
print "math.__name__: ", math.__name__
print
print "math.__doc__:", math.__doc__
print
print "math.log10.__name__: ", math.log10.__name__
print
print "math.log10.__doc__: ", math.log10.__doc__
print
print type(math.log10)
# In[21]:
get_ipython().run_line_magic('pinfo', ' math.log10')
# ## 4. E-learning 7, 8 보충 자료
#
# ### 1) unicode 추가 설명
# In[1]:
a = unicode("한글과 세종대왕", 'utf-8')
b = u"한글과 세종대왕"
# In[2]:
print a == b
print a is b
# In[3]:
print ord('A') # ord(): 문자의 ASCII 코드값 반환
print chr(65) # char(): ASCII 코드 65를 지니는 문자를 반환
# http://www.fileformat.info/info/unicode/char/ac00/index.htm
# In[4]:
print unichr(0xac00) # unichr(): UNICODE 코드 0xac00를 지니는 문자를 반환
print unichr(44032)
# In[5]:
i = 0
while i < 1000:
print unichr(0xac00 + i),
i = i + 1
# ### 2) str()과 repr()의 차이
# - str(): 객체의 비공식적인 (informal) 문자열 표현 - 가능하면 읽기 편하게...
# - repr(): 객체의 공식적인 (official) 문자열 표현 - 가능하면 실제 객체를 완벽하게 표현할 수 있도록...
# - [참고] http://pinocc.tistory.com/168
# In[6]:
f = 1.23456789123456789
print f
print str(f)
print repr(f) # repr()은 유효 숫자를 길게 출력
# In[7]:
print "%s, %r" % (f, f) # str()과 repr() 호출
# In[8]:
print "%s -- %s" % ((1, 2), [3, 4, 5]) # str() 호출
# In[9]:
print "%r -- %r" % ((1, 2), [3, 4, 5]) # str() 대신에 repr() 내장 함수 사용
# In[10]:
g = 0.3
print str(g)
print repr(g)
# In[11]:
h = 'Hello'
print str(h)
print repr(h)
# In[12]:
x = eval(str(h))
# - repr() 내장함수에 의하여 반환된 문자열은 eval() 내장함수에 의하여 Evaluation이 가능함
# In[13]:
x = eval(repr(h))
# In[15]:
a = '1 + 2 + 3'
b = eval(a)
print b
# ### 3) [중요] 문서 문자열 (Documentation String, docstring)
# In[16]:
def add(a, b):
"add(a, b) returns a+b"
return a + b
# In[17]:
print add.__doc__
# In[18]:
help(add)
# In[22]:
get_ipython().run_line_magic('pinfo', ' add')
# ### 4) string 모듈 상수
# In[23]:
import string
print string.digits
print string.octdigits
print string.hexdigits
print string.letters
print string.lowercase
print string.uppercase
print string.punctuation # 각종 기호들
print
print string.printable # 인쇄 가능한 모든 문자들
print string.whitespace # 공백 문자들 '\011\012\013\014\015'
# In[24]:
x = 'a'
print x in string.uppercase
print x in string.lowercase
# In[25]:
d = string.letters + string.digits
print d
# In[28]:
userid = raw_input('your id:')
# In[29]:
d = string.letters + string.digits
for ch in userid:
if ch not in d:
print 'invalid user id'
break
# ### 5) [중요] 문자열 붙이기 코딩 방법 비교
# In[30]:
import time
start_time = time.time()
s = ''
for k in range(1000000):
s += 'python'
end_time = time.time()
print end_time - start_time
# In[31]:
start_time = time.time()
t = []
for k in range(1000000):
t.append('python')
s = ''.join(t)
end_time = time.time()
print end_time - start_time
# In[32]:
start_time = time.time()
s = 'python' * 1000000
end_time = time.time()
print end_time - start_time
# ## 3. E-learning 5, 6 보충 자료
# ### 1) 조심해야 할 나누기 연산
# In[23]:
print 5 / 4 # 자동으로 floor 처리 됨
print 5.0 / 4
print
print -5 / 4 # 자동으로 floor 처리 됨
print -5.0 / 4
# - //: floor division
# - 그러므로 '정수 // 정수' 결과는 '정수 / 정수'와 항상 동일
# - 하지만 실수에 대한 // 연산 결과는 floor division 이므로 정수형 실수로 결과나 나옴
# In[18]:
print 1.0 / 2
print 1.0 // 2 # floor division
print
print 5.0 / 4
print 5.0 // 4 # floor division
print 5 / 4
print 5 // 4 # floor division
print
print -5.0 / 4
print -5.0 // 4 # floor division
print -5 / 4
print -5 // 4 # floor division
# ### 2) 함수 내 디폴트 인자 선언시 조심할 점
# In[24]:
def incr(x=1, y): # 디폴트 인자 뒤에 정상적인 인자 선언 안됨
return x + y
print incr(5)
print incr(5, 10)
# ### 3) 유용한 모듈 학습: 시각 다루기
# In[40]:
import time
currentTime = time.time() # Unix Epoch 부터 현재까지 경과된 시각 (GMT/UST 기준)을 실수형 초 단위로 최대한 정확하게 얻어온다.
print currentTime
print type(currentTime)
print
totalSeconds = int(currentTime) # 1970년 1월 1일 0시 이후부터 현재시각까지의 정수형 초 값을 얻어온다.
print "totalSeconds -", totalSeconds
currentSecond = totalSeconds % 60 # 현재 시각의 초 값을 얻어온다.
totalMinutes = totalSeconds // 60 # 전체 분 값을 계산한다.
print "totalMinutes -", totalMinutes
currentMinute = totalMinutes % 60 # 현재 시각의 분 값을 얻어온다.
totalHours = totalMinutes // 60 # 전체 시 값을 계산한다.
print "totalHours -", totalHours
currentHours = totalHours % 24 # 현재 시각의 시 값을 얻어온다.
print "현재 시각은", currentHours, ":", currentMinute, ":", currentSecond, "GMT 입니다."
# - 대한민국의 Time Zone 및 로컬타임 얻기
# In[39]:
print time.tzname
print
localtime = time.localtime()
print localtime
# ### 3) 코드 학습: 숫자 맞추기 게임 소스
# In[41]:
# This is a guess the number game.
import random
guessesTaken = 0
print('Hello! What is your name?')
myName = raw_input()
number = random.randint(1, 20) # return random integer in range [a, b], including both end points.
print('Well, ' + myName + ', I am thinking of a number between 1 and 20.')
while guessesTaken < 6:
print('Take a guess.')
guess = int(input())
guessesTaken = guessesTaken + 1
if guess < number:
print('Your guess is too low.')
if guess > number:
print('Your guess is too high.')
if guess == number:
break
if guess == number:
guessesTaken = str(guessesTaken)
print('Good job, ' + myName + '! You guessed my number in ' + guessesTaken + ' guesses!')
if guess != number:
number = str(number)
print('Nope. The number I was thinking of was ' + number)
# ## 2. E-learning 3, 4 보충 자료
# ### 1) 파이썬에서 지원하는 각종 타입들 알아보기
# In[2]:
import types
dir(types)
# In[3]:
print type(123) is types.IntType
print type(123.0) is types.FloatType
print type('abc') is types.StringType
print type([]) is types.ListType
print type(()) is types.TupleType
print type({}) is types.DictionaryType
# ### 2) 레퍼런스 카운트 (Reference Count)와 쓰레기 수집 (Garbage Collection)
# In[4]:
x = y = z = 100
# 
# In[5]:
del x
# 
# In[6]:
y = 200
z = 300
# 
# - 레퍼런스 카운트를 얻는 법
# - sys 모듈의 getrefcount() 함수: 함수 수행 결과의 레퍼런스 카운트가 생각보다 큰 이유 --> 본 함수가 작업 처리를 하기 위해서 순간적으로 레퍼런스가 증가할 수도 있고, 파이썬 가상머신 자체가 관리의 용도로 레퍼런스를 지니고 있을 수 있음
# In[17]:
import sys
a1 = 191919
print sys.getrefcount(a1) # 새로운 191919 객체를 만들고 이 객체에 대한 reference count 반환
print
a2 = a1
print sys.getrefcount(a1) # a1과 a3가 참조하는 객체는 동일하며, reference count는 기존보다 1이 증가되어 있음
print sys.getrefcount(a2) # a2는 여전히 reference count가 이전 값과 동일함
print
aa1 = aa2 = aa3 = 202020
print sys.getrefcount(aa1)
print sys.getrefcount(aa2)
print sys.getrefcount(aa3)
# 4) [참고] turtle 모듈 활용하기
# - https://opentechschool.github.io/python-beginners/ko/simple_drawing.html
# - http://openbookproject.net/thinkcs/python/english3e/hello_little_turtles.html
# - https://www.youtube.com/watch?v=vEkiaHtdwIk
# - https://python-turtle-demo.googlecode.com/files/SevenWaysToUseTurtle-PyCon2009.pdf
# In[31]:
import turtle
t = turtle.Turtle()
t.shape("turtle")
t.color("blue")
t.pensize(3) # 펜 사이즈를 3으로 설정한다.
t.penup() # 펜을 종이로 부터 들어올린다.
t.goto(-200, -50) # 해당 좌표로 이동한다.
t.pendown() # 펜을 종이에 놓는다.
t.circle(40, steps=3) # 반지름이 40인 원을 3 step으로만 그린다. ==> 삼각형이 그려짐
t.penup()
t.goto(-100, -50)
t.pendown()
t.circle(40, steps=4)
t.penup()
t.goto(0, -50)
t.pendown()
t.circle(40, steps=5)
t.penup()
t.goto(100, -50)
t.pendown()
t.circle(40, steps=6)
t.penup()
t.goto(200, -50)
t.pendown()
t.circle(40, steps=40)
# Turtle의 펜 그리기 상태 메소드
#
# | 메소드 명 | 설명 |
# | ---------- | :--------- |
# |turtle.pendown()|펜을 내려놓는다 - 움직일 때 그려진다.|
# |turtle.penup()|펜을 들어올린다 - 움직일 때 그려지지 않는다.|
# |turtle.pensize()|선의 두께를 특정 폭으로 설정한다.|
# Turtle의 이동 메소드
#
# | 메소드 명
| 설명
|
# | ---------- | :--------- |
# |turtle.forward(d)|turtle이 향하고 있는 방향으로 특정 거리 d만큼 앞으로 이동시킨다.|
# |turtle.backward(d)|turtle이 향하고 있는 반대 방향으로 특정 거리 d만큼 뒤로 이동시킨다. turtle의 방향은 바뀌지 않는다.|
# |turtle.right(angle)|turtle을 특정 각만큼 오른쪽으로 회전시킨다.|
# |turtle.left(angle)|turtle을 특정 각만큼 왼쪽으로 회전시킨다.|
# |turtle.goto(x,y)|turtle을 절대 위치 (x,y)로 옮긴다.|
# |turtle.setx(x)|turtle의 x 좌표를 특정 위치로 옮긴다.|
# |turtle.setx(y)|turtle의 y 좌표를 특정 위치로 옮긴다.|
# |turtle.setheading(angle)|특정 각도로 turtle의 방향을 설정한다. 0-동쪽, 90-북쪽, 180-서쪽, 270-남쪽.|
# |turtle.home()|turtle을 원점 (0,0)으로 옮기고 동쪽 방향으로 설정한다.|
# |turtle.circle(r, ext, steps)|특정 반지름 r, 경계 ext와 단계 step인 원을 그린다.|
# |turtle.dot(diameter, color)|특정 지름 diameter와 색상 color인 원을 그린다.|
# |turtle.undo()|turtle의 마지막 명령을 (반복적으로)되돌린다.|
# |turtle.speed(s)|1부터 10사이의 정수(10이 최대) s로 turtle의 속도를 설정한다.|
#
#
# Turtle 펜 색상, 채우기와 그리기 메소드
#
# | 메소드 명
| 설명
|
# | ---------- | :--------- |
# |turtle.color(c)|펜 색상을 c로 설정한다.|
# |turtle.fillcolor(c)|펜 채우기 색상을 c로 설정한다.|
# |turtle.begin_fill()|도형을 채우기 전에 이 메소드를 호출한다.|
# |turtle.end_fill()|begin_fill에 대한 마지막 호출전까지 그려진 도형을 채운다.|
# |turtle.filling()|채우기 상태를 반환한다. 채우기 상태이면 True, 그렇지 않으면 False|
# |turtle.clear()|창을 깨끗하게 지운다. turtle의 상태와 위치는 영향을 받지 않는다.|
# |turtle.reset()|창을 깨끗하게 지우고 turtle의 상태와 위치를 원래 기본값으로 재설정한다.|
# |turtle.screensize(w,h)|캔버스의 폭과 높이를 w와 h로 설정한다.|
# |turtle.hideturtle()|turtle을 보이지 않게 만든다.|
# |turtle.showturtle()|turtle을 보이게 만든다.|
# |turtle.isvisible()|turtle이 보이면 True를 반환한다.|
# |turtle.write(s,font=("Arial",8,"normal"))|현재 turtle의 위치에 문자열 s를 쓴다. 폰트는 폰트명, 폰트크기, 폰트유형의 세 값으로 구성된다.|
# ### 3) 연습문제
# - (1) 다음 사항을 읽고 요구하는 프로그램을 작성하시오.
# * 정다각형은 모든 변의 길이와 내각의 크기가 같은 $n$개의 변으로 이루어진 다각형이다 (즉, 다각형이 등변이고 등각이다).
# * 한변의 길이가 $s$일 때 정다각형의 넓이를 계산하는 공식은 다음과 같다.
# * $정다각형의 넓이 = (n \times s^2) / (4 \times tan(\pi / n))$
# * 사용자로 부터 정다각형의 변의 개수와 변의 길이를 입력받고 정다각형의 넓이를 출력하는 프로그램을 작성하시오.
# * 출력예는 다음과 같다.
#
# [출력예]
# ```
# 변의 개수를 입력하세요: 5
# 변의 길이를 입력하세요: 6.5
# 다각형의 넓이는 73.69017017488385 입니다.
# ```
# - (2) 다음 사항을 읽고 요구하는 프로그램을 작성하시오.
# * 사용자로 부터 ASCII 코드 (0부터 127 사이의 정수)를 입력받는다.
# * 입력받은 코드에 대한 문자를 출력하는 프로그램을 작성하시오.
# * 출력예는 다음과 같다.
#
# [출력예]
# ```
# ASCII코드를 입력하세요: 69
# 문자는 E 입니다.
# ```
# - (3) 다음 프로그램을 분석해보고, 어떤 목적의 프로그램인지 파악해보시오. 또한, assert 예약어가 무엇인지 Googling 하여 알아보시오.
# In[27]:
import math
def distance( x0, y0, x1, y1 ):
"""( x0, y0 )와 ( x1, y1 ) 사이의 거리를 계산한다."""
return math.sqrt( (x1-x0) ** 2 + (y1-y0) ** 2 )
def close( left, right ):
"""두 부동소수점 값이 근사한지 테스트 한다."""
return abs( left - right ) < 1.0e-6
def test_distance():
"""distance 함수가 올바르게 동작하는지 테스트 한다."""
assert close( distance( 1.0, 0.0, 1.0, 0.0 ), 0.0 ), '동일 지점 실패'
assert close( distance( 0.0, 0.0, 1.0, 0.0 ), 1.0 ), '단위 거리 실패'
test_distance()
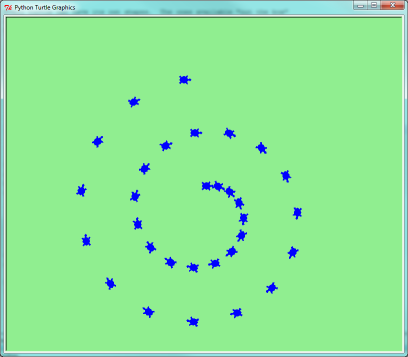
# - (4) Python 터틀로 다음 그림을 그려보시오.
# 
# ## 1. E-learning 1, 2 보충 자료
# ### 1) 현재 이름 공간에 있는 이름 리스트 출력
# - dir() 내장 함수 사용
# - 리턴형: 리스트
#
# - 아래 리스트 중 python 기본 이름
# - \_\_builtins\_\_
# - \_\_doc\_\_
# - \_\_name\_\_
#
# - 나머지는 ipython이 자체적으로 생성한 이름들
# - 단순 이름만 출력: dir()
# - 리턴형: 리스트
# In[1]:
dir()
# ### 2) 특정 객체가 지니고 있는 이름 리스트 출력
# In[2]:
a = 10
print dir(a)
# In[3]:
print dir(__builtin__)
# ### 3) 파이썬 버전 및 모듈들이 존재할 수 있는 패스 알아보기
# In[4]:
import sys
print sys.version
print
print sys.path
# In[5]:
print dir(sys)
# ### 4) 연습문제
# - 다음은 math 모듈을 가져오는 코딩이다. math 모듈을 가져온 후 math 모듈에 정의된 함수를 이용하여 -4.3 값을 반올림한 후 절대값을 계산하여 출력하는 코딩을 한 줄로 완성하라.
# In[6]:
import math
# In[ ]:
# - 다음은 두 점의 좌표 (x1, y1), (x2, y2)를 나타내는 변수 값들이다. math 모듈에 정의된 함수를 이용하여 이 두 점 사이의 거리를 계산하여 출력하는 코딩을 한 줄로 완성하라.
# In[8]:
x1 = 10
y1 = 20
x2 = 30
y2 = 40
# In[ ]: