如何使用預訓練的模型來分類照片中的物體
卷積神經網絡現在能夠在一些電腦視覺任務上勝過人類的肉眼,例如圖像分類。
也就是說,給出一個物體的照片,我們可以讓電腦來回答這個照片是1000個特定 種類物體中的哪一類這樣的問題。
在本教程中,我們將使用幾個Keras己經內建好的預訓練模型來進行圖像分類, 其中包括了:
- VGG16
- VGG19
- ResNet50
- InceptionV3
- InceptionResNetV2
- Xception
- MobileNet

# 這個Jupyter Notebook的環境
import platform
import tensorflow
import keras
print("Platform: {}".format(platform.platform()))
print("Tensorflow version: {}".format(tensorflow.__version__))
print("Keras version: {}".format(keras.__version__))

%matplotlib inline
import matplotlib.pyplot as plt
import matplotlib.image as mpimg
import numpy as np
from IPython.display import Image
Using TensorFlow backend.
Platform: Windows-7-6.1.7601-SP1
Tensorflow version: 1.4.0
Keras version: 2.1.1
開發一個簡單的照片分類器
VGG16
1.獲取範例圖像
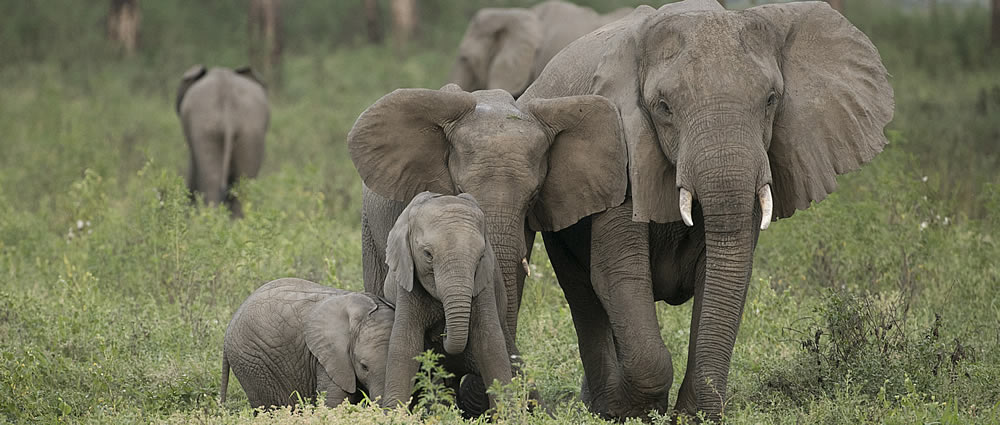
首先,我們需要一個我們可以進行分類的圖像。
您可以在這裡從Google隨意檢索一些動物照片並下載到這個jupyter notebook所處的目錄。比如說: 我下載了: https://www.elephantvoices.org/images/slider/evimg16tf.jpg
2.加載VGG模型
加載在Keras己經預訓練好的VGG-16的權重模型檔。
from keras.applications.vgg16 import VGG16

# 載入權重
model_vgg16 = VGG16()
3.加載和準備圖像
接下來,我們可以將圖像加載進來,並轉換成預訓練網絡所要求的張量規格。
Keras提供了一些工具來幫助完成這一步驟。
首先,我們可以使用load_img()函數加載圖像,並將其大小調整為224×224像素所需的大小。
from keras.preprocessing.image import load_img

# 載入圖像檔
img_file = 'evimg16tf.jpg'
image = load_img(img_file, target_size=(224, 224)) # 因為VGG16的模型的輸入是224x224
接下來,我們可以將像素轉換為NumPy數組,以便我們可以在Keras中使用它。我們可以使用這個img_to_array()函數。
from keras.preprocessing.image import img_to_array

# 將圖像資料轉為numpy array
image = img_to_array(image) # RGB

print("image.shape:", image.shape)
image.shape: (224, 224, 3)
VGG16網絡期望單色階(grey)或多色階圖像(rgb)來作為輸入;這意味著輸入數組需要是轉換成四個維度:
(圖像批次量,圖像高,圖像寬, 圖像色階數) -> (batch_size, img_height, img_width, img_channels)
我們只有一個樣本(一個圖像)。我們可以通過調用reshape()來重新調整數組的形狀,並添加額外的維度。
# 調整張量的維度
image = image.reshape((1, image.shape[0], image.shape[1], image.shape[2]))

print("image.shape:", image.shape)
image.shape: (1, 224, 224, 3)
接下來,我們需要按照VGG在訓練ImageNet數據一樣的方法來對圖像進行前處理。具體來說,從論文裡談到:
The only preprocessing we do is subtracting the mean RGB value, computed on the training set, from each pixel.
Very Deep Convolutional Networks for Large-Scale Image Recognition, 2014.
Keras提供了一個稱為preprocess_input()的函數來為VGG網絡準備新的圖像輸入。
from keras.applications.vgg16 import preprocess_input

# 準備VGG模型的圖像
image = preprocess_input(image)
4.做一個預測
我們可以調用模型中的predict()函數來預測圖像屬於1000個已知對像類型的機率。
# 預測所有產出類別的機率

y_pred = model_vgg16.predict(image)
from keras.applications.vgg16 import decode_predictions

# 將機率轉換為類別標籤
label = decode_predictions(y_pred)

# 檢索最可能的結果,例如最高的概率
label = label[0][0]

# 打印預測結果
print('%s (%.2f%%)' % (label[1], label[2]*100))
African_elephant (30.40%)
VGG19
from keras.applications.vgg19 import VGG19
from keras.preprocessing import image
from keras.applications.vgg19 import preprocess_input
from keras.applications.vgg19 import decode_predictions

# 載入權重
model_vgg19 = VGG19(weights='imagenet')
# 載入圖像檔
img_file = 'evimg16tf.jpg'
image = load_img(img_file, target_size=(224, 224)) # 因為VGG19的模型的輸入是224x224

# 將圖像資料轉為numpy array
image = img_to_array(image) # RGB
print("image.shape:", image.shape)

# 調整張量的維度
image = image.reshape((1, image.shape[0], image.shape[1], image.shape[2]))
print("image.shape:", image.shape)

# 準備模型所需要的圖像前處理
image = preprocess_input(image)

# 預測所有產出類別的機率
y_pred = model_vgg19.predict(image)

# 將機率轉換為類別標籤
label = decode_predictions(y_pred)

# 檢索最可能的結果,例如最高的概率
label = label[0][0]

# 打印預測結果
print('%s (%.2f%%)' % (label[1], label[2]*100))
image.shape: (224, 224, 3)
image.shape: (1, 224, 224, 3)
tusker (53.61%)
ResNet50
from keras.applications.resnet50 import ResNet50
from keras.preprocessing import image
from keras.applications.resnet50 import preprocess_input
from keras.applications.resnet50 import decode_predictions

# 載入權重
model_resnet50 = ResNet50(weights='imagenet')

# 載入圖像檔
img_file = 'evimg16tf.jpg'

# 因為ResNet的模型的輸入是224x224
image = load_img(img_file, target_size=(224, 224))

# 將圖像資料轉為numpy array
image = img_to_array(image) # RGB
print("image.shape:", image.shape)

# 調整張量的維度
image = image.reshape((1, image.shape[0], image.shape[1], image.shape[2]))
print("image.shape:", image.shape)

# 準備模型所需要的圖像前處理
image = preprocess_input(image)

# 預測所有產出類別的機率
y_pred = model_resnet50.predict(image)

# 將機率轉換為類別標籤
label = decode_predictions(y_pred)

# 檢索最可能的結果,例如最高的概率
label = label[0][0]

# 打印預測結果
print('%s (%.2f%%)' % (label[1], label[2]*100))
image.shape: (224, 224, 3)
image.shape: (1, 224, 224, 3)
African_elephant (47.35%)
InceptionV3
from keras.applications.inception_v3 import InceptionV3
from keras.preprocessing import image
from keras.preprocessing.image import load_img
from keras.applications.inception_v3 import preprocess_input
from keras.applications.inception_v3 import decode_predictions

# 載入權重
model_inception_v3 = InceptionV3(weights='imagenet')

# 載入圖像檔
img_file = 'image.jpg'
# InceptionV3的模型的輸入是299x299
img = load_img(img_file, target_size=(299, 299))

# 將圖像資料轉為numpy array
image = image.img_to_array(img) # RGB
print("image.shape:", image.shape)

# 調整張量的維度
image = image.reshape((1, image.shape[0], image.shape[1], image.shape[2]))
print("image.shape:", image.shape)

# 準備模型所需要的圖像前處理
image = preprocess_input(image)

# 預測所有產出類別的機率
y_pred = model_inception_v3.predict(image)

# 將機率轉換為類別標籤
label = decode_predictions(y_pred)

# 檢索最可能的結果,例如最高的概率
label = label[0][0]

# 打印預測結果
print('%s (%.2f%%)' % (label[1], label[2]*100))
image.shape: (299, 299, 3)
image.shape: (1, 299, 299, 3)
giant_panda (94.42%)
InceptionResNetV2
from keras.applications.inception_resnet_v2 import InceptionResNetV2
from keras.preprocessing import image
from keras.applications.inception_resnet_v2 import preprocess_input
from keras.applications.inception_resnet_v2 import decode_predictions

# 載入權重
model_inception_resnet_v2 = InceptionResNetV2(weights='imagenet')

# 載入圖像檔
img_file = 'evimg16tf.jpg'

# InceptionResNetV2的模型的輸入是299x299
image = load_img(img_file, target_size=(299, 299))

# 將圖像資料轉為numpy array
image = img_to_array(image) # RGB
print("image.shape:", image.shape)

# 調整張量的維度
image = image.reshape((1, image.shape[0], image.shape[1], image.shape[2]))
print("image.shape:", image.shape)

# 準備模型所需要的圖像前處理
image = preprocess_input(image)

# 預測所有產出類別的機率
y_pred = model_inception_resnet_v2.predict(image)

# 將機率轉換為類別標籤
label = decode_predictions(y_pred)

# 檢索最可能的結果,例如最高的概率
label = label[0][0]

# 打印預測結果
print('%s (%.2f%%)' % (label[1], label[2]*100))
image.shape: (299, 299, 3)
image.shape: (1, 299, 299, 3)
African_elephant (62.94%)
MobileNet
from keras.applications.mobilenet import MobileNet
from keras.preprocessing import image
from keras.applications.mobilenet import preprocess_input
from keras.applications.mobilenet import decode_predictions

# 載入權重
model_mobilenet = MobileNet(weights='imagenet')

# 載入圖像檔
img_file = 'evimg16tf.jpg'

# MobileNet的模型的輸入是224x224
image = load_img(img_file, target_size=(224, 224))

# 將圖像資料轉為numpy array
image = img_to_array(image) # RGB
print("image.shape:", image.shape)

# 調整張量的維度
image = image.reshape((1, image.shape[0], image.shape[1], image.shape[2]))
print("image.shape:", image.shape)

# 準備模型所需要的圖像前處理
image = preprocess_input(image)

# 預測所有產出類別的機率
y_pred = model_mobilenet.predict(image)

# 將機率轉換為類別標籤
label = decode_predictions(y_pred)

# 檢索最可能的結果,例如最高的概率
label = label[0][0]

# 打印預測結果
print('%s (%.2f%%)' % (label[1], label[2]*100))
image.shape: (224, 224, 3)
image.shape: (1, 224, 224, 3)
African_elephant (90.81%)
總結 (Conclusion)
在這篇文章中有一些個人學習到的一些有趣的重點:
- 在Keras中己經預建了許多高級的圖像識別的網絡及預訓練的權重
- 需要了解每種高級圖像識別的網絡的結構與輸入的張量
- 了解不同高級圖像識別的網絡的訓練變數量與預訓練的權重可以有效幫助圖像識別類型的任務